INTRODUCTION
I’m writing this article in response to the neverending stream of comments I see on forums regarding learning the various skills that all make up what we know as ‘alpinism’. This would include rock climbing, mountaineering, backcountry skiing, and ice climbing. There seems to be a trend online that has people shaming those who claim to be self-taught or who are suggesting that’s the path they want to take. This post is about dispelling the myth that one needs professional guidance to be a safe alpinist. The reason I titled this article about ‘alpinism’ is because that’s my personal journey. I want to be an ‘alpinist’, in the sense that I want to be proficient in all forms of mountainous terrain. However, maybe you just want to just want to focus on one area.
If you are just here to get some insight into self-learning in a specific area, you can skip to “The Skills” section rather than reading all this nonsense. The “General Personal Timeline” section will also give you some insight into the pace of my learning, as an example, but not as something that must be followed.
Here is my basic feelings on the matter of learning these skills:
1) Taking courses and trips with guides (or even getting out with an experienced mentor) is a valid, and likely the most efficient, way to learn these skills. If you have the financial capacity, then by all means, take a course! If you’re a little hard up on cash, look into what local clubs are near you and what kind of programming they offer. That being said, the value (and necessity) of guides in the learning process is vastly overstated by most people on the internet. Furthermore, you cannot solely rely on guides to teach you the skills. Everyone must self-teach. I have never met someone who came fresh off a guided course who could fully replicate the skills they learned. Everyone must practice these skills and utilize self-learning resources to do so.
2) Every skill that falls under the various branches of alpinism can be self-taught. Yes, even avalanche skills (gasp). There are more accessible learning resources today than ever before. 40 years ago the vast majority of people were self-taught with far less resources. Today, with the right approach, it is completely safe to self-teach. No matter your learning path, the source of knowledge can always be high quality. Most of the popular books, website, and videos are being produced by certified guides.
3) Connecting to the last point, having the right approach is key to the whole journey of self-teaching. People rightfully question whether or not self-learners are either getting lucky or are they are actually knowledgeable in these skills, though really I’d question many people who were ‘guide’ taught on this account as well. The reason I’ve been successful in this path is because I’m a ball of anxiety and paranoia. I was the biggest wuss as a kid, I can clearly recall refusing to get on a ferris wheel, a damn FERRIS wheel, because I was so scared of the heights. However, I’ve refused to let that hold me back from these adventures and it’s actually been an advantage in self-teaching. Absolutely, you will meet people who are really just getting by on luck, not skill. I refuse to be that person because I simply can’t operate in that way. All of my skills were practiced in the lowest risk environment first. For instance, most of my rope rescue skills have been taught using my coat or towel rack first. If you ARE one of those people who likes to push your luck, you should do some introspection and think about how you go on this journey of self-teaching.
In the interest of transparency, I’ll clarify that I am not completely self-taught. Just mostly. I took a beginner class at my climbing gym to learn how to tie in and belay on their janky ground anchor set-ups. A staff member I met there, Andy, a good friend now, took me outside for my first time. However, that was the only time I had a mentor take me out in person. I moved away a week later. Professional instruction-wise, a long time after I had taught myself crevasse rescue, I took an alpine club subsidized course which simply affirmed my self-teachings. That’s not to say it wasn’t valuable, if you have the opportunity for subsidized instruction after learning a skill, take it! Affirming your skills (or possibly learning your mistakes) is only a good thing. For backcountry skiing, I took a program with the Rocky Mountain Section of the Alpine Club of Canada (ACC) called Backcountry Intro to Skiing (BITS). This was amateur-led but essentially identical to AST1, confirmed by the many people who had taken AST1 that were also in the program. In fact, I contacted a local guiding service, Yamnuska, to ask if it would work as a pre-requisite to AST2 and they were more than happy to take it, even stating it seemed to cover more than AST1 (a full extra day of companion rescue). When I worked as a trail crew member on a ski resort’s patrol team, part of the avalanche control operations was to ski the one avalanche slope threatening a chair in a large group to compact fresh snow in hopes of consolidating layers. The hill had two Avalanche Techs and it was their protocol that you had to have your AST1 to ski the slope. I was able show them my experience with BITS in place of that to satisfy the Avalanche Technician’s to let me help out.
THE SERMON
Now, if you’re here to get some insight on how to approach self-teaching in a specific area, you can skip the next section and go right to that. Here is where I’ll expound a bit more on those above beliefs and the issues I take with what seems to be the popular belief systems around learning in the mountain community. Since I’ve been asked multiple times, I’ll also get into my own experiences and why I feel affirmed in my self-taught skills. As I alluded to in the title, I am still on a self-learning journey. I am far from the gnarliest, most knowledgeable climber out there and I’ve been doing it for a relatively short period of time, about 6 years.
Internet Toxicity
Firstly, I want to talk about the toxicity on internet forums. It’s something I constantly faced starting out. It’s a horrible feeling to be it’s subject and even now it sucks to see others experience it. Many people will frame their comment out of ‘concern for your safety’. In my opinion, it is mostly out of concern for their own safety and coming from a place of ego. They’re afraid. Mountains are indeed scary places often, it’s fair. But they let that fear push them into believing the only way to be safe in the mountains is if you have a ‘professional’ tell you what to do.
The Downsides of Professionalism in the Mountains
Unfortunately, this mindset is perpetuated by guides themselves. Not always on purpose but it is extremely common to see climbers in region specific community pages asking if there’s anyone willing to help out a newcomer get started and you see handfuls of guides dive into the comments soliciting their services, followed by non-guides telling them the only way to safely learn is by hiring a guide. It is a daunting experience for the newcomer and it’s the starting point of this belief system being ingrained into every mountain recreationist’s brain from the first moment of interest. Now, I don’t think it’s reasonable to expect everyone to hop at the chance of helping out a newcomer. It’s a lot to ask a stranger to take on that responsibility. But this is just simply not fully understood by many newcomers and they’re excited to learn, so they’re looking for anything they can get, it’s not coming from a place of entitlement, as I’ve seen some personalities suggest.
Let’s also take a moment and talk about professionalism in mountain recreation as well. As the Chair of the local alpine club, I experienced a local ‘professional association’ pushing back on a program we wanted to offer. An instructional program for backcountry skiing and avalanche skills, based directly on the program I was a participant of in Canmore. They expressed concerns of liability for our volunteers who weren’t professionals and stated that as non-professionals we weren’t even ‘allowed’ to offer instructional programs for avalanche safety.
Let’s make this very, very clear about guiding in Canada. It is NOT a professionally, legally regulated industry, compared to professions such as engineering or medicine, whose members are bound by the law to meet minimum standards of practice and can face legal action, even jail, if they break them. Unlike guides, who can simply have patrons sign a waiver that protects them even from negligence. There are multiple examples of ACMG guides being named in lawsuits but only one has actually proceeded to trial; because the guide failed to have the patron sign a waiver for that particular climb. This case is ongoing and who knows, may result in changes to the industry depending on how it culminates, but currently this is the reality. Can you recall the last time a doctor had you sign a waiver? Guiding is what’s known as an ‘industry regulated’ (ie self-regulated) profession. The Association of Canadian Mountain Guides is known as THE professional association of guides in Canada. They are affiliated with the International Federation of Mountain Guides Associations (IFMGA). Most countries with large alpine communities have guiding associations that are affiliated with the IFMGA and often have very similar standards. However, unlike engineers or physicians, anyone is able to advertise their services as a ‘guide’ for anything climbing, skiing, mountaineering etc. related. You will see a variety of guiding certifications being presented through various provinces and the same is true of the states. The exception to this, in Canada, is the National Parks. Parks Canada has mandated all guides operating in a National Park must be certified by the ACMG. So, that covers the question of legality of offering guiding services.
The Real Barrier to Guiding or Leading Trips
But what about liability? Well I’m not a lawyer so I wouldn’t try to give you legal advice. But suffice it to say, liability is a concern in any activity that has risk. Thus, people who are often offering a service that can be risky, opt to purchase Commercial General Liability (CGL) insurance. In fact, it’s often compulsory depending on the situation.
The ONLY real barrier to operating as a guide (outside of National Parks) is this insurance. Certifications are often not a legal requirement BUT insurance providers may require certain qualifications to provide coverage for one activity or another, that is up to their discretion as private companies.
Take the Alpine Club of Canada (ACC), for example. Their volunteers are covered under a CGL policy with zero requirements for qualifications or experience to provide programming, instructional or otherwise, for all things alpinism. Different ACC sections have different trip leader protocols and the National org has created handbooks, but there is no enforced standard for who is covered under the CGL policy.
So the use of the word ‘professional’ when it comes to guiding in Canada is very, very loose. The point of this all is, is that the industry is not as cohesive and regulated as the layman (or even people from some of those association, apparently) might think. Guides are far from infallible or even in agreement of best practices. Not all guides are equal and a qualification in this space is not a guarantee that you are receiving better quality instruction than a book or a good mentor could provide.
Gentrification of the Mountains
A big issue I have with this mindset that the only safe way to learn is from a guide is that it’s ultimately, in my opinion, leading to the gentrification of mountain recreation and many people who hold it don’t realize the place of privilege they’re coming from.
When I was transitioning from hiking/scrambling into the more technical aspects of alpinism, I was frankly too poor to both pay for gear AND professional instruction. And I’m saying this at least as a relatively privileged person myself. A cis-white man who grew up comfortably middle class in the suburbs of Toronto. I was working paycheck to paycheck but I always had a safety net and felt comfortable entering these spaces in my body. I can’t imagine what it’s like for anyone trying to do the same thing with more financial concerns and less inherent comfort in the space.
Some people only thinly-veil the fact that they believe this effect is beneficial to our outdoors communities, since they fear the overcrowding of wild spaces and the detrimental effect that could have. However, I’m of the opinion that if everyone was a dedicated recreationist, the world would be a better place. As someone who cares deeply about the environment and fights for it through my professional work, I can tell you that this passion came from my experiences outdoors. Giving people access to these more committing activities such as rock climbing or backcountry skiing I find often builds a deeper relationship as well, when compared to lower commitment activities like hiking. Though those activities are great due to the even better level of access, so I won’t knock them. I just don’t see the Toronto people who go on a single hike in Alongquin once every few years as being very connected with nature. But this all goes back to urbanism and lack of access, if there are only a handful of easily accessible areas, then you will see crowding in them even though your average person is spending less time in the outdoors, all exacerbated by gentrification of the spaces.
I believe we should be fighting to open these spaces up and seeing the growing demand for our beloved activities as an opportunity to create a society that is more connected to the land and is willing to fight for it. This is the very basis for things like the Reconnection Vision, a vision by Yukon First Nations youth that pushes the perspective that reconnection to the land, for all peoples, is key to climate action.

THE SKILLS
I don’t have the time to write an exhaustive guide here. Rather, I’ll share a list of necessary skills, how I approached them and some suggested resources.
GENERAL APPROACH
As I’ve written in the previous section, the approach is the most important part of any learning path, whether that’s self-learning, mentorship, or professional courses.
Regardless of the knowledge resource you are utilizing (based on the 3 paths listed above) it would behoove anyone to:
1) Seek a variety of sources, do not just rely on any one source, and do your due diligence in researching the validity of the source.
2) Practice. It’s something that I’ve seen very often with people who take the guided route. They fail to practice skills on their own outside of course environments and therefore have issues confidently replicating the skills.
These points are especially important for self-learners. People logically criticize the concept of self-learning as you do not have immediate feedback from someone who has been certified to hold the knowledge, so you need to find a way to implement that feedback loop on your own. This requires an iterative process of giving yourself practice scenarios that are low consequence but increasingly ‘real world’. This requires creativity on part of the individual.
As a tangible example, I’ll talk about how I taught myself to rappel. First, I wrapped my rope around a pillar in my home and ‘rappelled’ on flat ground by leaning into the rope. Then I rappelled down a semi-steep slope by using a tree as an anchor, this allowed me to put more of my weight on the system in a more realistic scenario. I messed around during this process, doing it multiple times with different set-ups taken from different sources, and trying to make the system fail (ie using a prusik/third hand and letting go of the system to verify it worked). This is how I received ‘feedback’, I was able to find the system that I felt was the most efficient and safe to use. If the system did fail (feedback), then the consequence was a bruised ass or an uncomfortable tumble down the hill. That never happened, because I simply never fucked it up, but that’s the approach that was necessary to ensure my learning was quality and verified. I finalized this skill by rappelling easily accessible top anchors at a local crag. This is only one example of how to approach self-teaching a skill, you will need to be creative with every skill and take the time to review multiple sources, multiple times to be certain you are competent.
GENERAL OUTDOOR SKILLS
- Camping (All Seasons)
- Eating and Hydrating
- Navigation
- Emergency Plans
- Packing for various length trips
- Layering
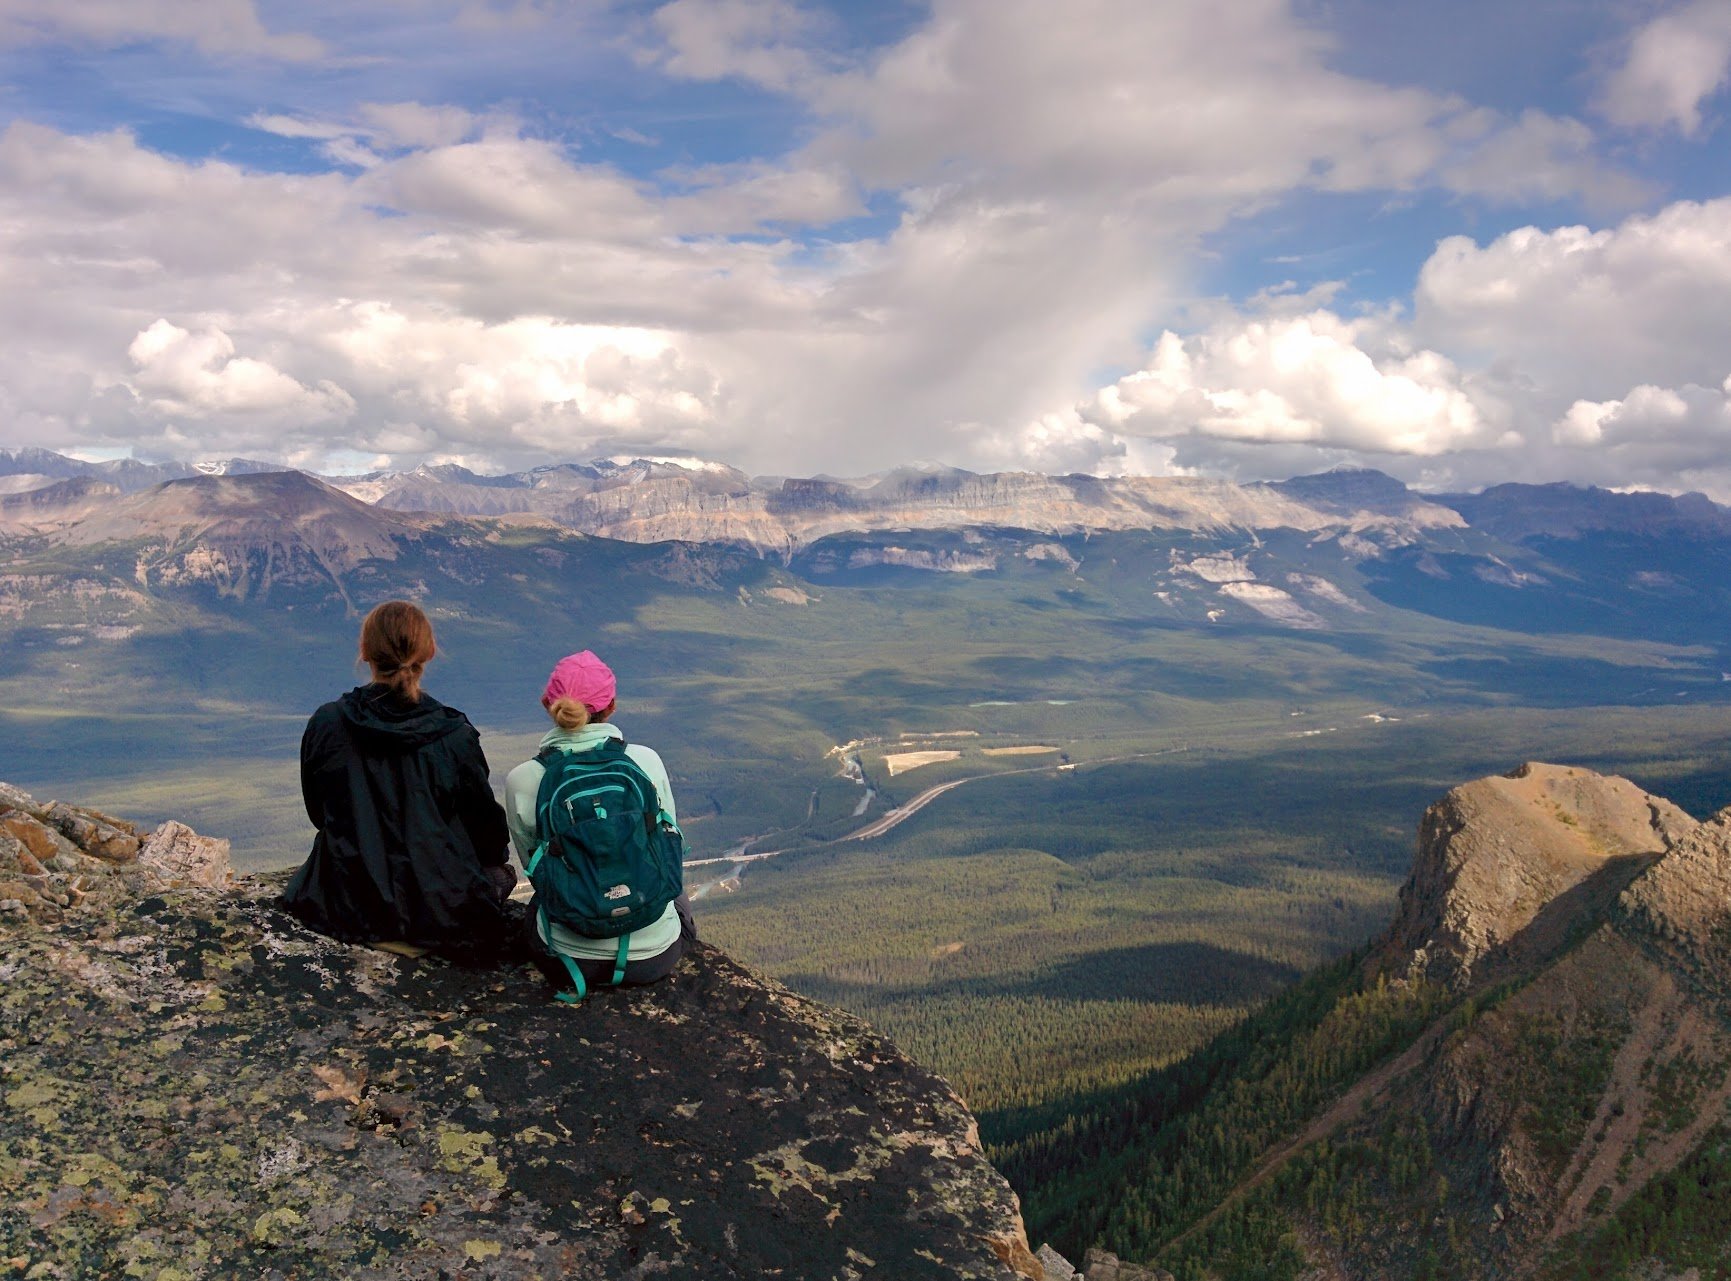
I’m not going to touch on these very much. There is a buttload of information on all these subjects and I’m certainly not a master of them all. For me, it’s been a very slow learning process. As I mention in my Personal Timeline section, I started my backcountry experiences flatwater paddling in Algonquin. Most of the routes I did, had very short portages and so I was able to bring a lot of gear. As I learned how to actually backcountry camp in different conditions I was able to identify what I needed and didn’t need. My first overnight hike was into an ACC hut in the Rockies. Simply put, do lots of googling on these items and start slowly. Head into areas with lower commitment (not too far, trails with huts, etc.) and ideally dial things in like eating, hydrating, navigation, and layering with day trips in different seasons first.
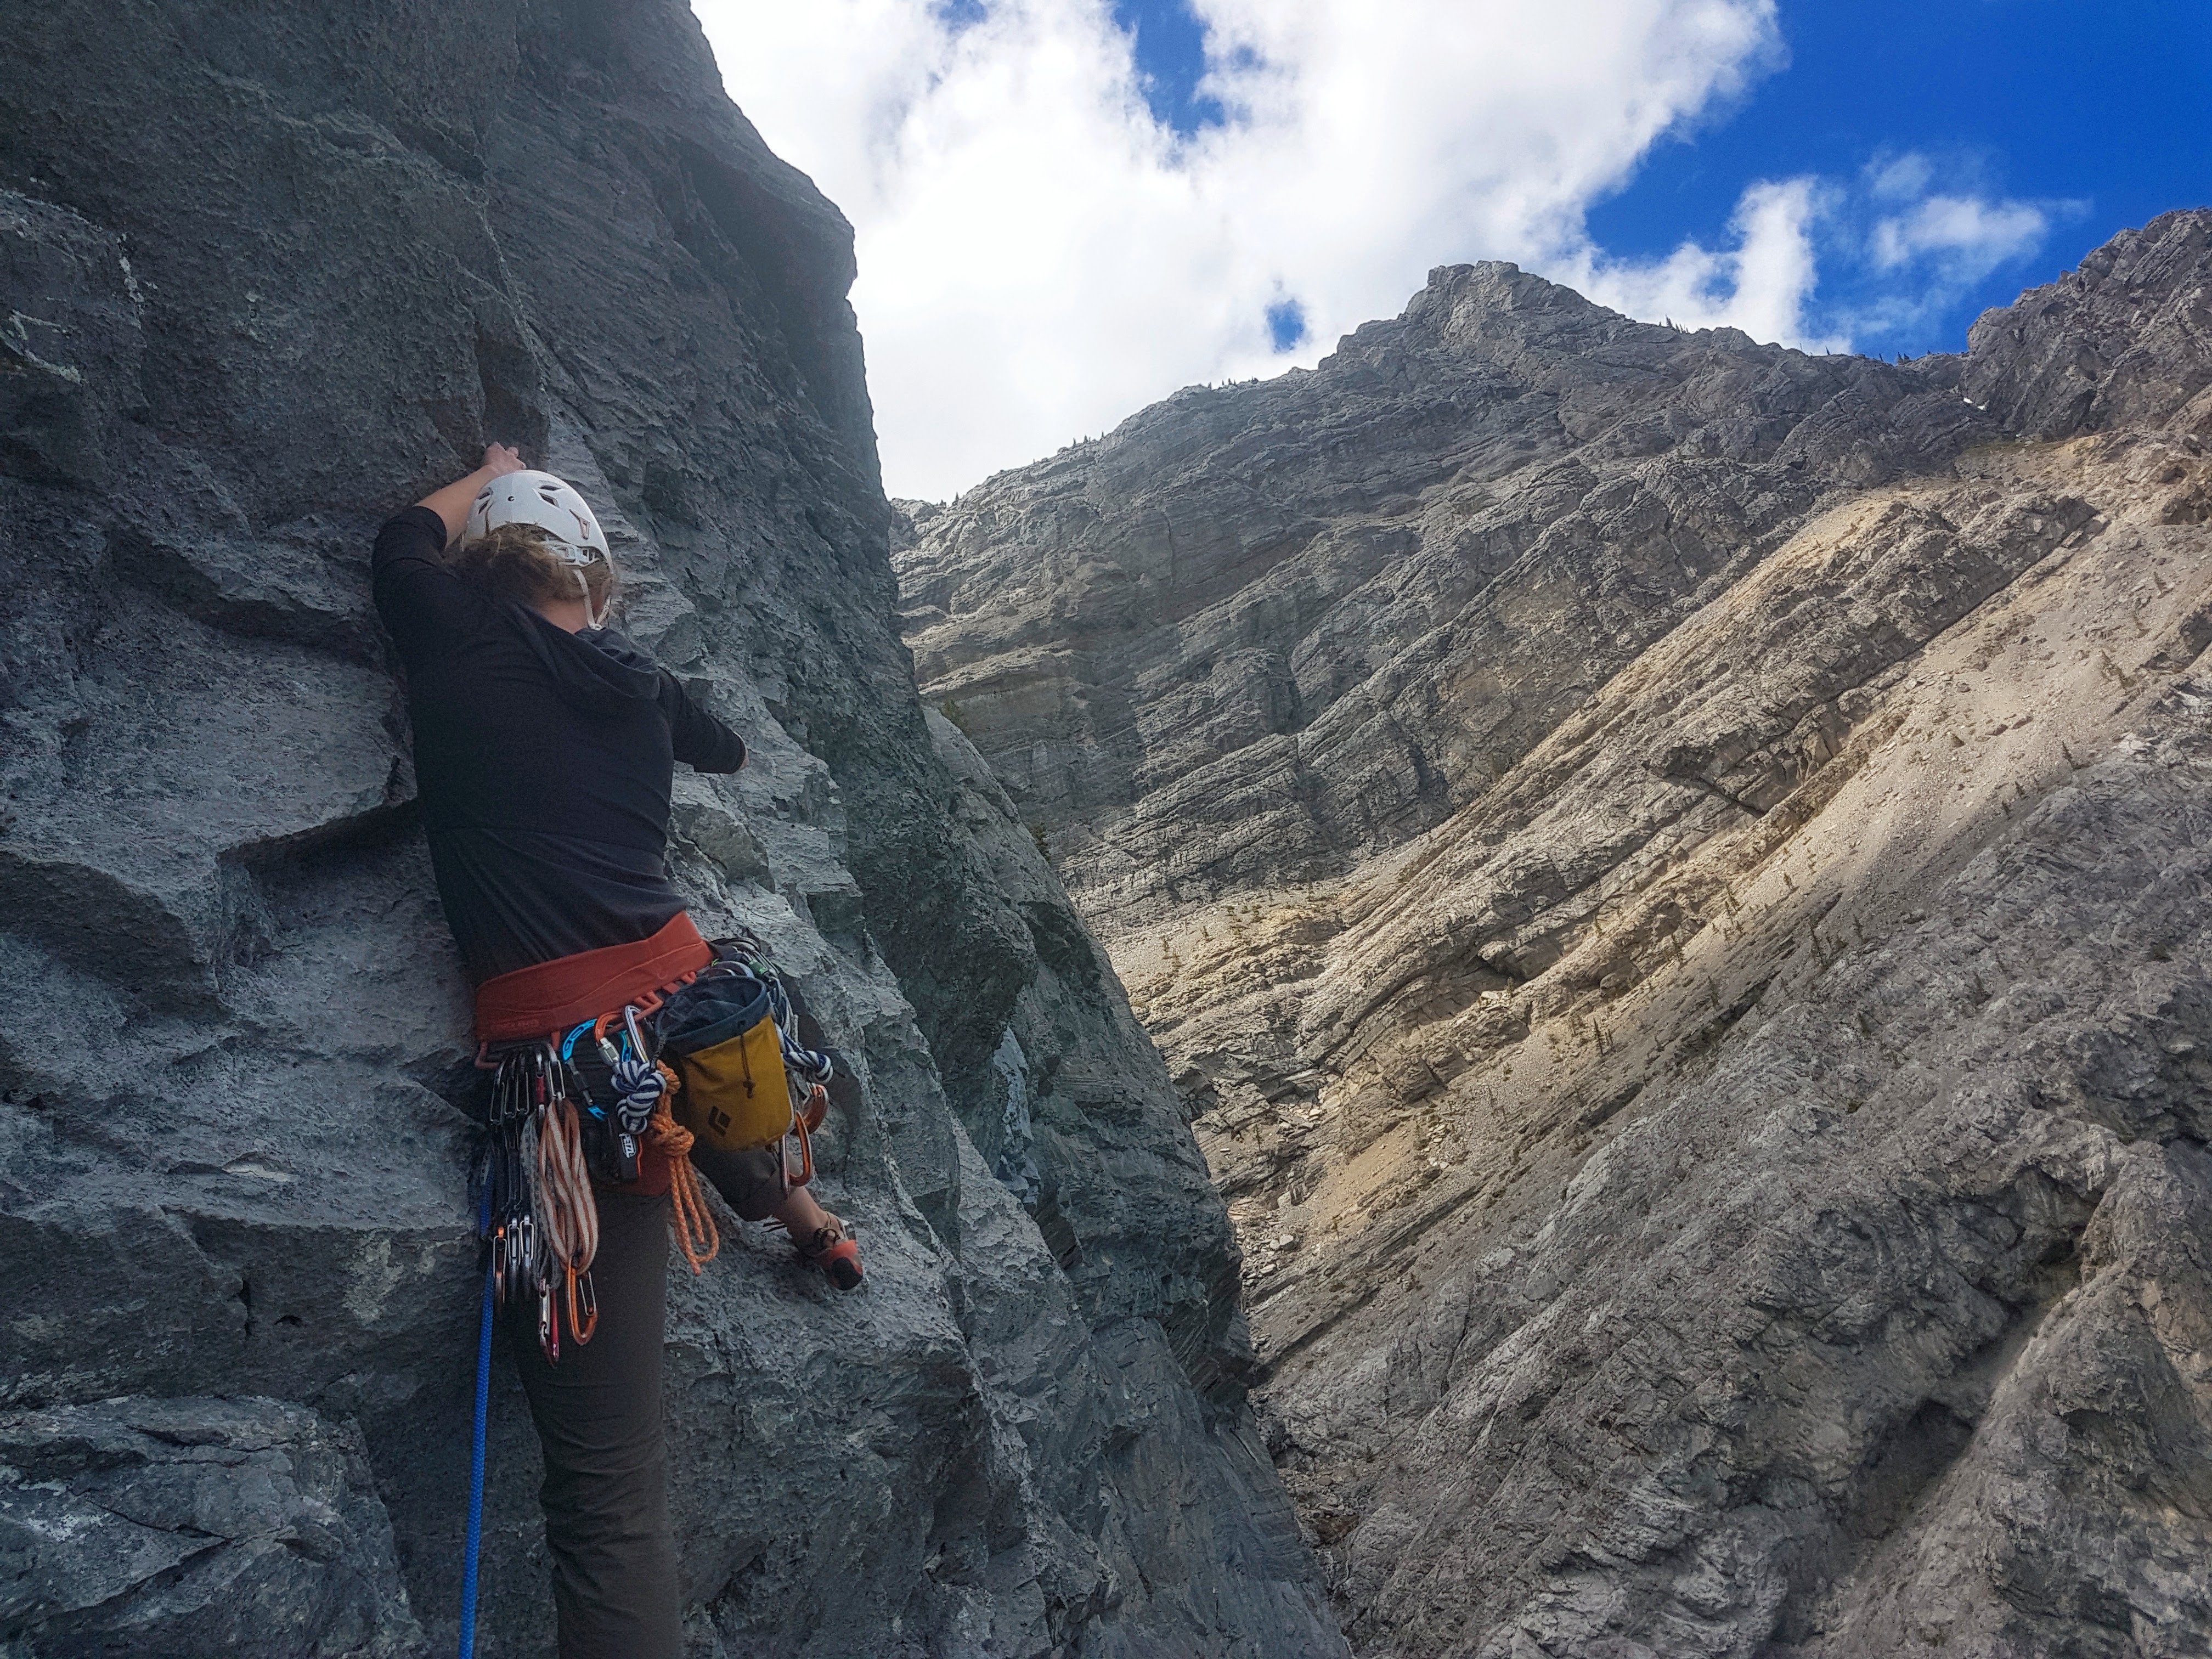
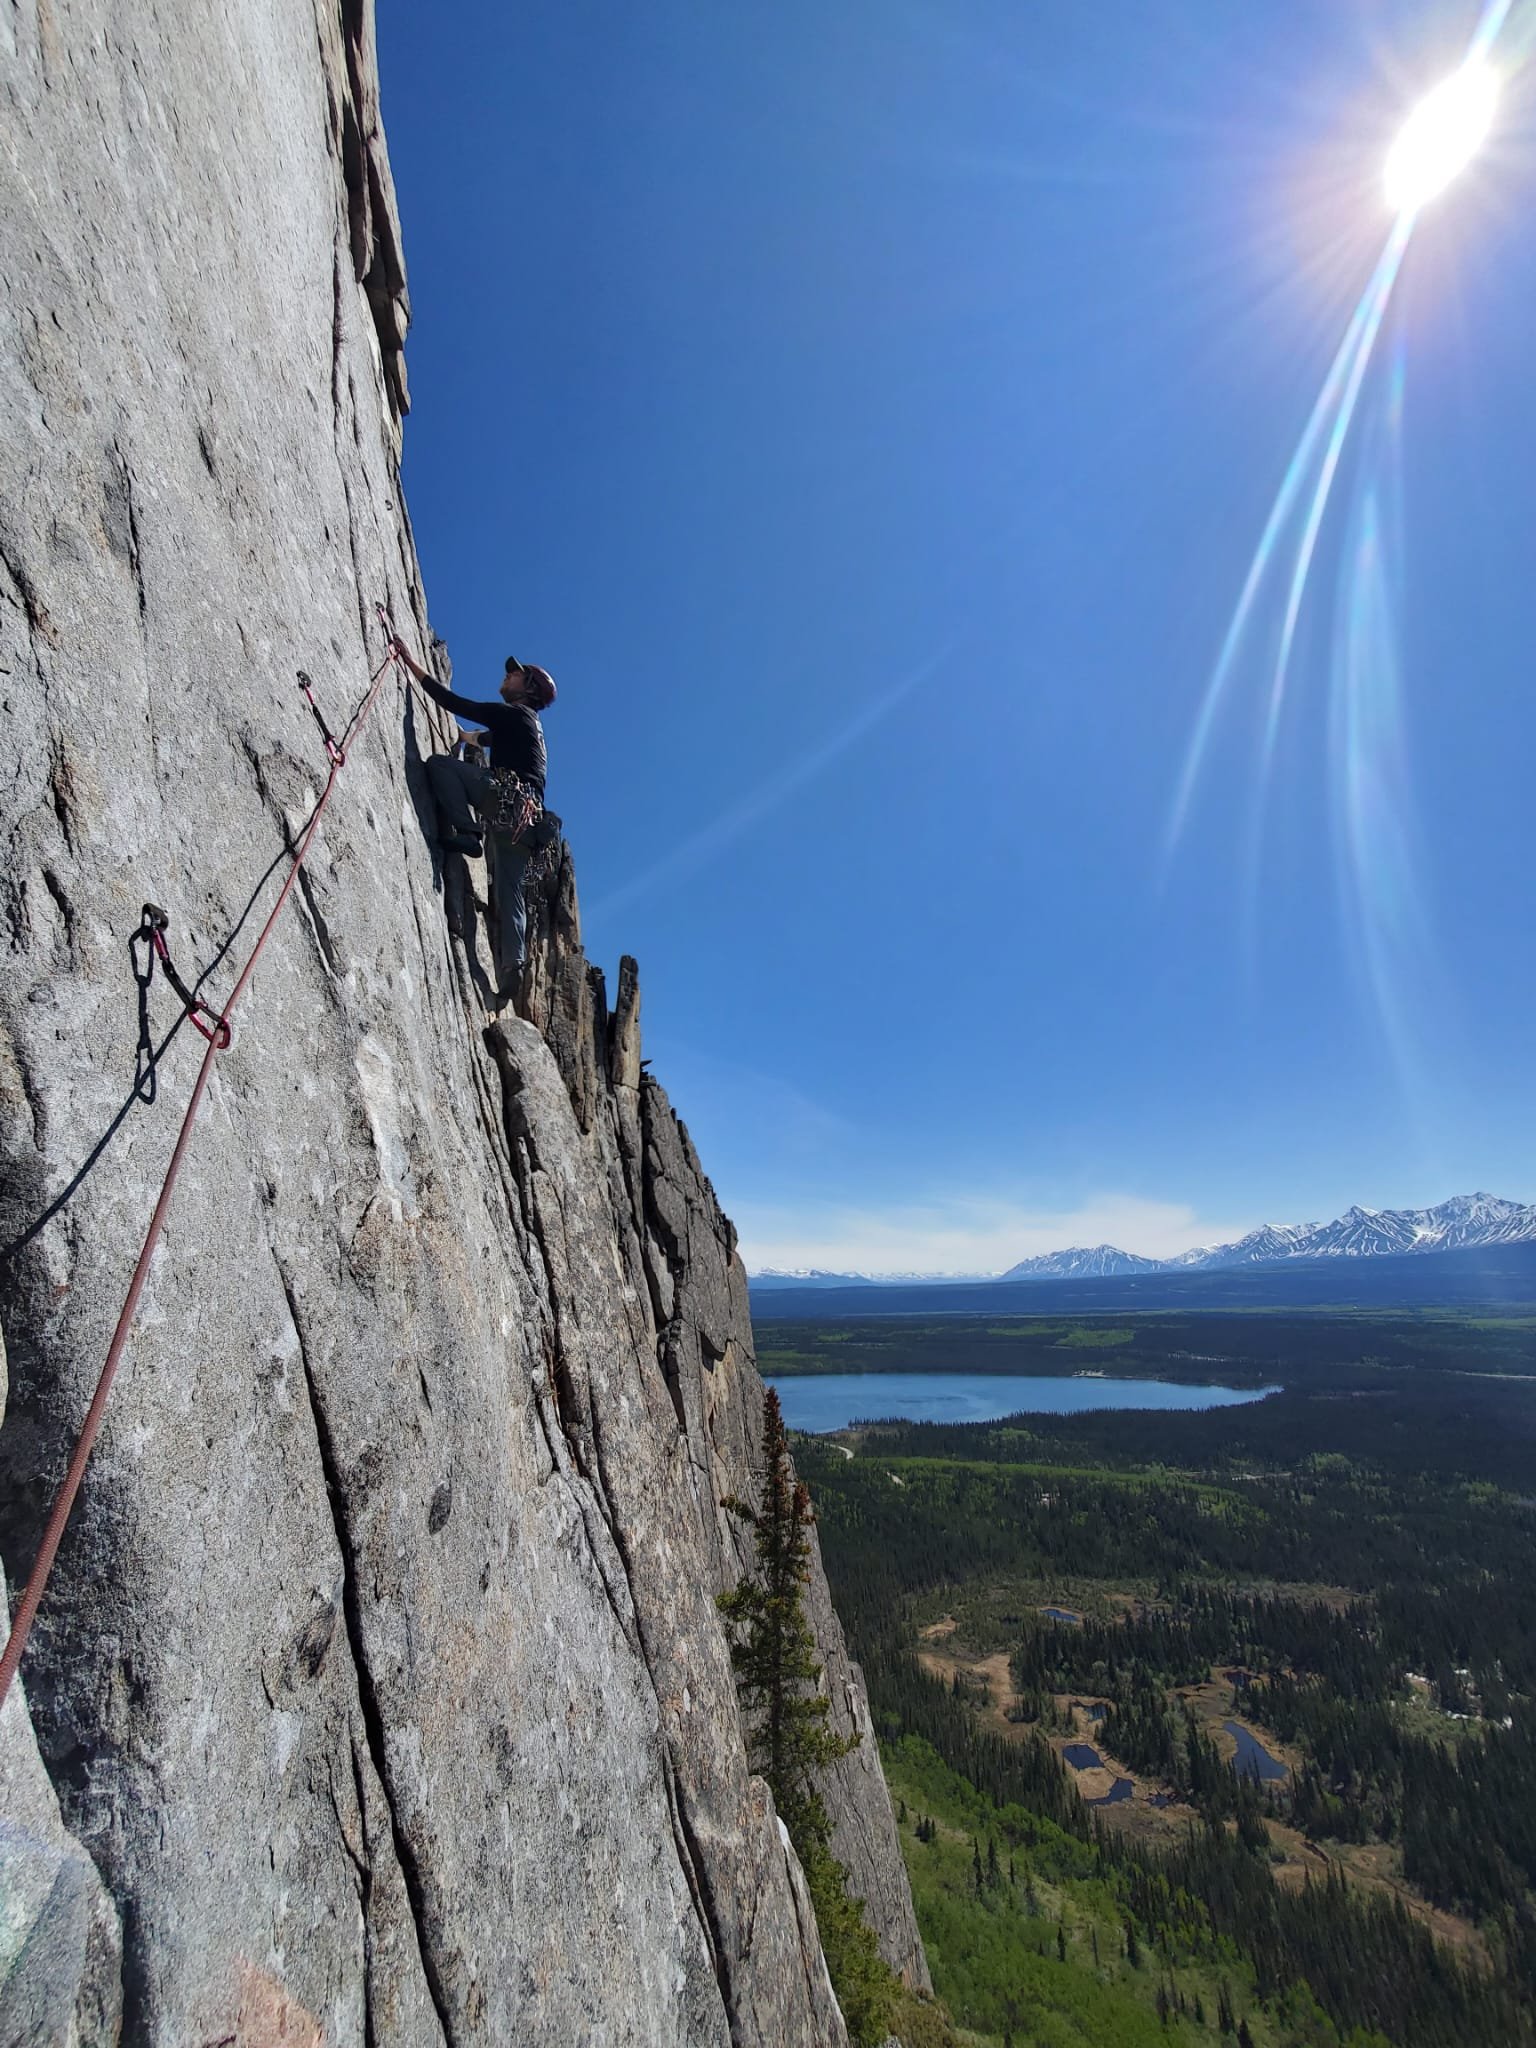
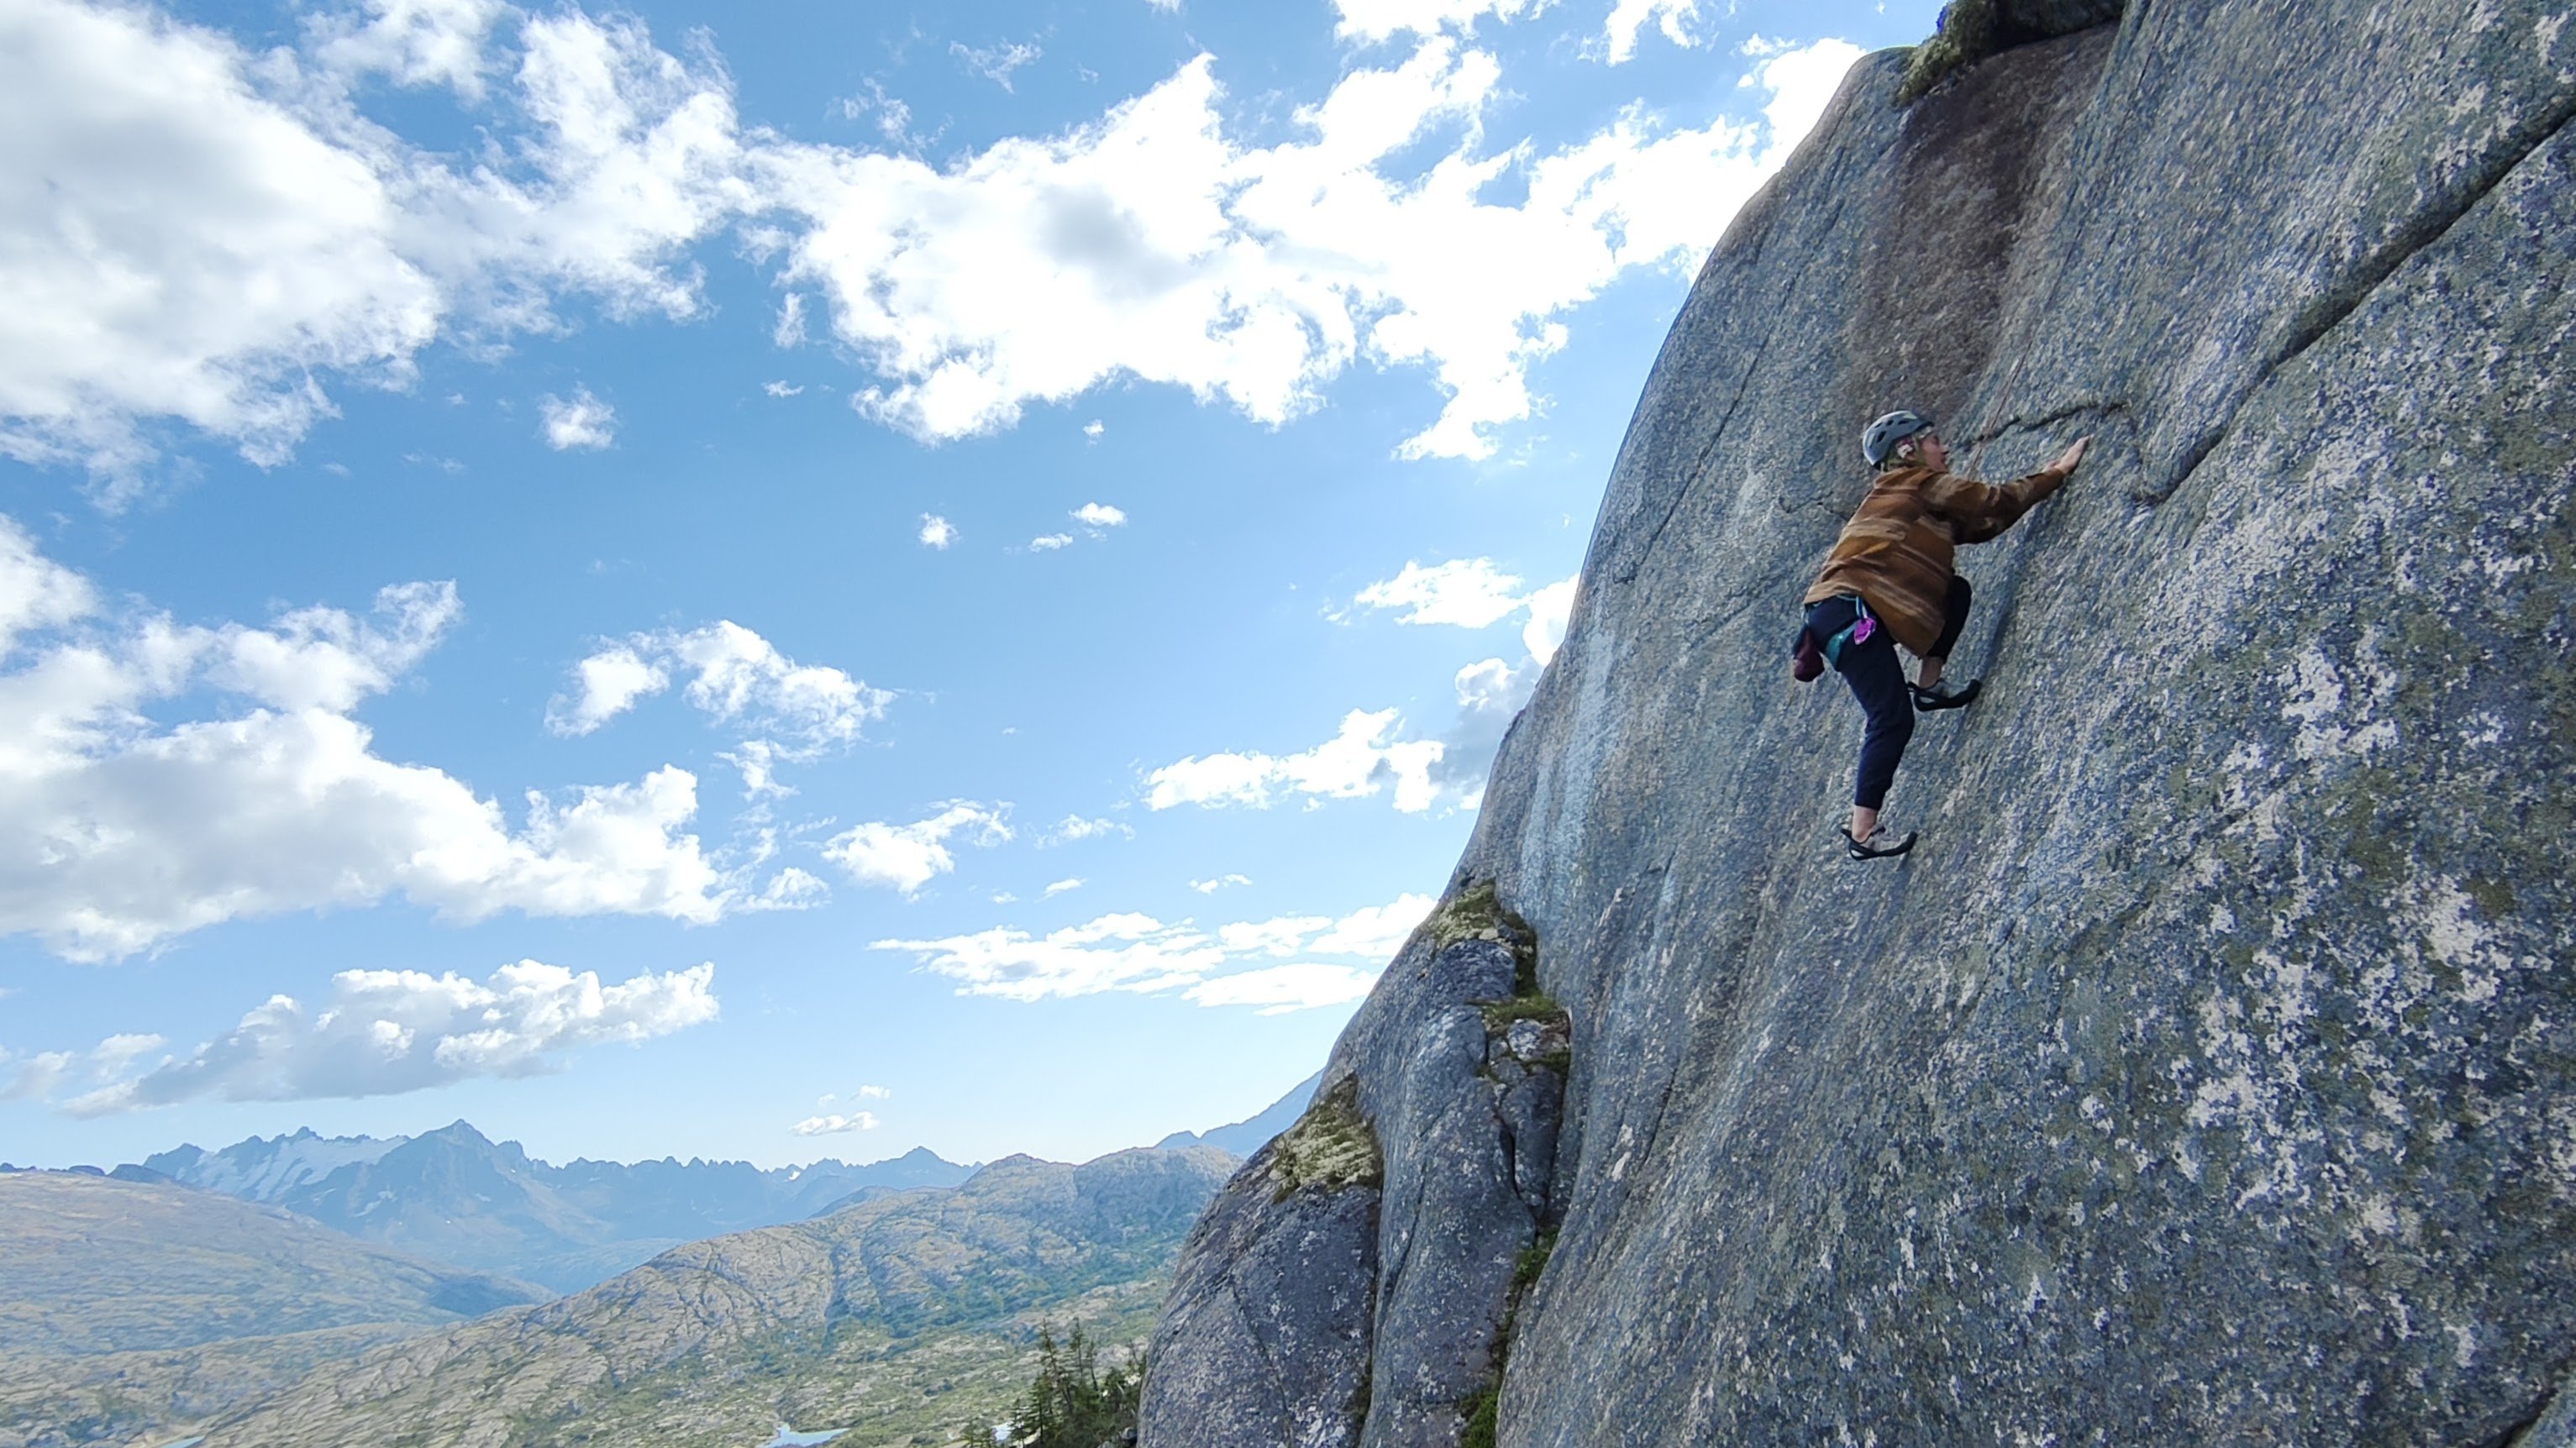
ROCK CLIMBING
Rock climbing is by far my most advanced area. As everything, I took a very iterative approach. My approach was ALWAYS to practice things on the ground in my home first, using my towel or coat rack. If you live near a climbing gym, start there, intro classes can be cheap and learning the basic skills such as tying in and belaying through supervision is the ideal way to do it (and how I did it). But I’m confident these could be self-learned as well. For example, I’ve taught people to lead climb and belay for the first time on a set of stairs by clipping draws/slings to the bannister and demonstrating issues like ‘backclipping’ and ‘z-clipping’ with staggered draws clipped to kitchen cupboards/drawers. One could practice ‘belaying’ someone up a steep slope off an anchor built on a tree (like I did with rappelling). Have that person put as much weight as possible on the system or ‘fall’ suddenly, practice lowering them down the slope, etc.
Resources:
- REI Climbing Skills Playlist
- A number of videos produced by REI on basic skills such as selecting gear, knots, tying in, belaying, building top rope anchors, belaying.
- VDiff Climbing
- A large collection of free online articles as well as extremely cheap e-books in PDF form for all levels from newcomers to aspiring big wall climbers. The books are ‘name your price’ and will only cost you a couple dollars if necessary, as well as DRM free.
- Multipitchclimbing.com
- Free online e-book on multipitch climbing skills including a very comprehensive chapter on rock rescue.
- Digital and Physical Guidebooks
- MountainProject is THE primary digital source for local climbing information (or beta) in North America. Though other websites like theCrag are popular in certain parts of NA and around the world. Obtaining the skills to climb is one thing, finding where to climb is a whole other exercise. Most popular areas also have high quality guidebooks that sometimes offer more information than the digital resources with better approach and climbing beta. As you break into trad climbing, it’s also handy to find out what gear to bring on a particular climb.
Skills:
- Single Pitch Skills
- Basic gear skills (tying in, putting on harness, roping up etc)
- Top Rope Anchors
- Top Rope Belay
- Lead Climbing + Belaying
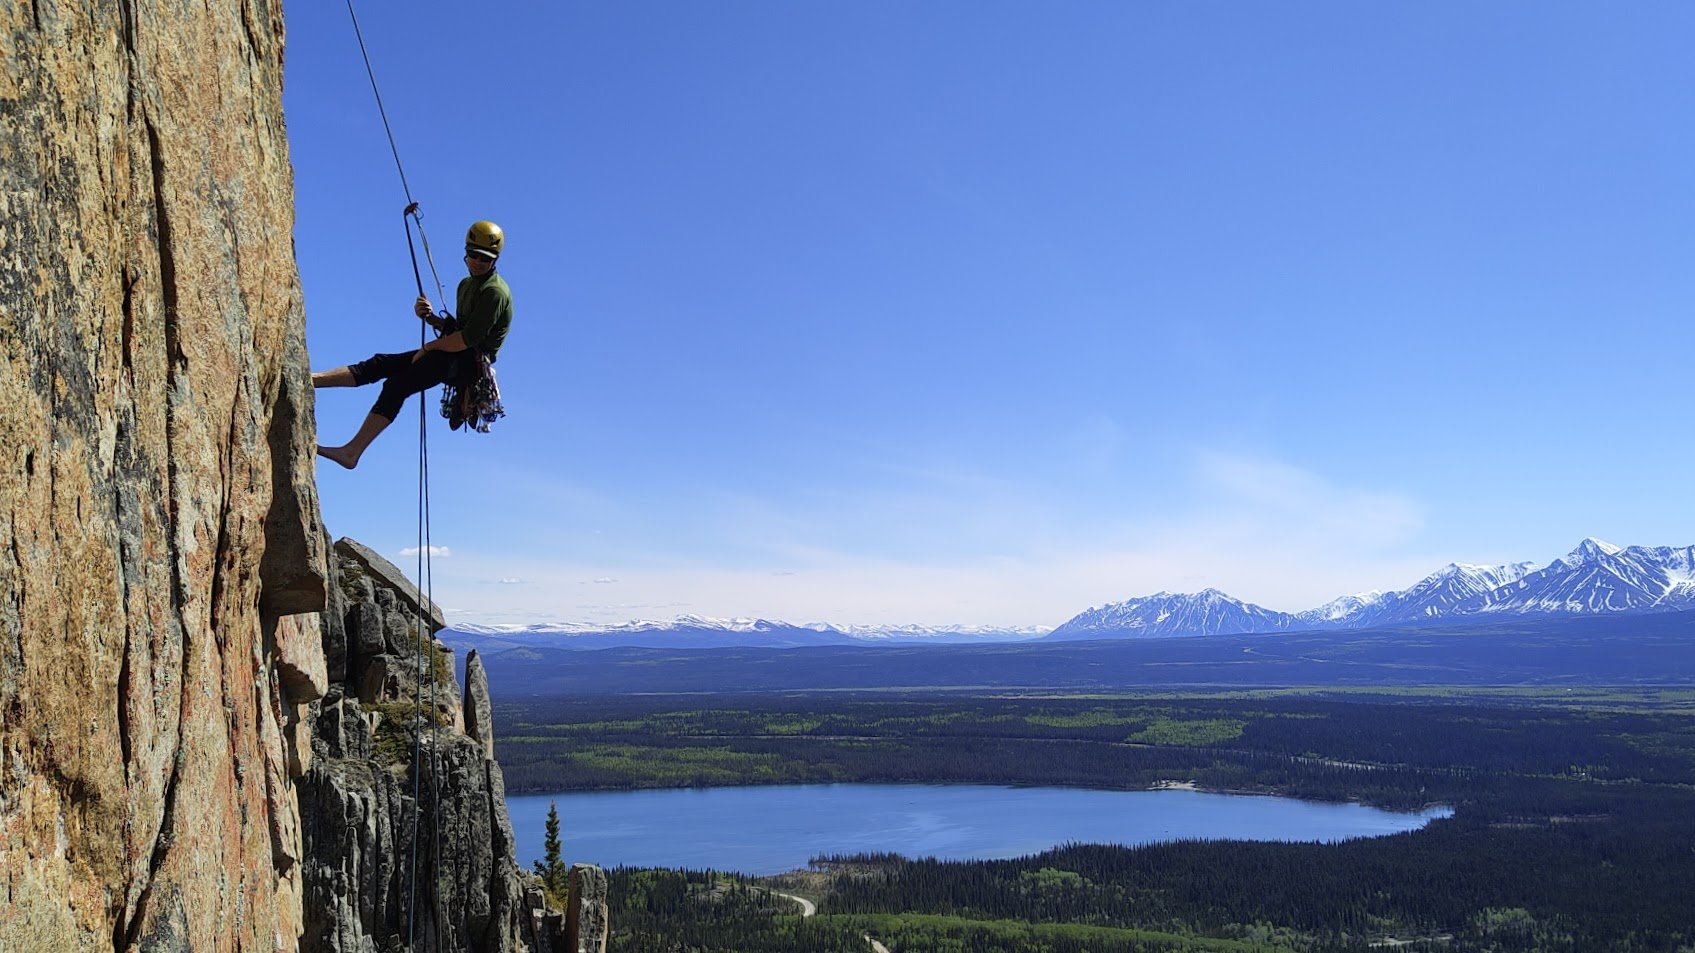
- Rappelling
- Cleaning Anchors
- Trad Climbing
- Multipitch Skills
- Belaying from above
- Gear anchors
- Transitions
- Rope Management
- Rock Rescue
- Aid Climbing
- Both ‘guerilla aid’ (see: multipitchclimbing.com), which falls under rock rescue, and bonafide aid
Most of these can be practiced on flat ground in your home! Get your harness on and build an anchor on your coat or towel rack. Before taking it right to the crag, try it on something that can take bodyweight but isn’t fatal if it fails. Practice top rope belaying off a sturdy tree branch or rappelling down a grassy hill off of a large, healthy tree. Then ideally move up to practicing off easily accessible two bolt anchors at a local crag. I practiced all my rock rescue skills first by attaching a small weight on a rope (just enough that it could overcome the natural friction in the system) on my second floor railing then with a bag full of rocks and a bolted anchor at my local crag. Get creative!
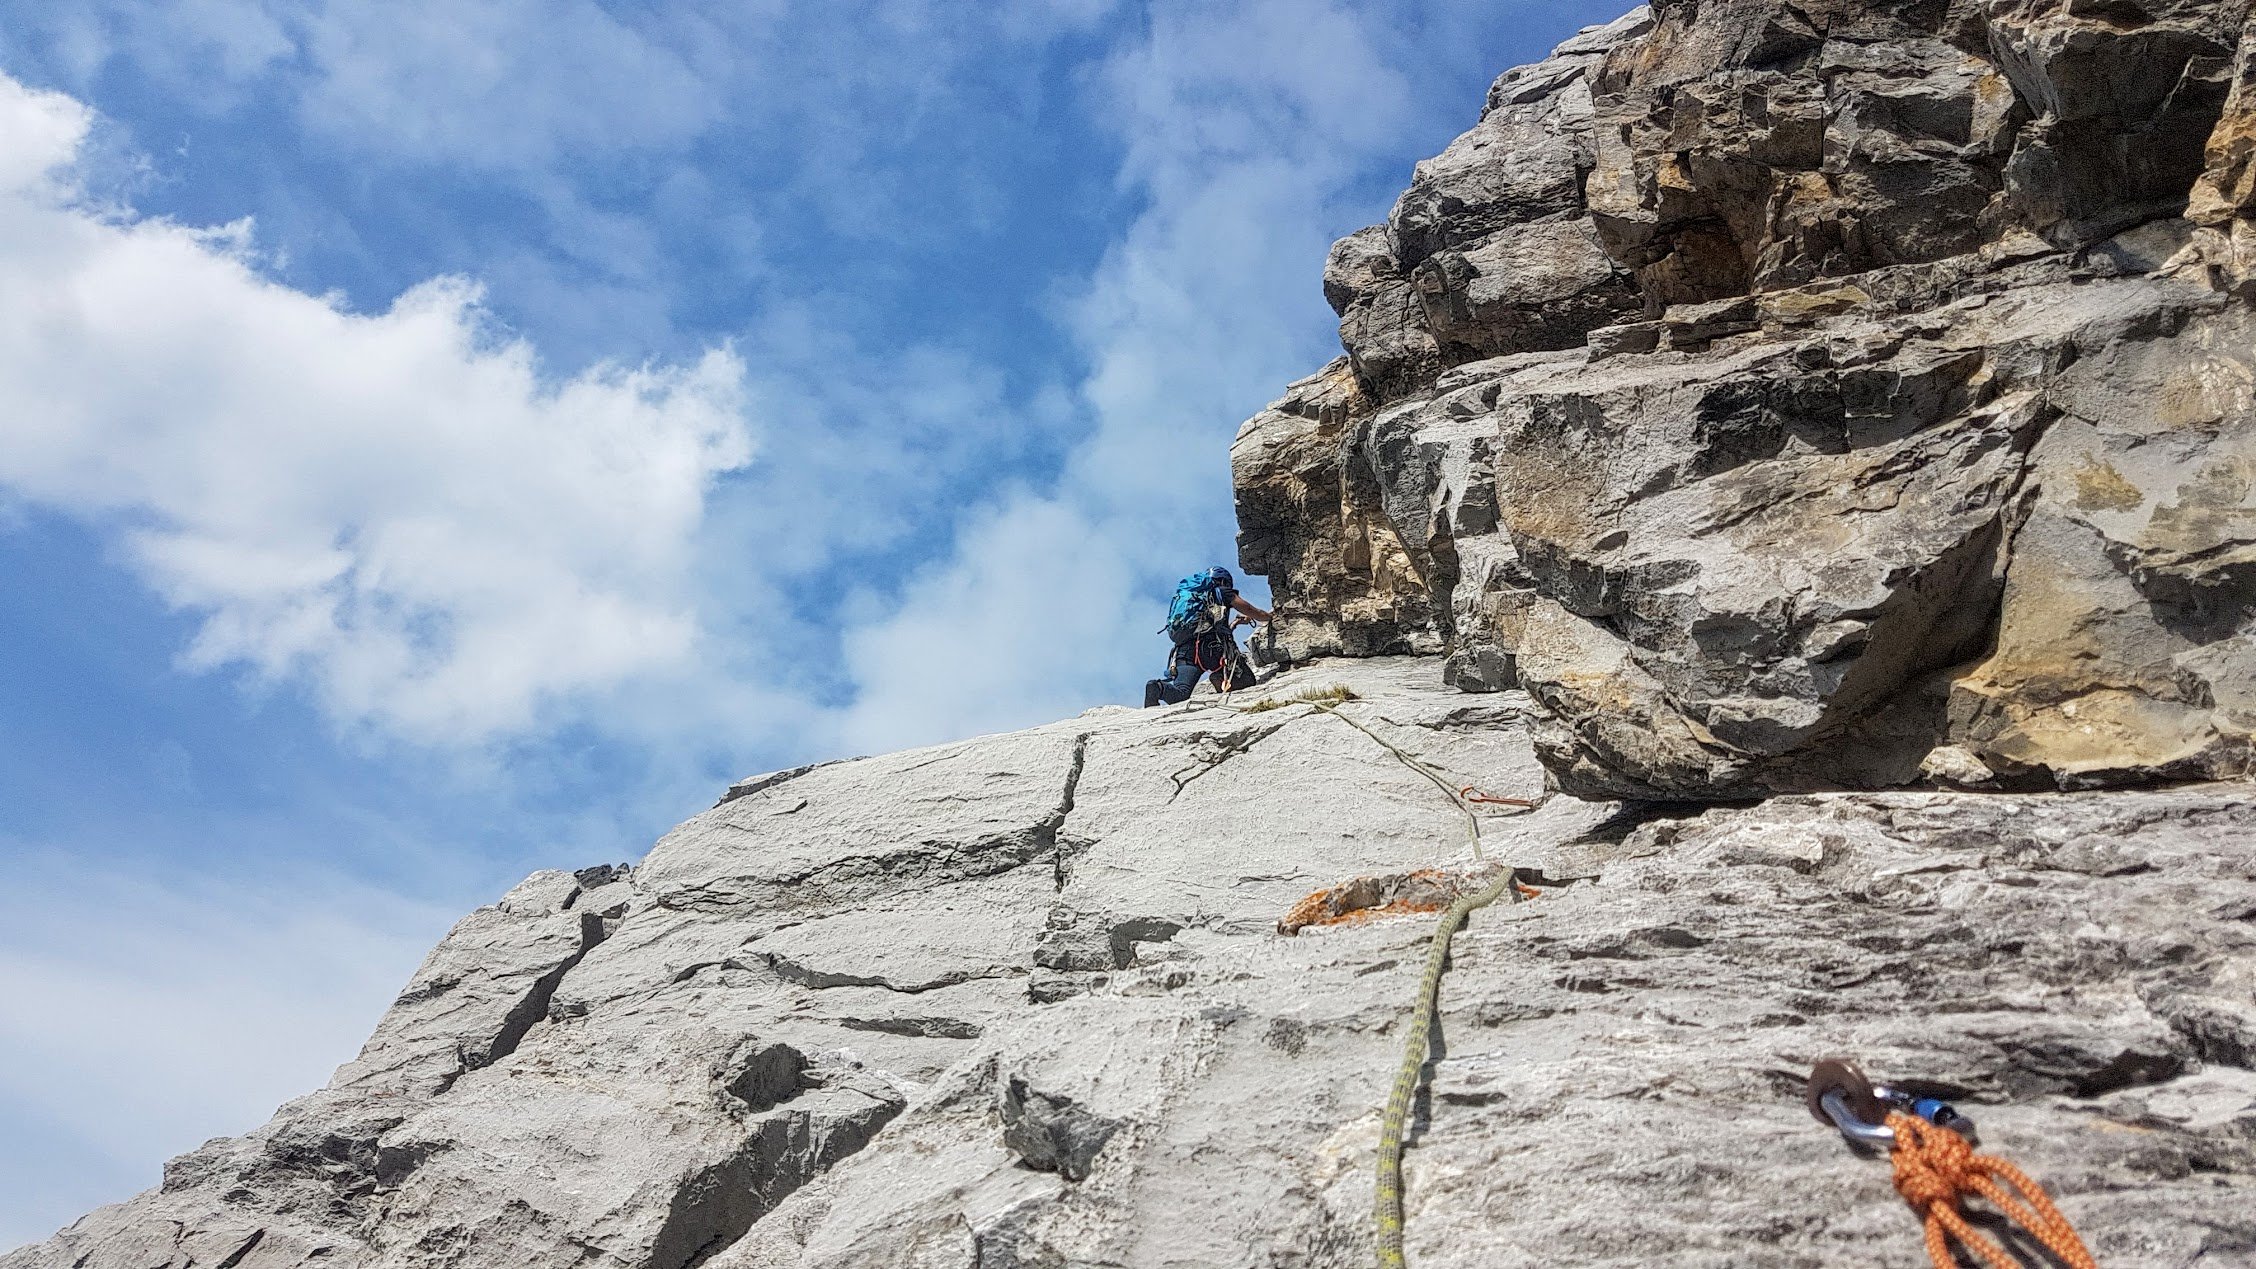
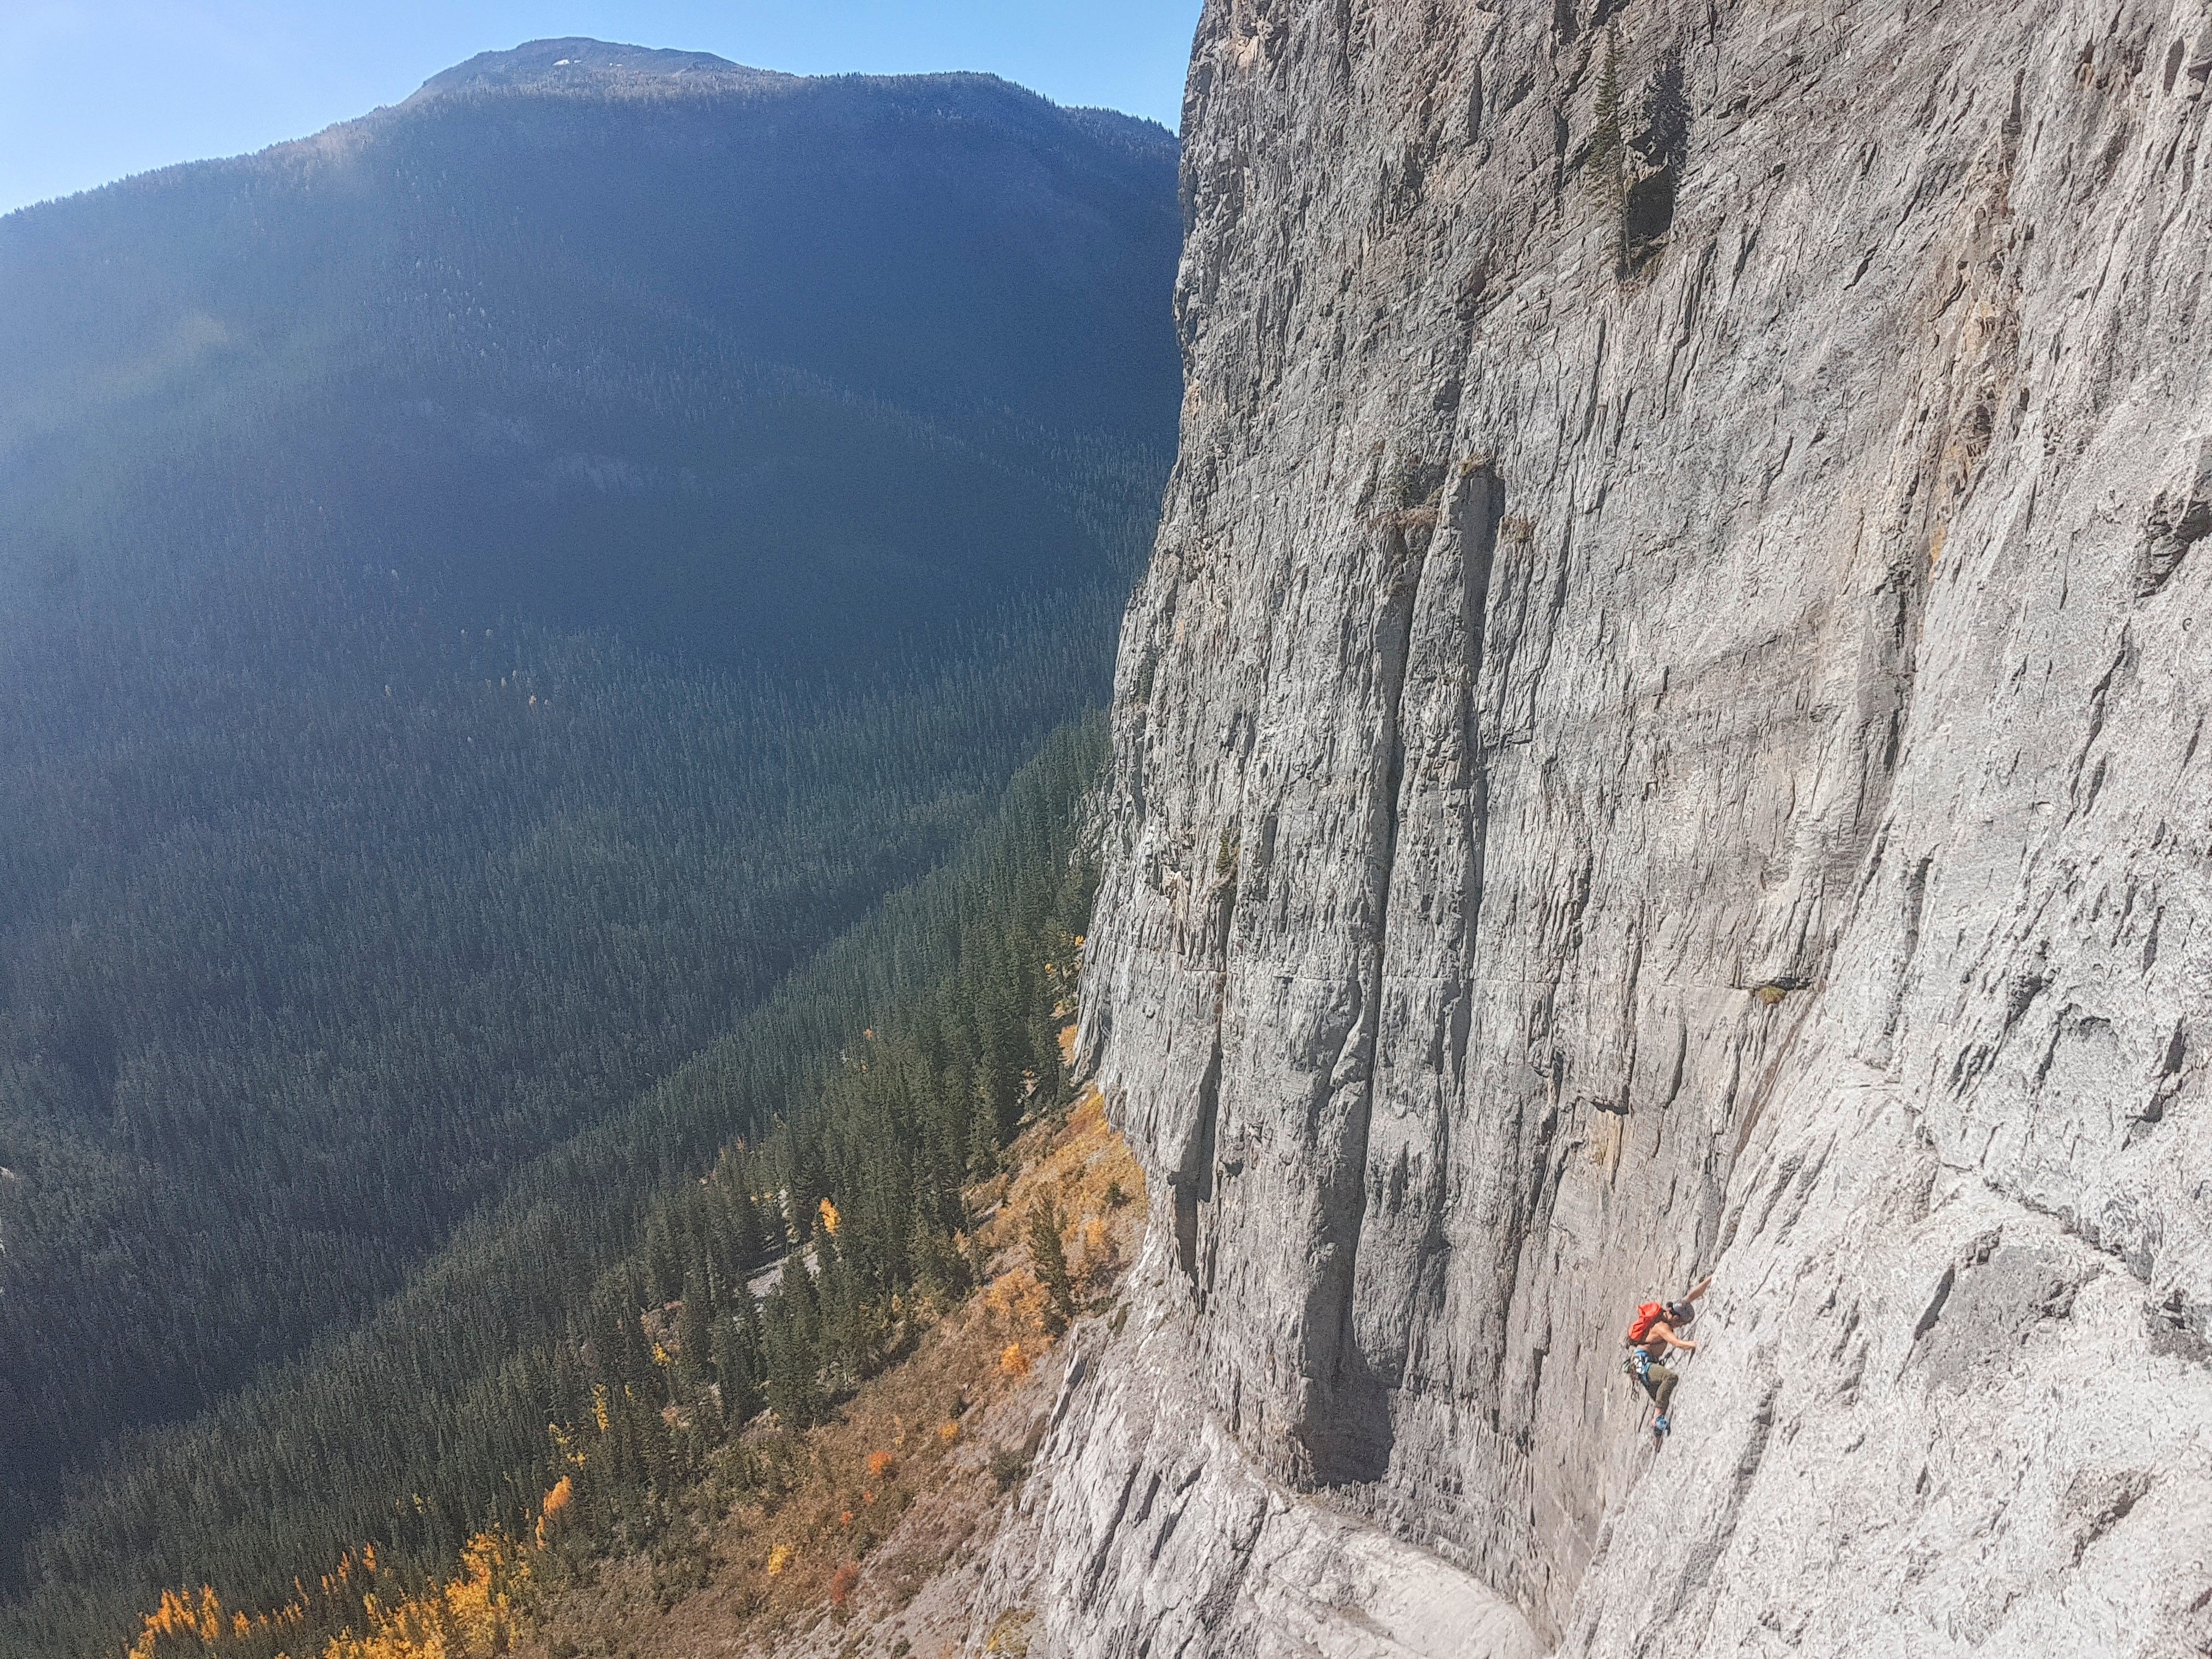
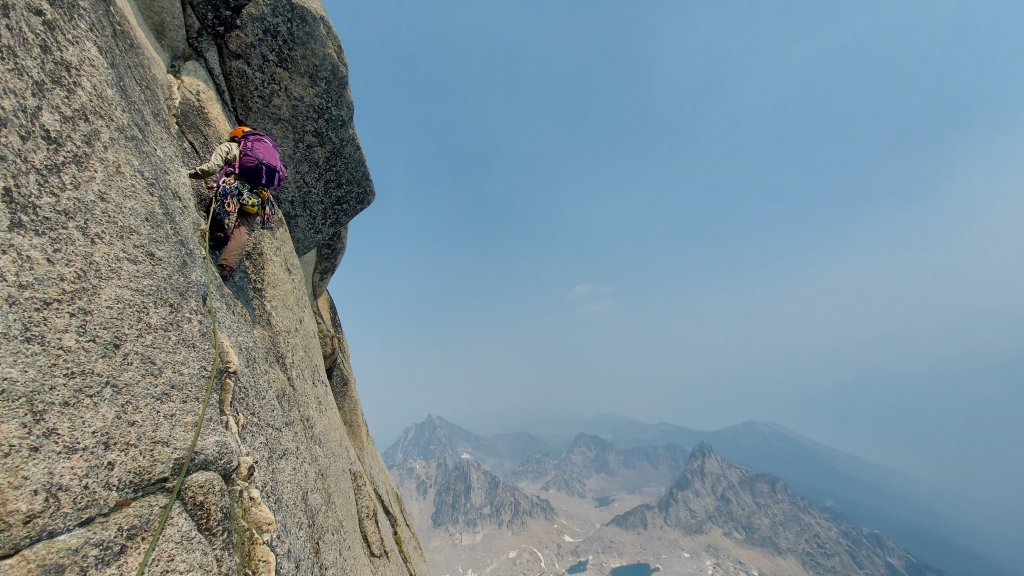
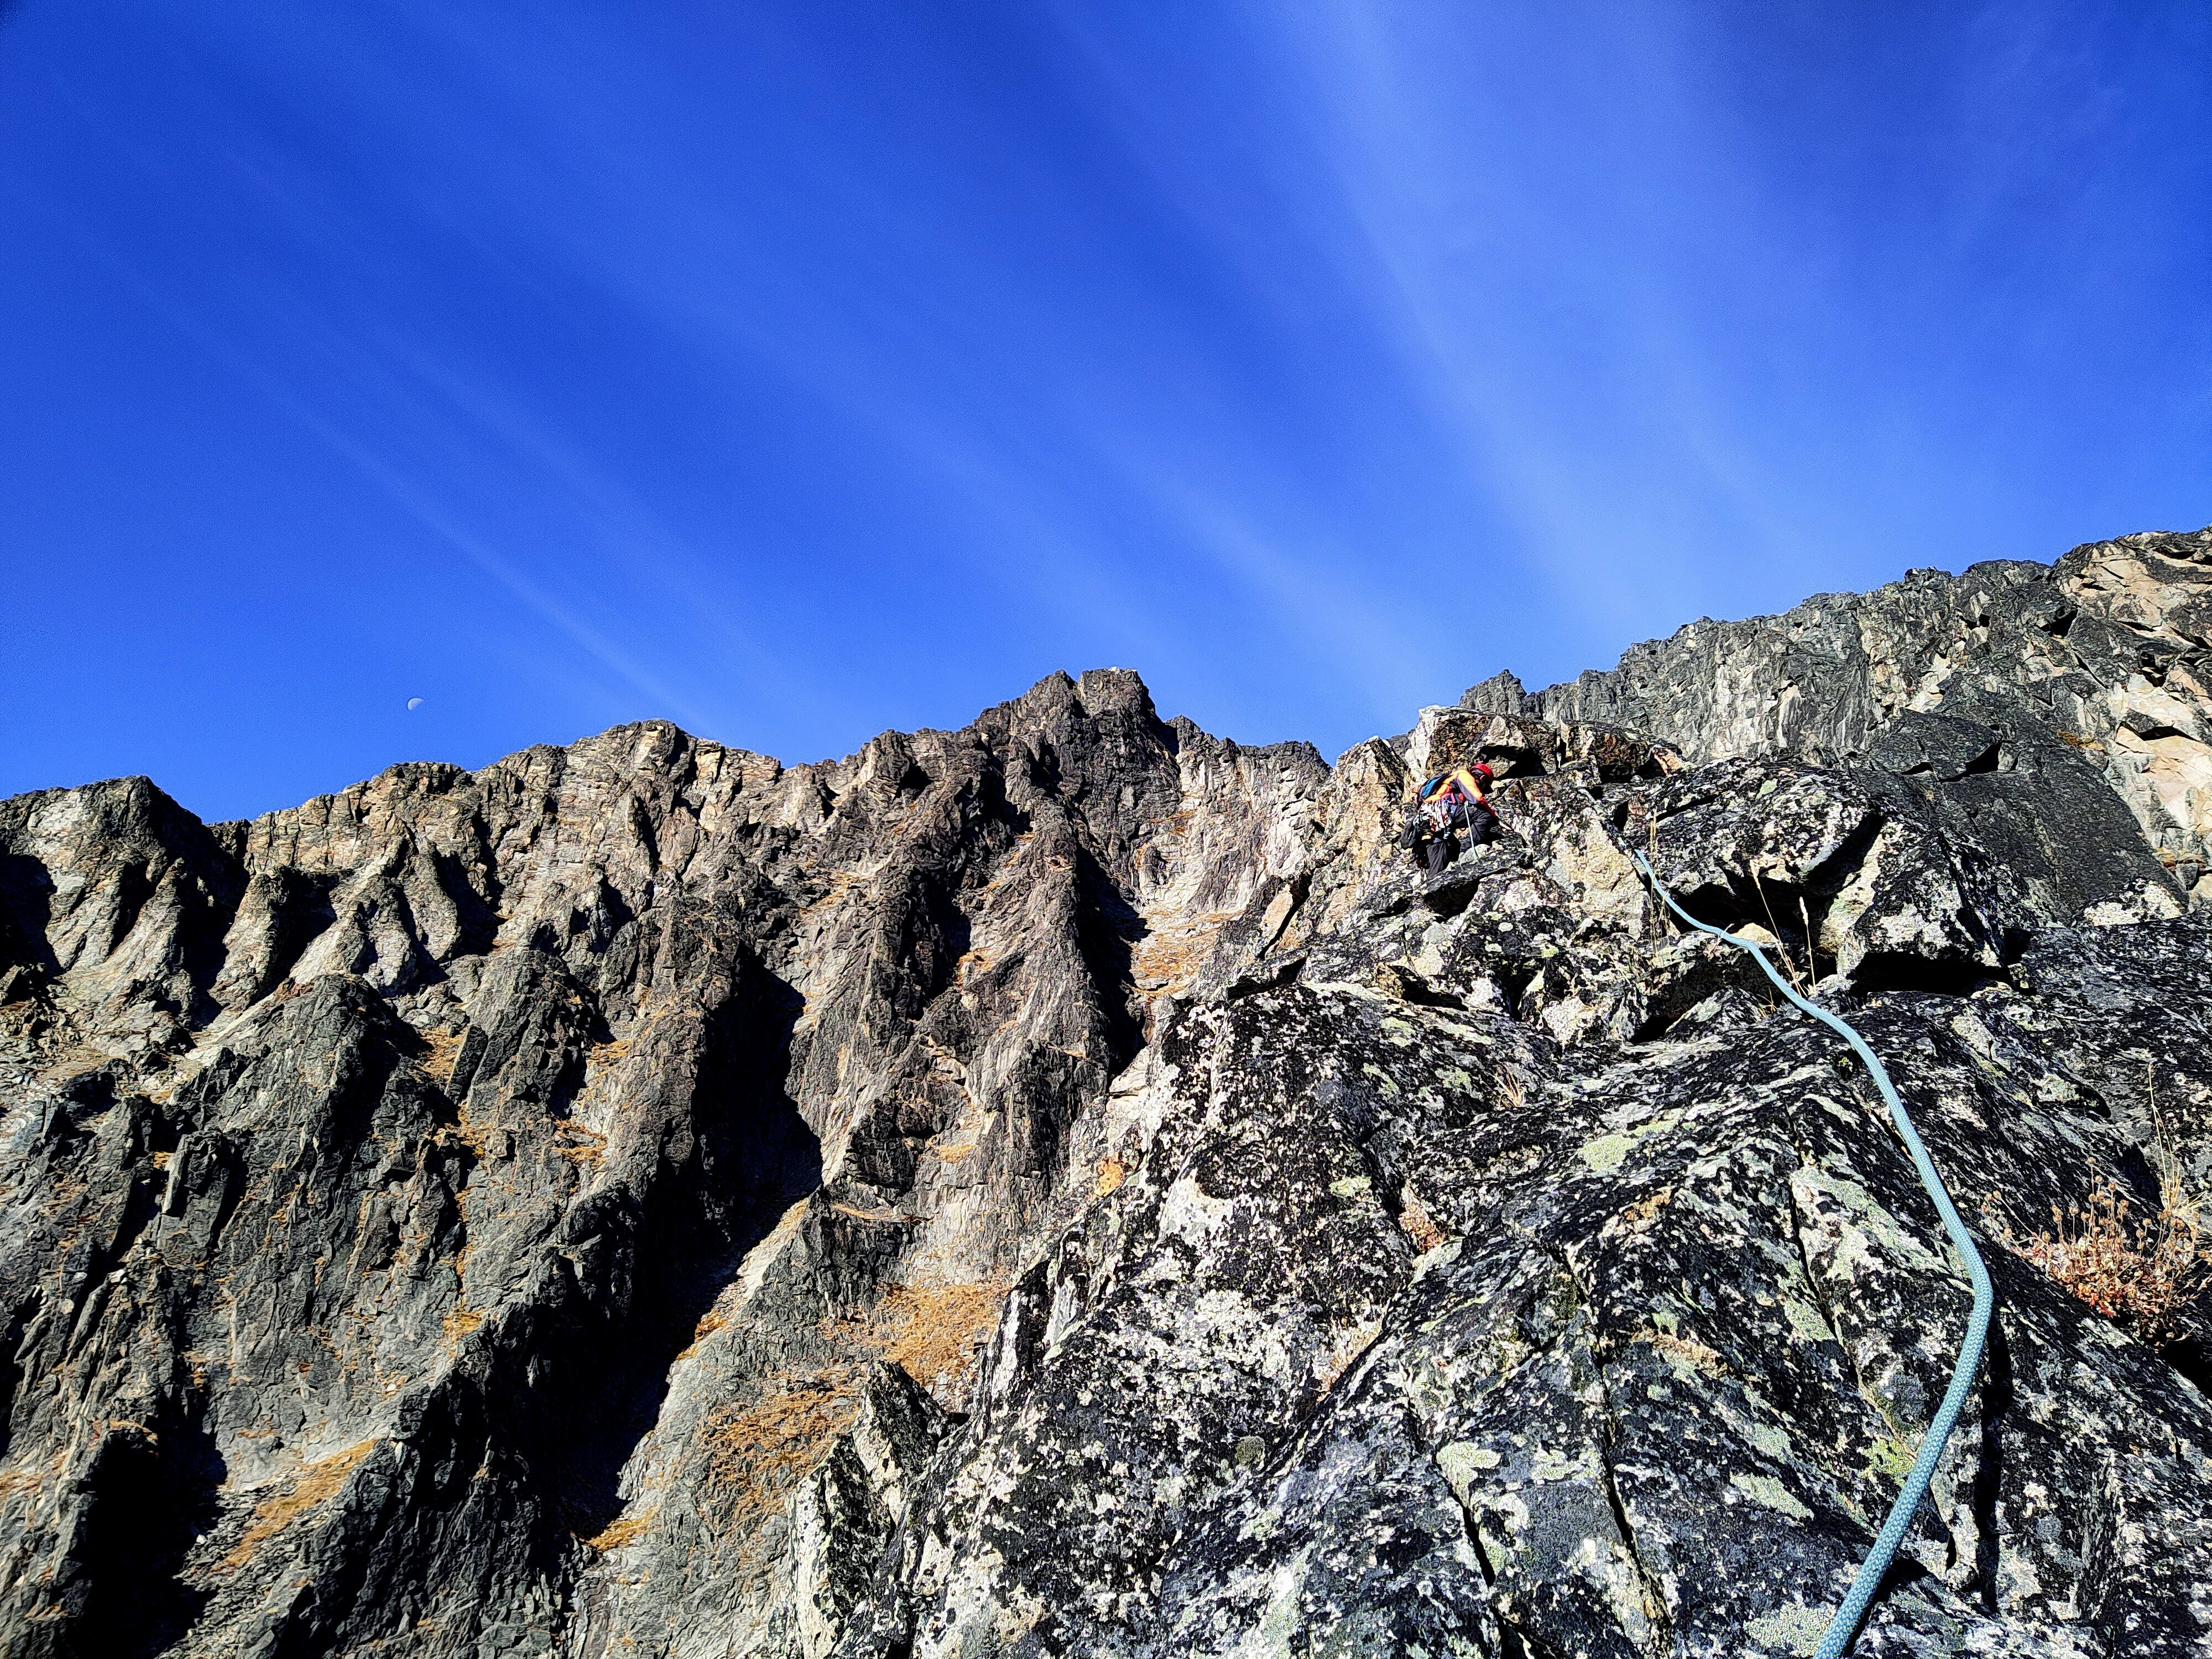
Trad climbing is a pretty complex topic and I won’t dive too deep. Suffice to say, I was fairly confident with my sport climbing (fully bolted climbs) before venturing into it BUT I did do my first trad climbs (single and multipitch) at the end of my first season. I did a LOT of top roping while placing gear as if I was on lead (as in, trying not to take on the rope to stop and fiddle gear in), then I would rappel and bounce test the pieces by clipping in with a dyneema sling and jumping on it repeatedly. Due to the static nature of the slings it produces forces similar to that of a small lead fall (I still do this on occasion if I’m working a trad route on TR and want to test a marginal looking piece of gear). I also would practice building multipiece anchors and send close-up photos to an experienced friend of mine to see what their thoughts on placements would be. When I did start leading, it was on routes far, far below my limit. The hardest grade I did that season was a 5.4 and the multipitch I climbed was a 5.2. To this day I spend a lot of time researching the quality of gear for any route I want to climb. I don’t particularly enjoy runouts but as I gain in confidence I’m more than happy to run it out on solid rock far below my limit. Make a habit of researching what gear you need to safely complete a route as you progress. The VDiff Trad Climbing book will give you a great look at all the other considerations and nuance that go into climbing safely on gear.
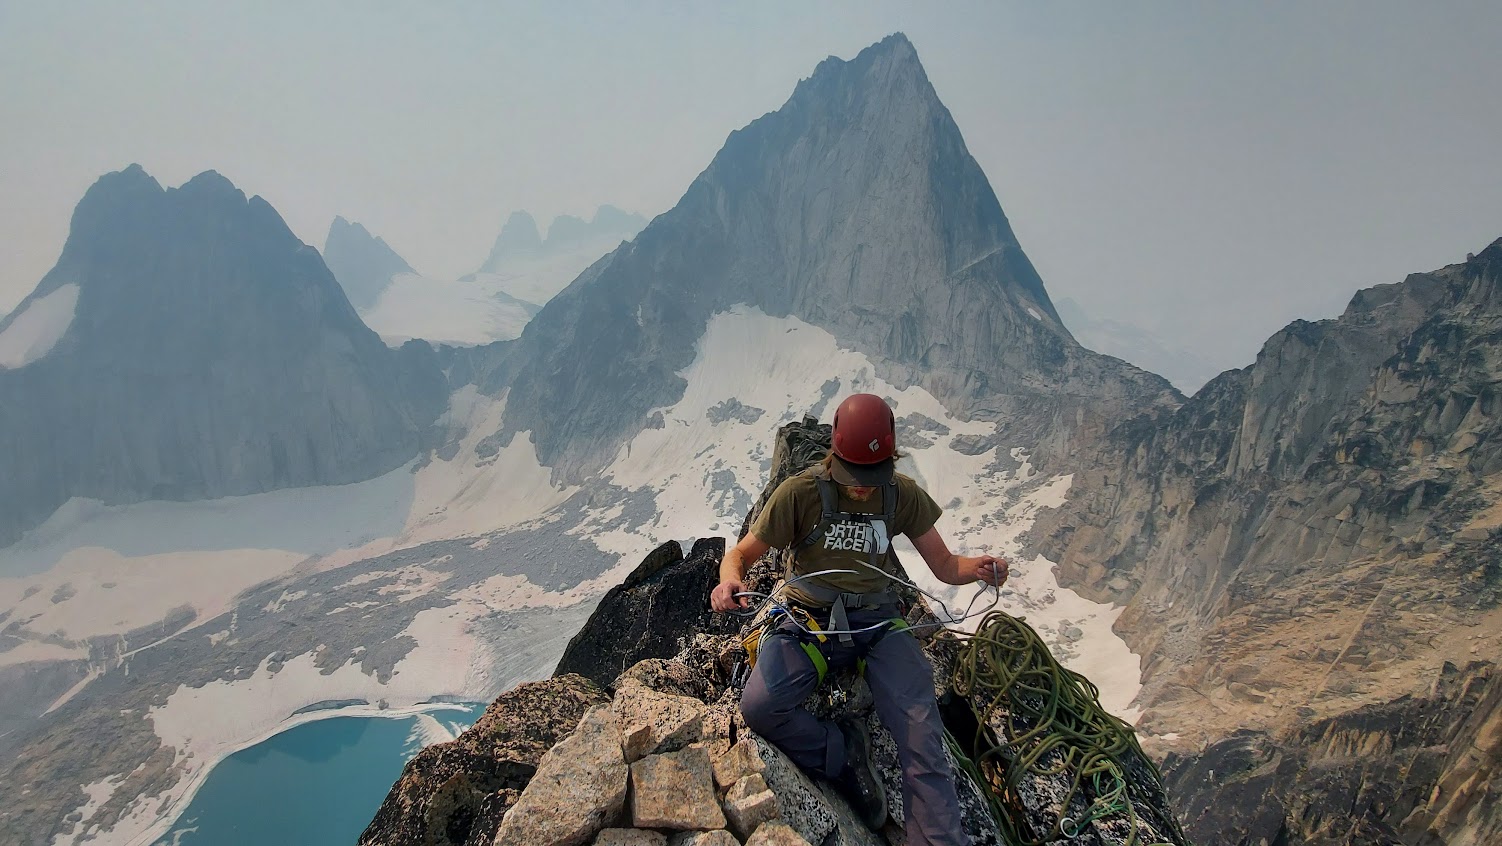
- Alpine Rock Skills
- Simulclimbing
- Terrain Belays and Rappels
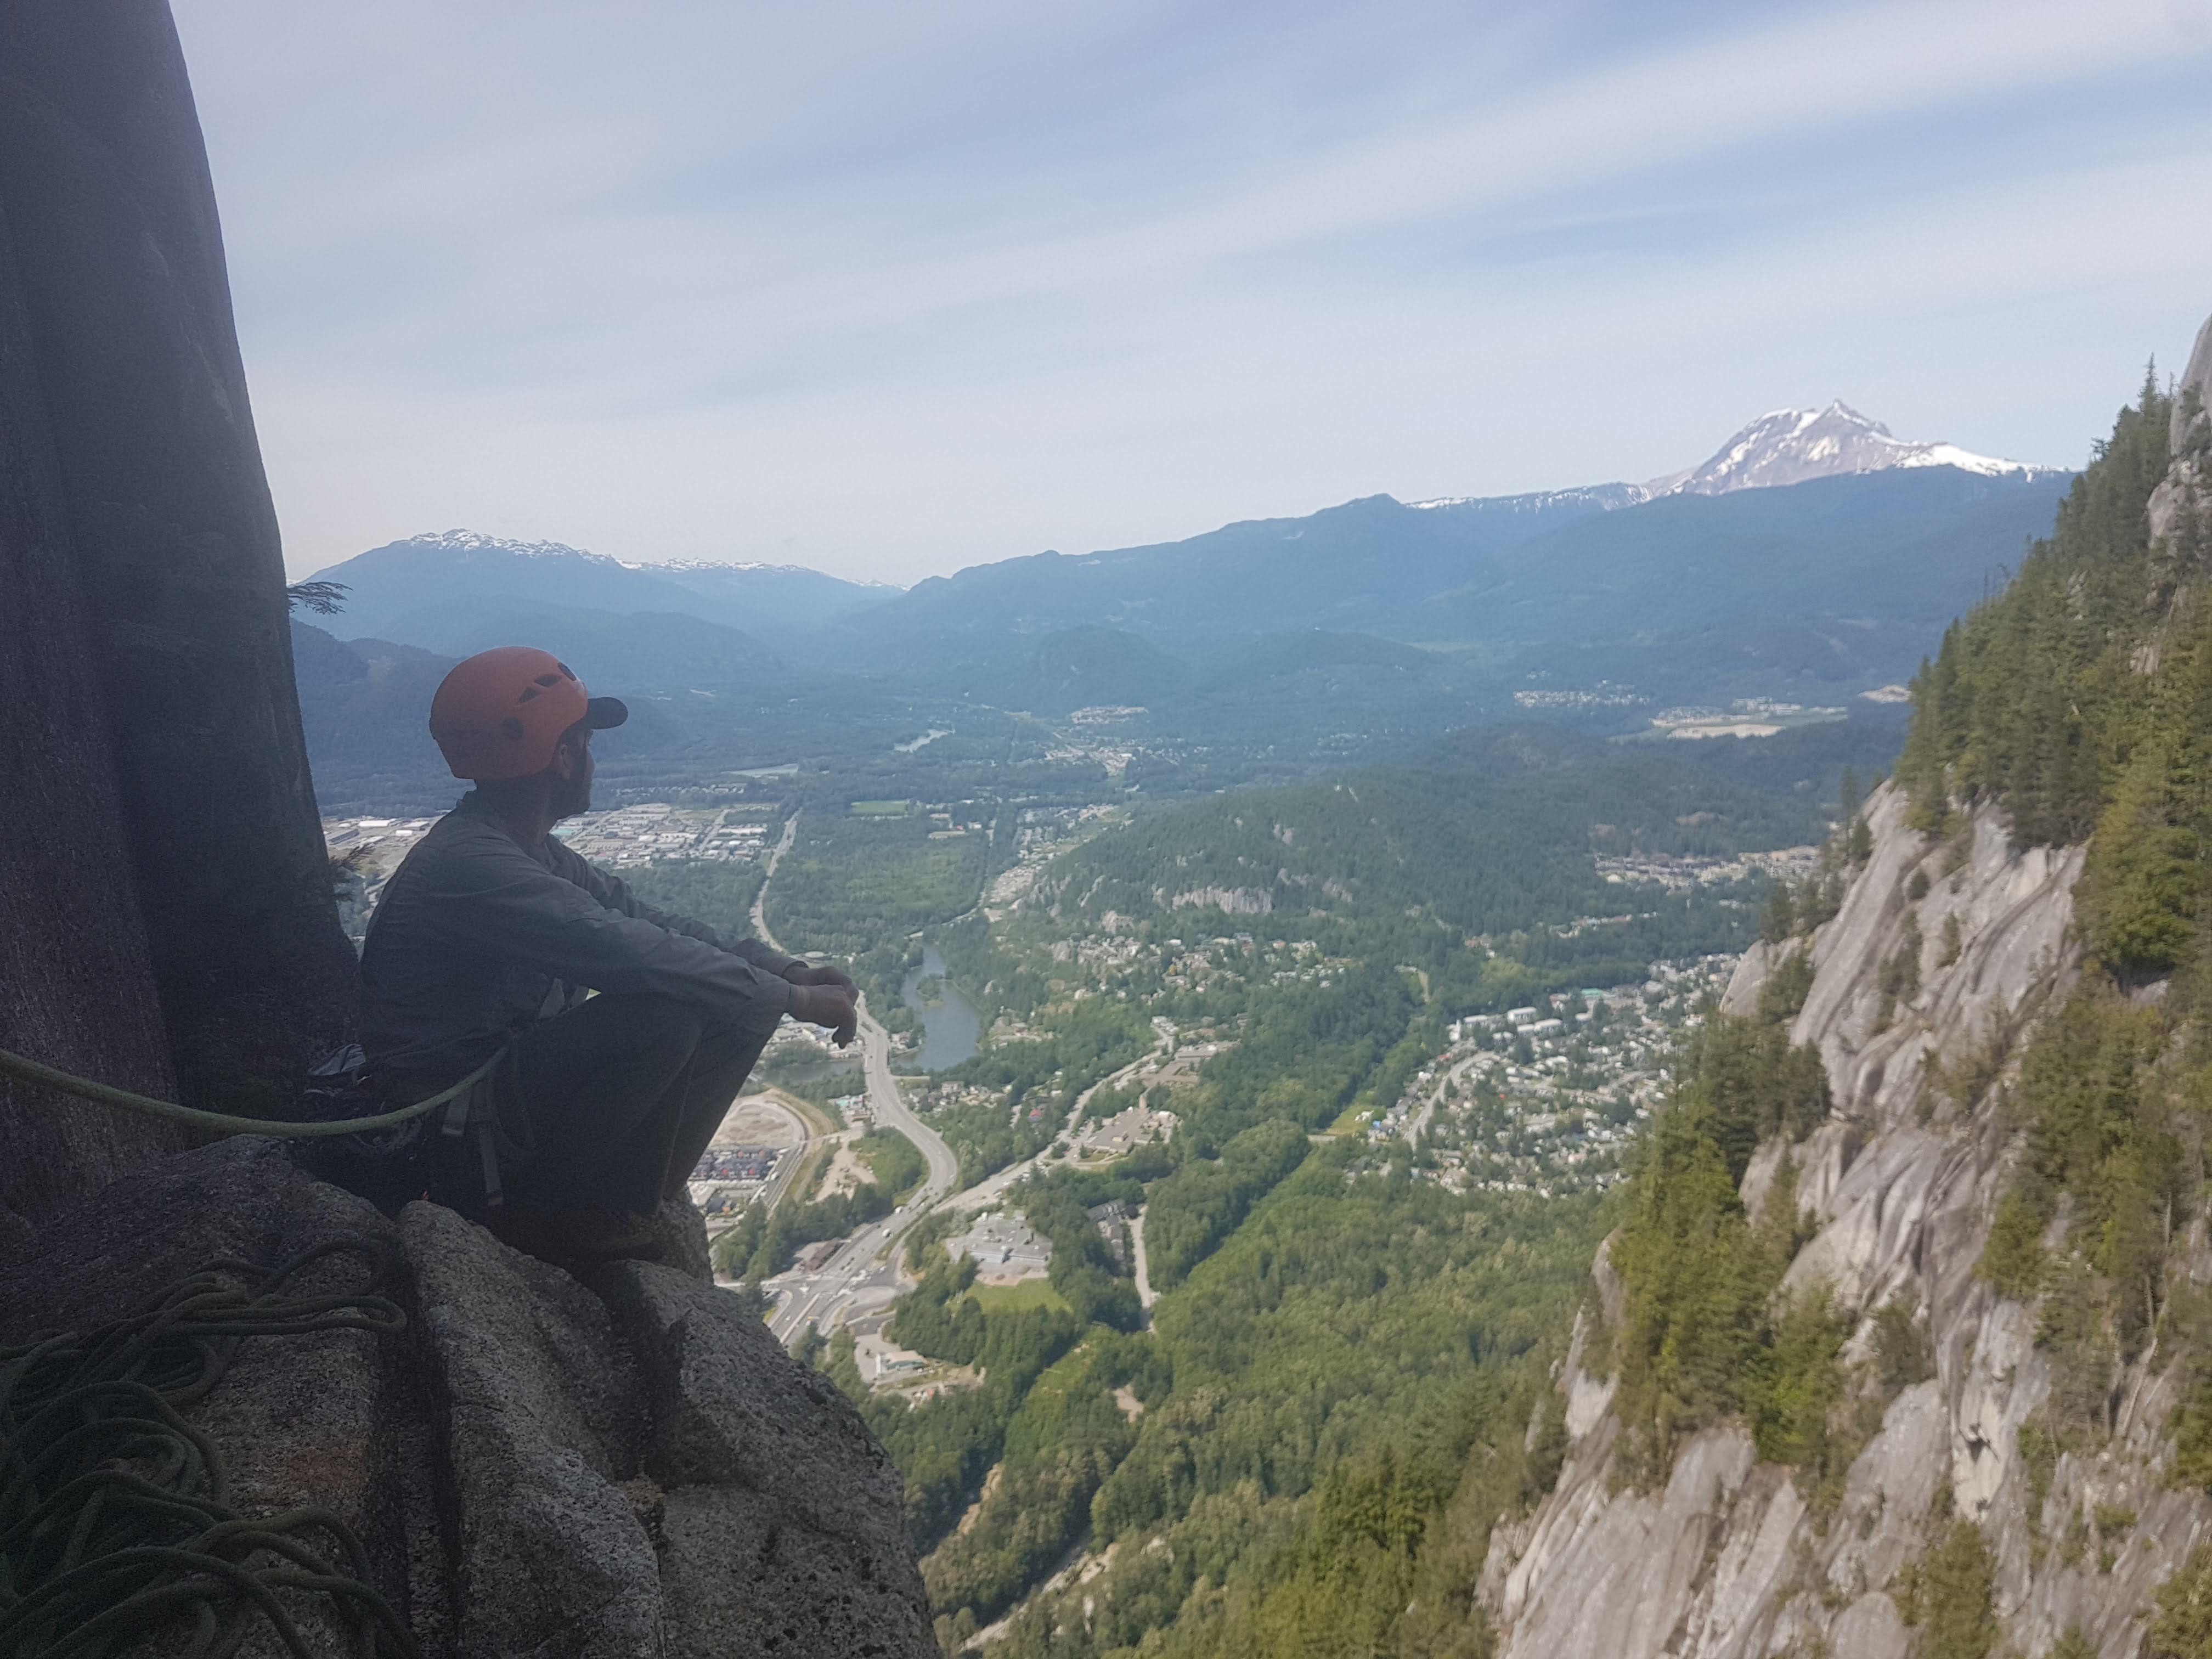
A lot of these can only really be learned by doing! If you have an objective in mind that might require these skills, do a lot of research on how others have done the routes. Practice things like roping up for simulclimbing with kiwi coils on the ground first. My first time simulclimbing was on a short multipitch I’d already done prior, a route named Rambles in Squamish. It was perfect as the first few pitches are well below my limit, all the anchors were bolted as well, but then the last pitch was a difficulty I wanted a belay on which meant we got to practice transitioning quickly from simuling to pitching out. It also followed my ideology of starting with low commitment, considering this route was maybe a couple hundred meters from one of BC’s most popular highways and in view of downtown Squamish. This was in preparation for the alpine rock route DOA Buttress on Blackcomb peak which was a lot of 4th and low 5th class climbing ending with a 5.7 pitch we pitched out. Perfect preparation.
- Rope Soloing
People will give you the run around on rope soloing, calling it ‘the dark art’. A lot of people would probably be shocked that I started Top Rope soloing my first season climbing but frankly it can be done fairly safely. However, none of the devices you’ll use are purpose built and thus people are pretty weary of giving advice on it. I’ll also say, that only do this out of necessity, as it’s a lot more hassle than simply going climbing with a partner. The best resources for this are the two Facebook pages: Top Rope Solo Climbing and Lead Rope Solo Climbing.
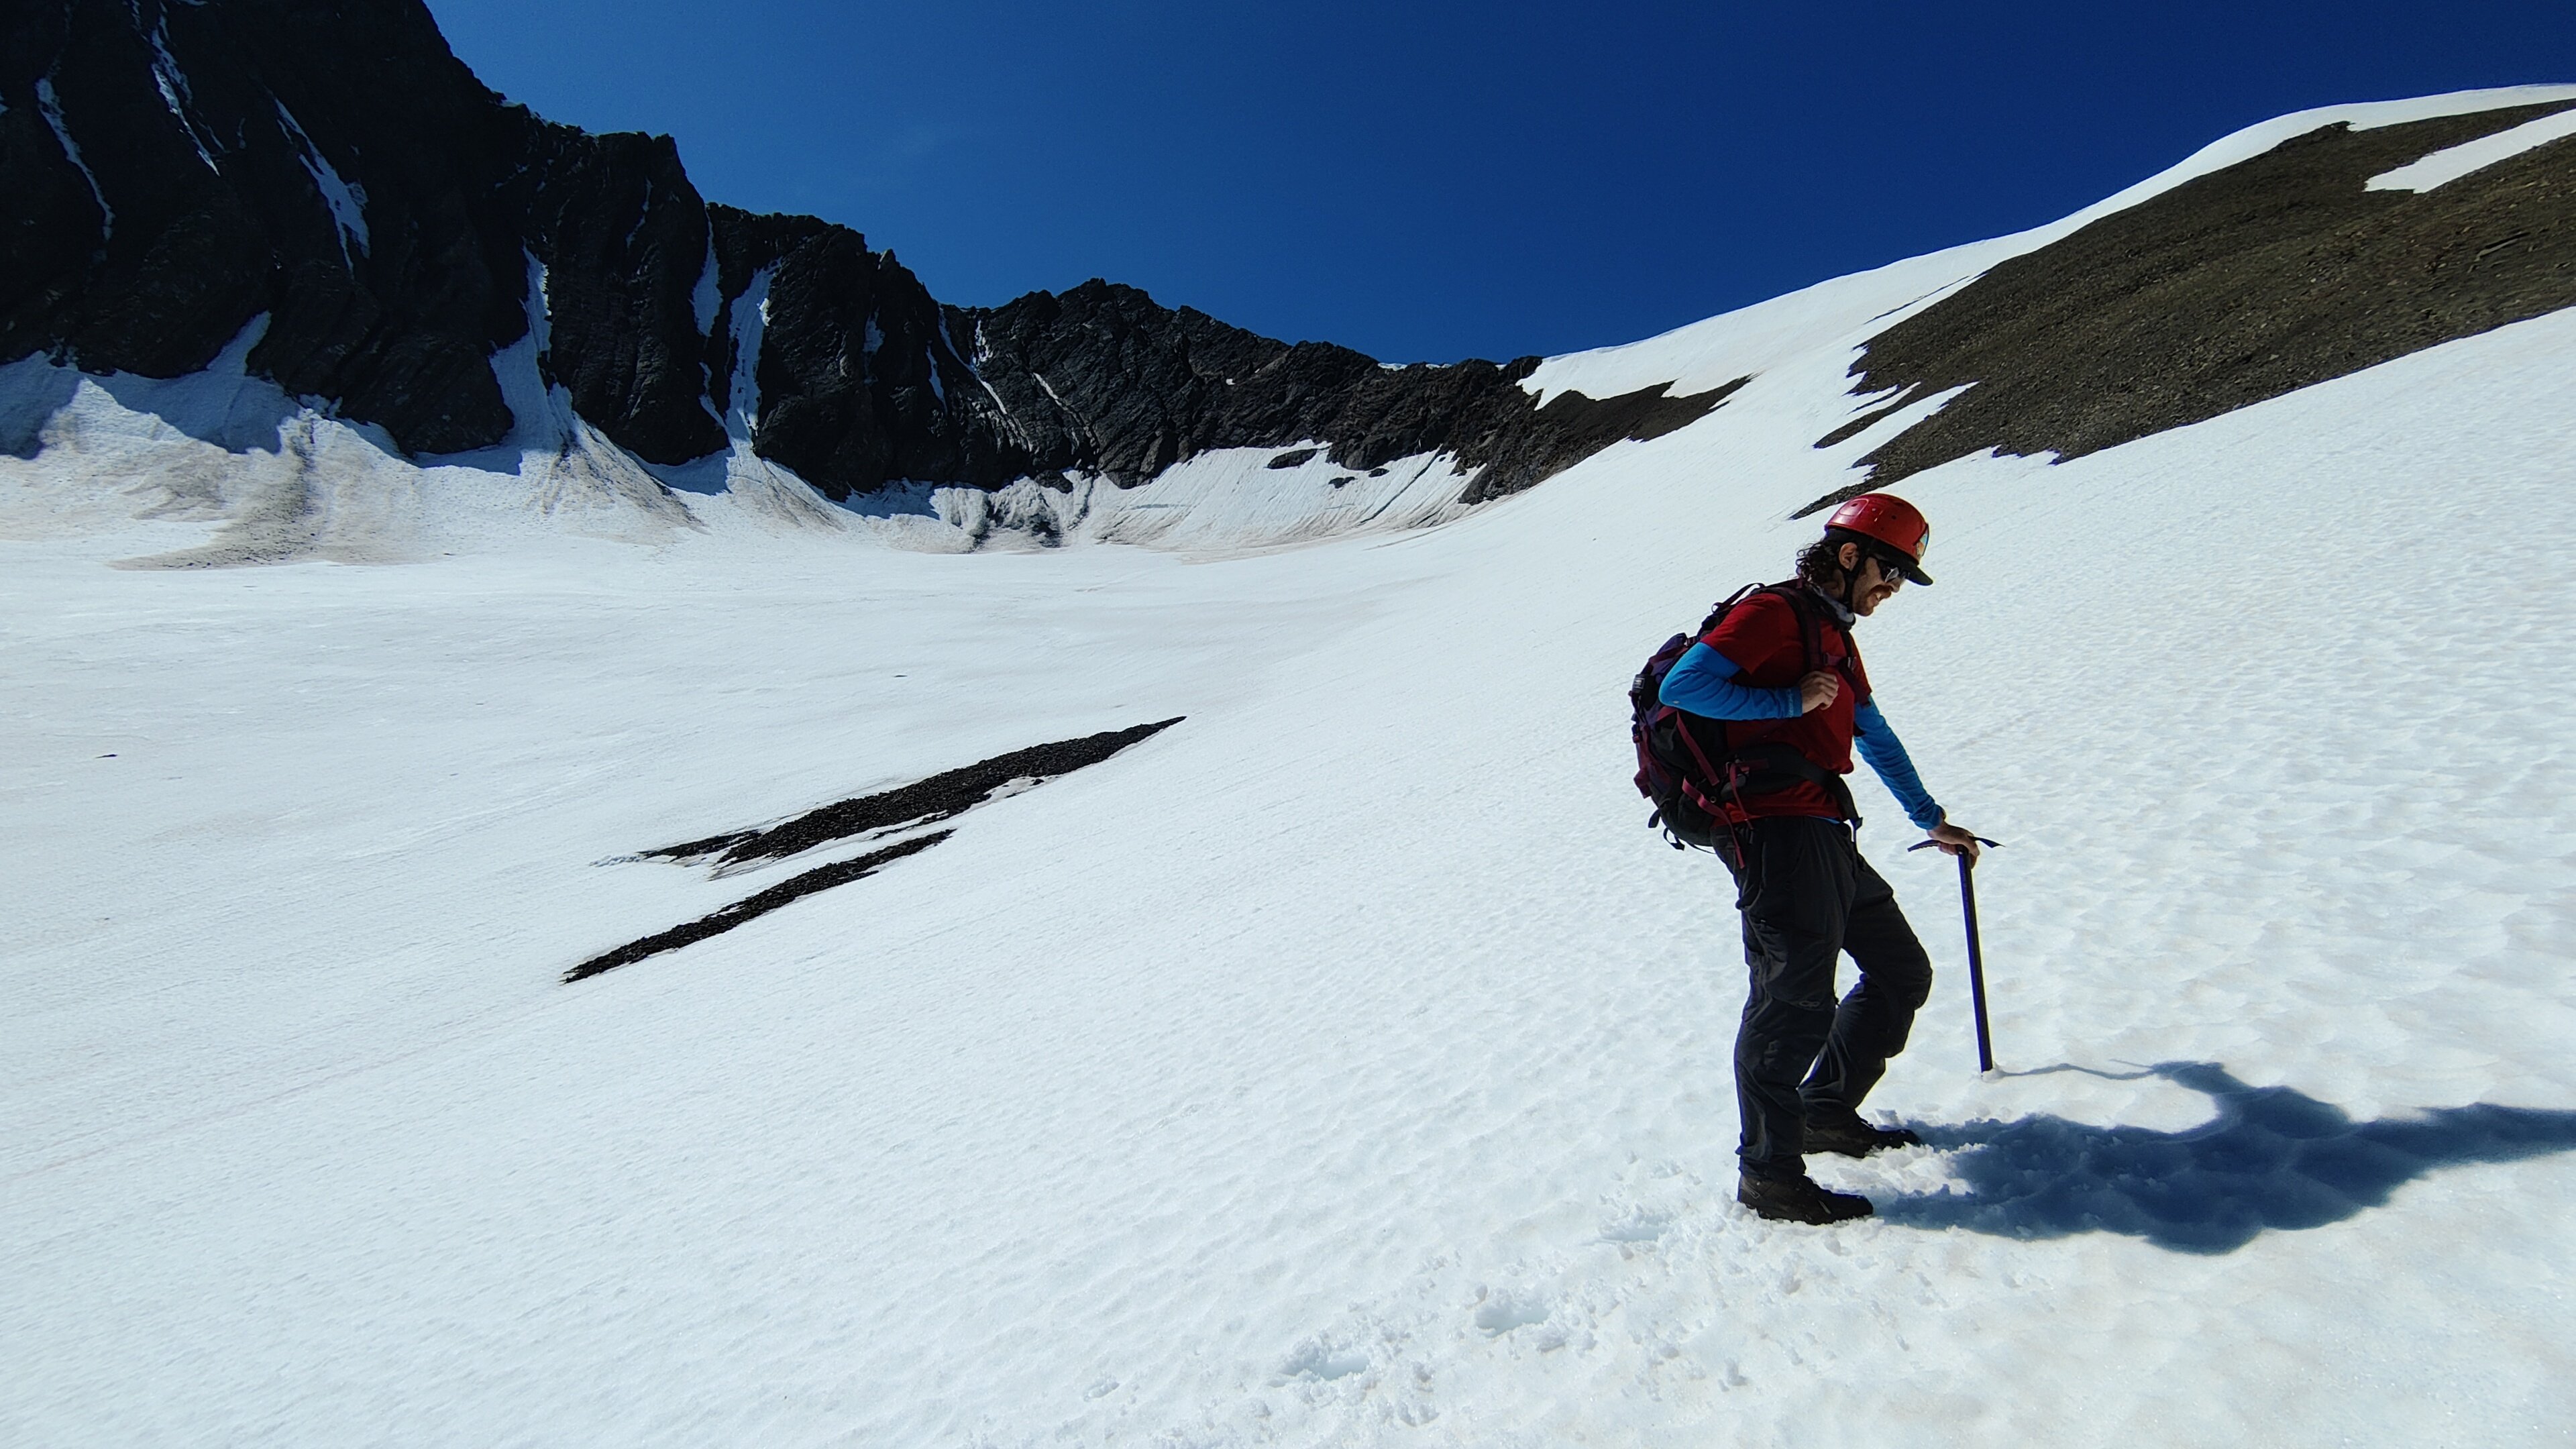
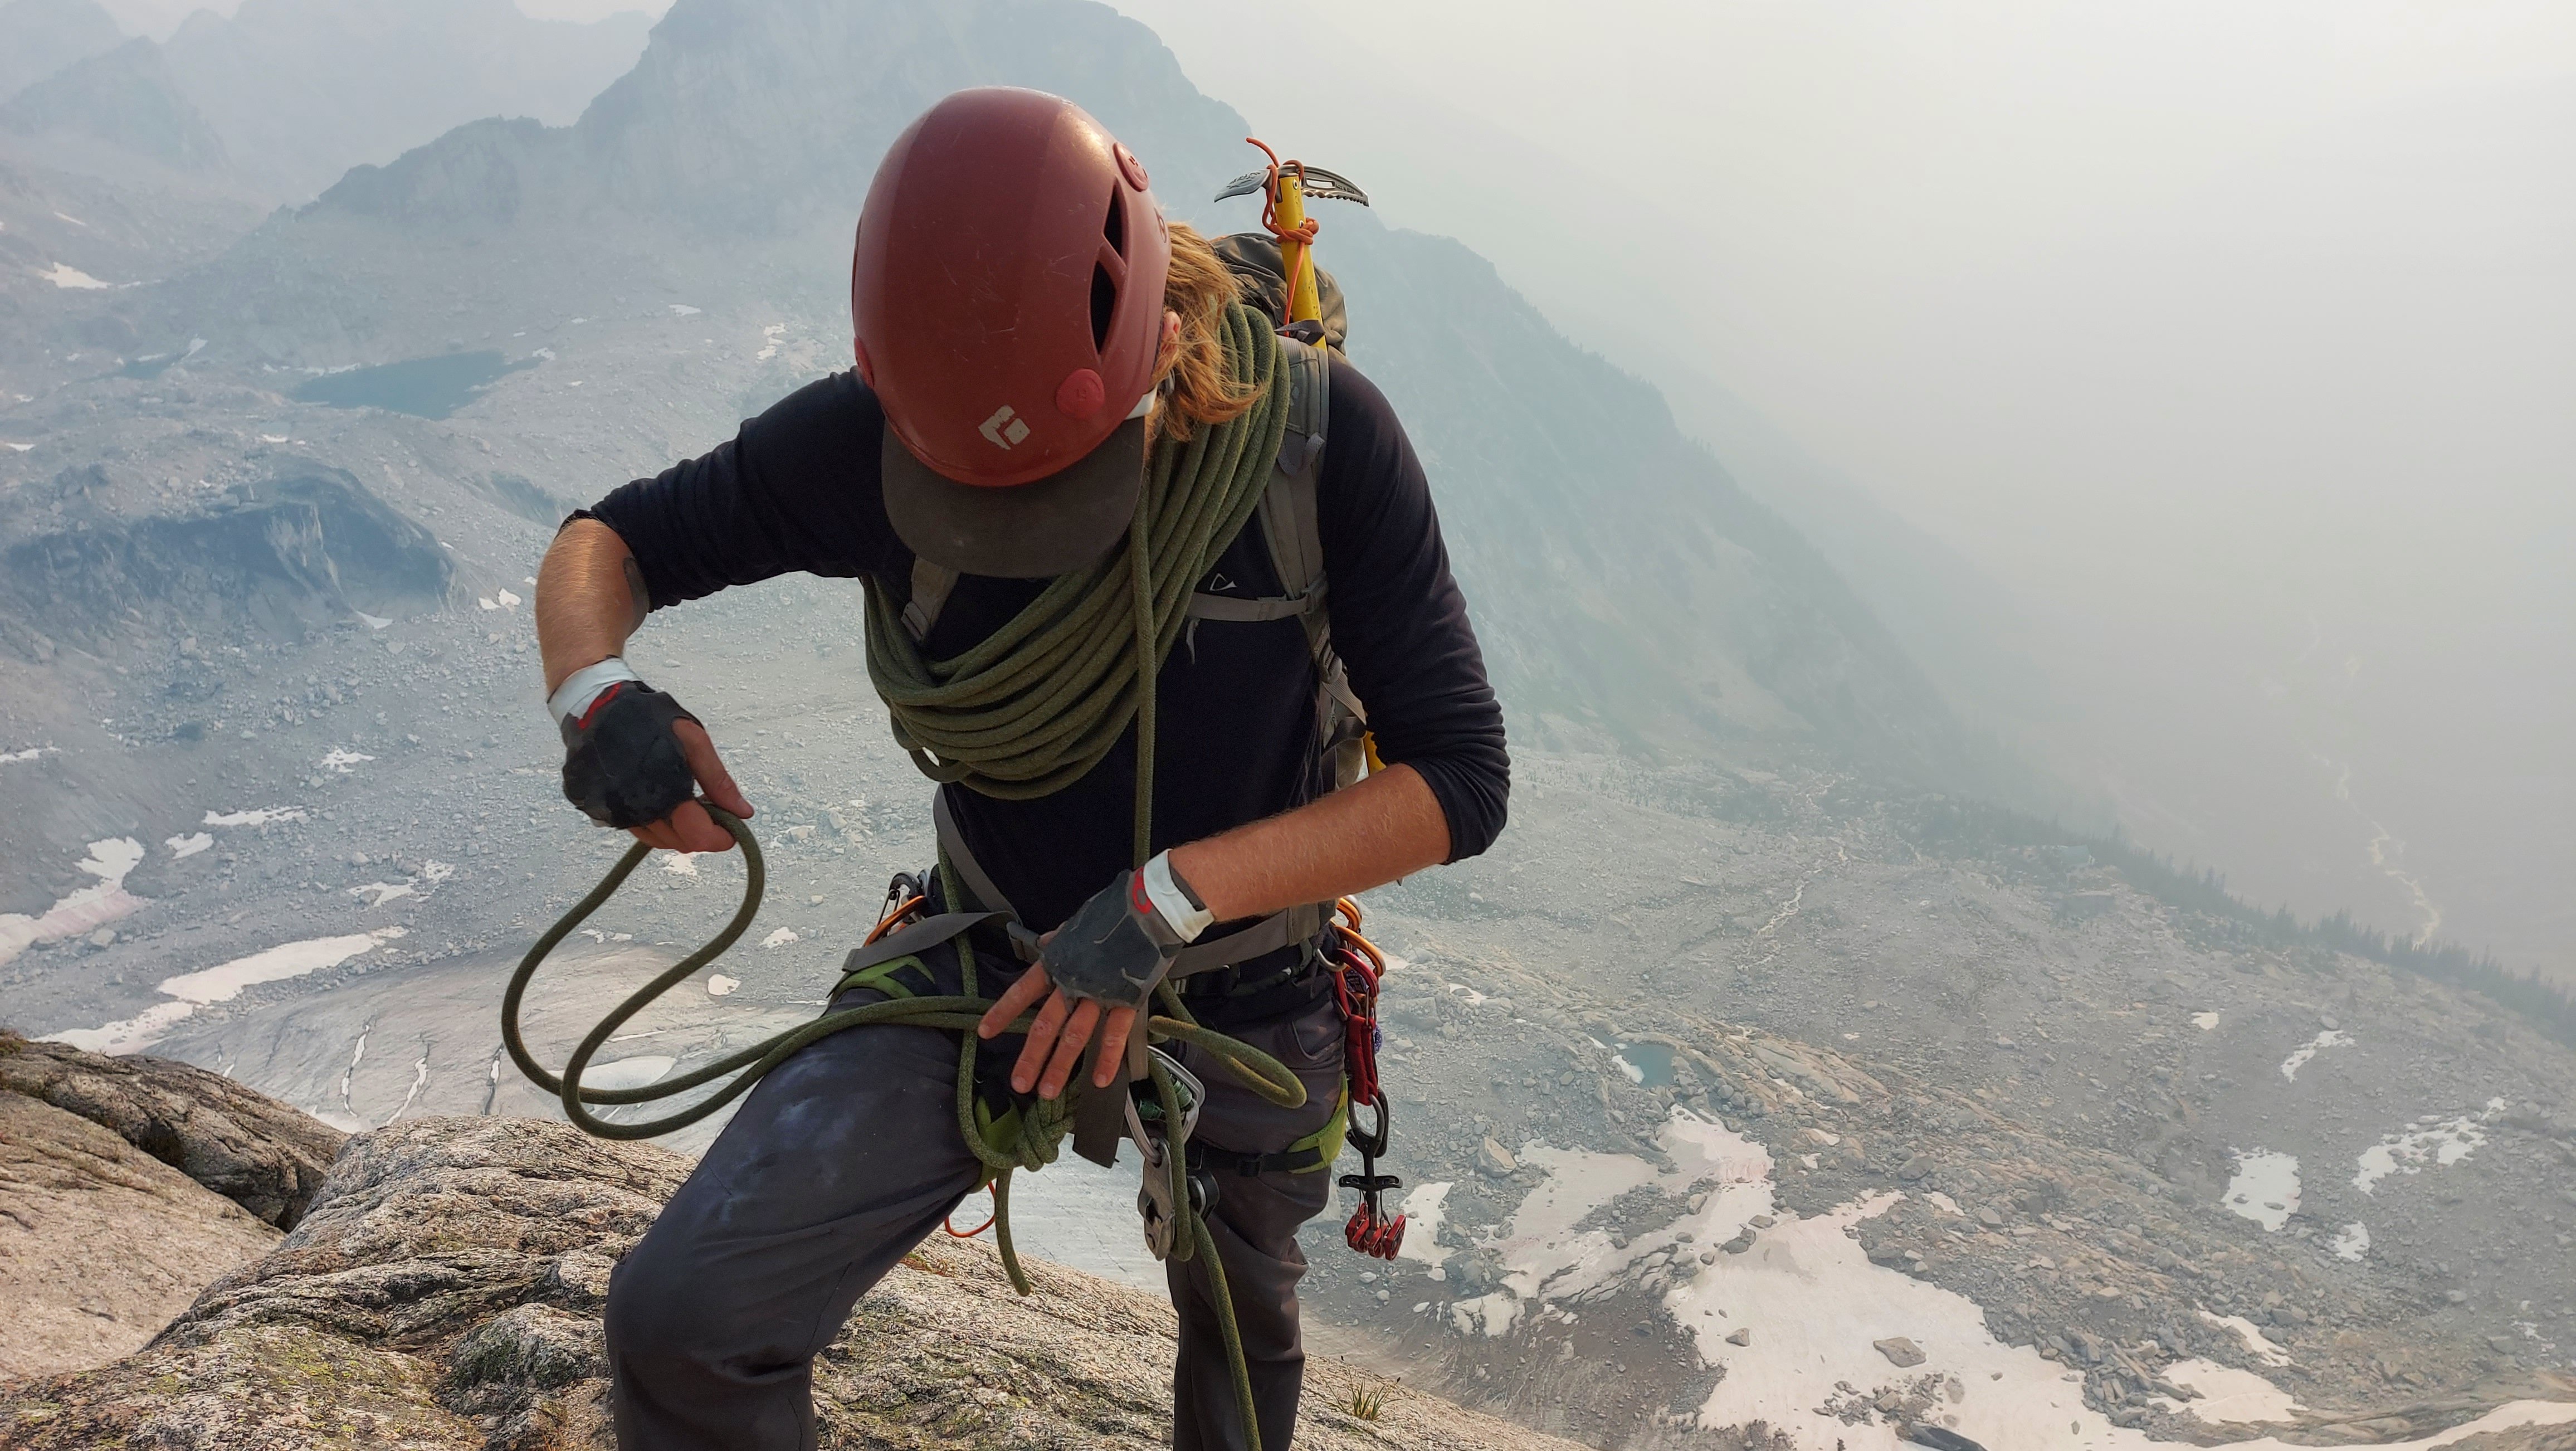
MOUNTAINEERING
The term ‘mountaineering’ and ‘alpinism’ are often used interchangeably. As per human nature, there is often drawn out arguments about the semantics of these terms. For the purpose of this article, ‘mountaineering’ aka ‘general mountaineering’ refers to the skills necessary to climb a mountain objective that may require moderate snow and glacier travel, rock terrain that is no harder than 4th class (ie most people climb it without a rope, though it may be often rappelled on descent), and no technical ice climbing.
These are all skills that are fundamental to technical alpinism. However, objectives that meet this category are often end-goals in and of themselves for many people. Think peaks like Rainier, Baker, Garibaldi, Athabasca, etc.
Resources:
- Outdoor Research Crevasse Rescue Playlist
- There are MANY YouTube videos for crevasse rescue. Though this one demonstrates a method that I believe is highly efficient and realistic. For some reason though, the videos are out of order, so you’ll have to sift through to find all of them.
- Freedom of the Hills
- Aka the mountaineering bible. This has soooo much information and I recommend any aspiring alpinist or mountaineer read through it.
- Petzl Tech Tips
- VDiff Climbing Glacier Travel and Crevasse Rescue E-Book
- Guidebooks & Online Information
- Depending where you are, there is a high likelihood of there being an ‘alpine’ guidebook that includes both technical and non-technical routes. In the Canadian Rockies, there is the revered Scrambles in the Canadian Rockies, which is largely non-technical climbing routes. However, on Vancouver Island you have Island Alpine which includes technical and non-technical routes alike.
- Common websites for information in North America are SummitPost and MountainProject, though the latter is largely focused on technical rock but occasionally you find non-technical routes posted. Another big resource for me is simply googling the peak or looking on regional alpine/hiking Facebook groups and finding trip reports. Reading a few of these usually gives me a good idea of what to expect on a trip.
Skills:
- Scrambling
- Snow Travel
- Self-Arrest
- Crevasse Rescue + Glacier Travel
- Snow Anchors
As with every section, the recommended approach is iterative. There are many people that get a sudden beam of inspiration (probably just watched 14 Peaks on Netflix) and their first experience spending substantive amounts of time in the outdoors is getting guided up one of the aforementioned peaks. If you are a self-learner, this is not the way you should be doing things.
Before mountaineering, you should be a proficient hiker. The next step should starting on non-technical, off trail mountain objectives, ie ‘scrambling’. This will help you develop your mountain sense, ie recognizing common alpine features, routefinding, etc. In North America, these peaks are often classified using the Yosemite Decimal System. A scramble will either be Class 2-4 and, just like terminology, there is a huge debate about what is what. Particularly with Class 4. Class 4 is the bridge between ‘non-technical’ terrain and ‘technical terrain’ (Class 5). Some people grade a route based on it’s exposure (ie are you going to drop 1000ft and die if you fall or are you going to drop to a ledge just below) and some people grade it based on difficulty of moves. Either way, get some good experience in the lower classes before you move up to the upper classes. Learning rock climbing skills is also recommended before diving into 4th class routes. In some cases, 4th class routes are often climbed with ropes. Don’t just go off ratings, read lots of trip reports and learn the common approach to a particular objective (and don’t be shamed into erring on the side of caution).
As usual in the outdoors, all safety rules apply. Read the forecast, pay attention to the weather on the mountain, let someone know where you’re going, and have a plan to bail. Oh, also, the standard rookie mistake (trust me) is not paying attention to your descent. Things look obvious when you’re heading up but are not always easily discernable on the way down. Regularly take time to look back at your route and identify landmarks. Or, better yet, record your GPS track or download one off a trip report in case you get turned around. Many people advocate for the continued use of paper maps and compasses. While I don’t think these are useless skills to have, they are easy to learn but hard to retain. People are better suited to using the technology they will have. You’ll notice people like Mountain Guide Mark Smiley certainly don’t list ‘map and compass’ on their alpine packing lists. Many rescues in the Rockies are from hikers/scramblers who lost their way on the descent, went down the wrong gully, and got cliffed out and were too scared to climb back up. Don’t be those people. But be prepared for rescue in case you do fuck up.
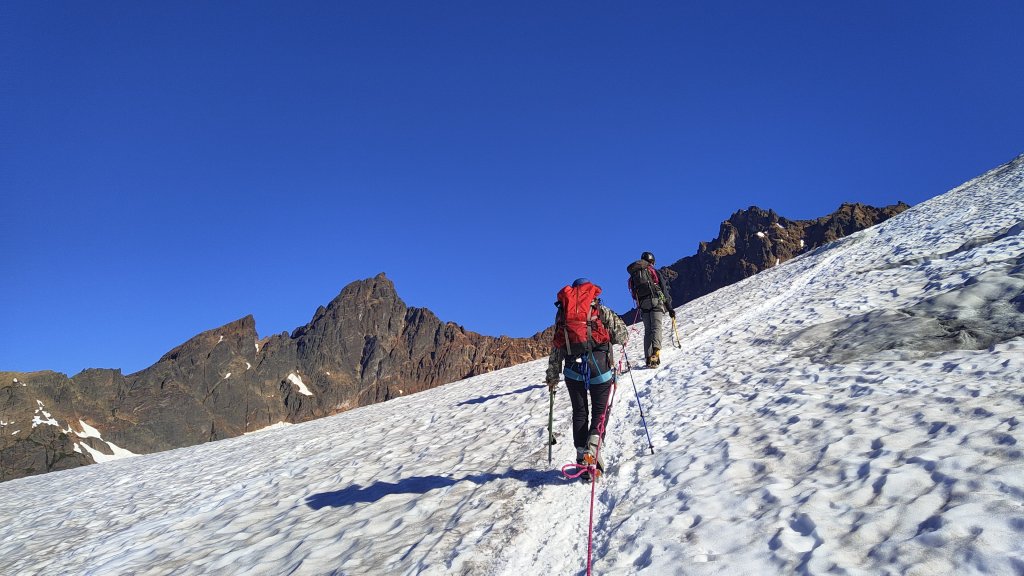
Once you’ve developed a healthy ‘mountain sense’ it’s a good time to move into more skill demanding objectives. This may mean moderate glacier or snow travel. Again, don’t just jump straight into it. Snow and glaciers means you’ll be utilizing gear and techniques that most people are familiar with from the movies: ropes, ice axes, and crampons. Ideally, get some experience on routes that contain some snow first, so that you can focus on your movement skills without worrying about falling into a crevasse. Avalanche Gulch on Shasta is an example of this type of route. Once you start approaching glaciated objectives, start with peaks that have much smaller and benign glaciers before working up to highly glaciated peaks like Rainier. Some examples of beginner glacier routes are Sky Pilot, Mt Tom Taylor, or Ruth Mountain. One of the toughest ‘soft skills’ with glacier travel is navigation and reading the glacier for what it is: a river of ice with rapids and underlying surfaces that change the way it moves. The VDiff book and FOTH do a good job of explaining the principles of this. Be intentional in practicing this terrain analysis every time you hop on a glacier and do your due diligence in probing for hidden openings.
Like everything else practice your skills in low/no consequence scenarios first. My first experience with crampons and ice axe was going to my local ski hill after hours and booting up the steepest run, trying out the various techniques detailed in Freedom of the Hills, I then took my crampons off and practiced self-arrest by throwing myself down the run in all possible positions (just don’t message me pissed off if you get arrested for trespassing). Taking the crampons off is key for practice as people tend to drop their feet when they’re starting out, which can mean catching the spikes and getting hurt. Also, make sure any slope you’re practicing self-arrest on has a safe run-out in case you fuck up.
Crevasse rescue is going to be the most complicated thing you learn when it comes to general mountaineering skills. It’s particularly difficult for those without prior rope skills. It requires you to be proficient in: arresting a fall, hauling a victim out (worst case scenario), ascending a rope to self-rescue if you fall-in and are able, building solid snow/ice anchors, and properly tying in for glacier travel. Each of these skills can be isolated and practiced/learned in iterative scenarios. For instance, I first learned to ‘haul’ by hauling a weighted bag across my bedroom floor with an anchor set up on my coat rack. I then went to my local rock crag, set it up on bolted anchors with an ample ledge, and hauled a bag full of rocks. This immediately showed me where my system was lacking. I’ve taught people how to ascend the rope off of sturdy tree branches or fixed ropes at the rock crag (you should also be proficient at rappelling, read the rock section). Snow and ice anchors were practiced on steep slopes or ice crags, etc. etc.
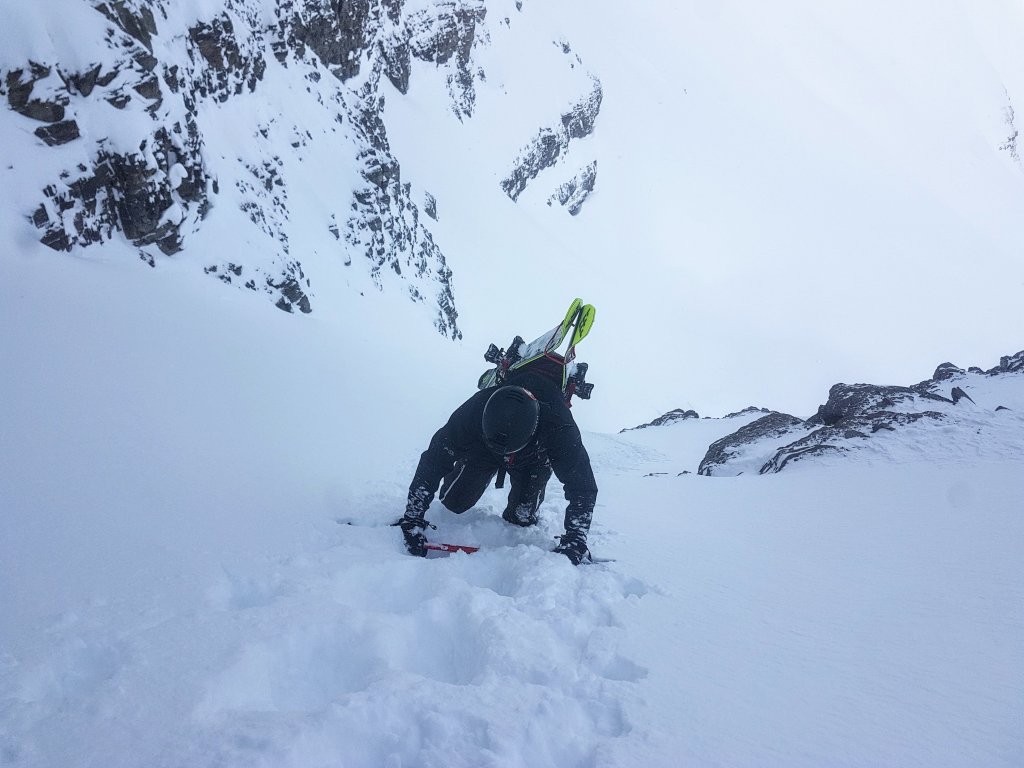
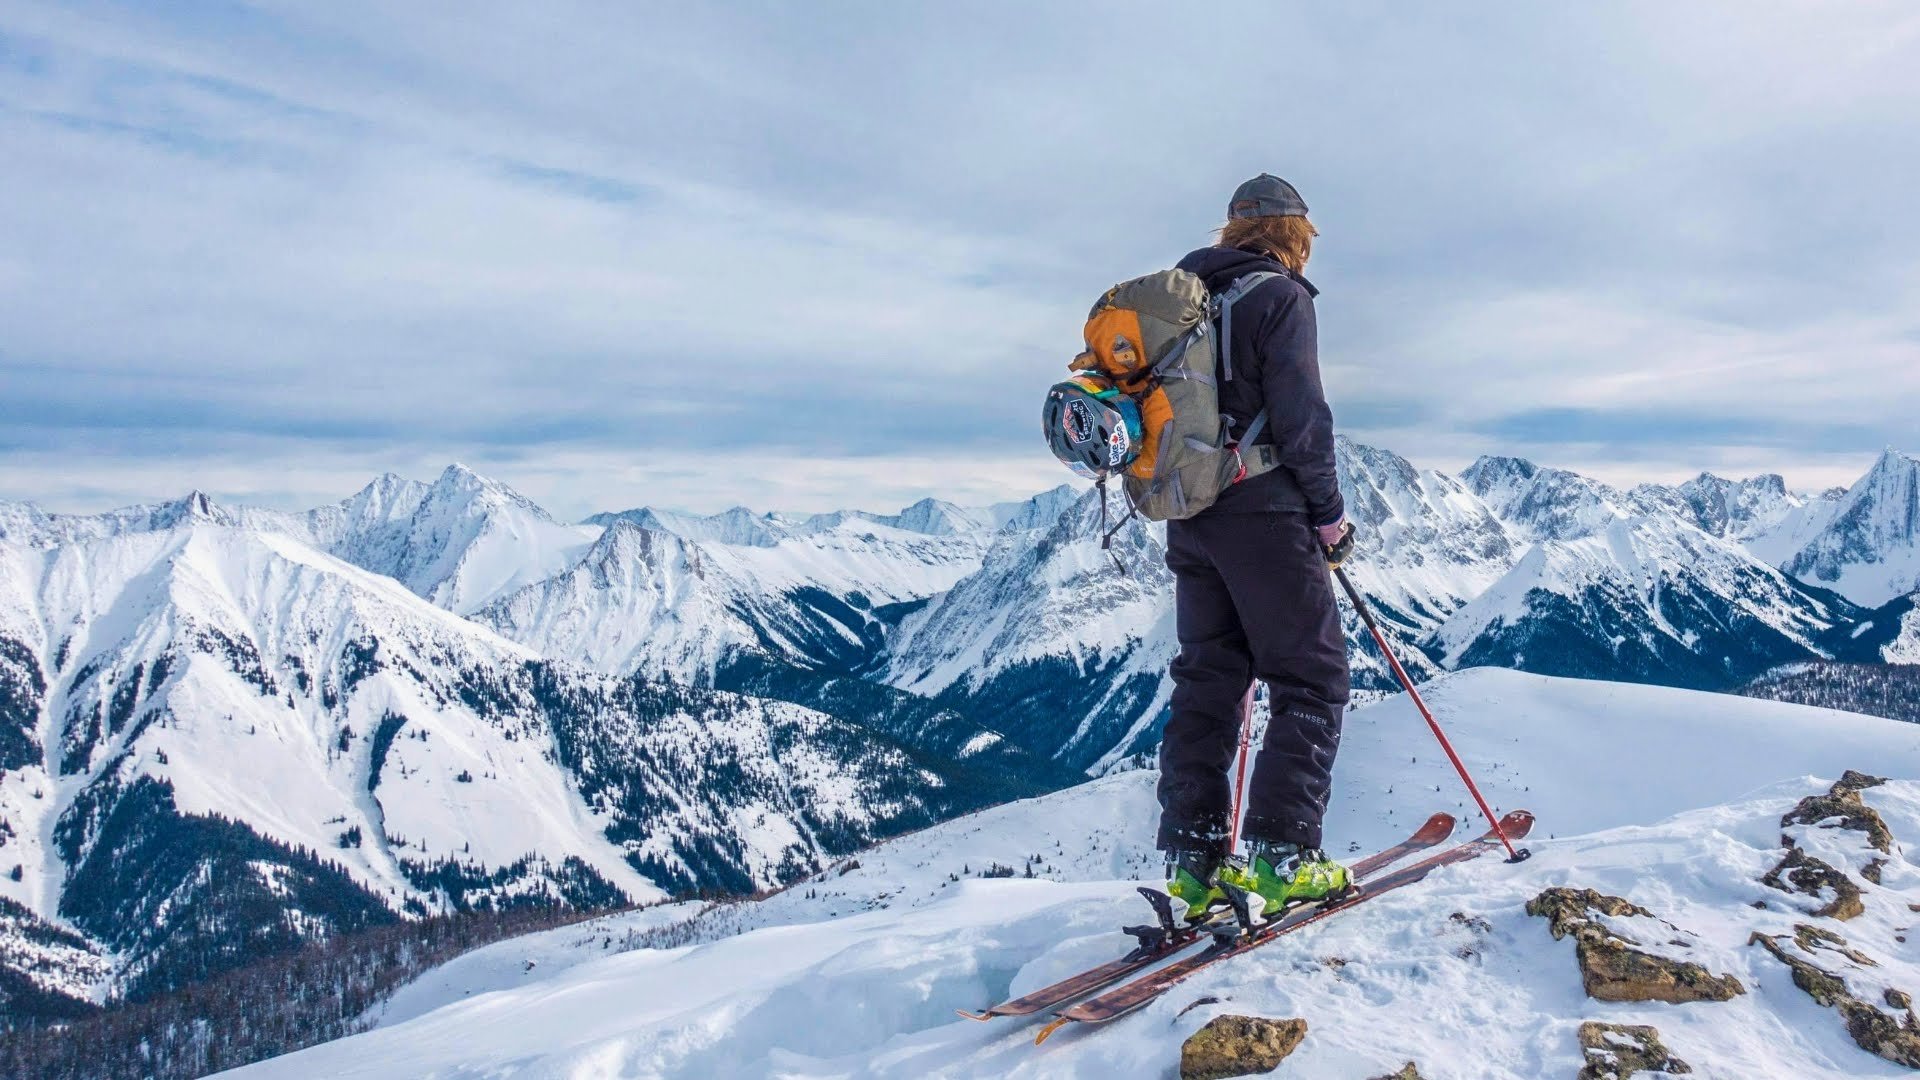
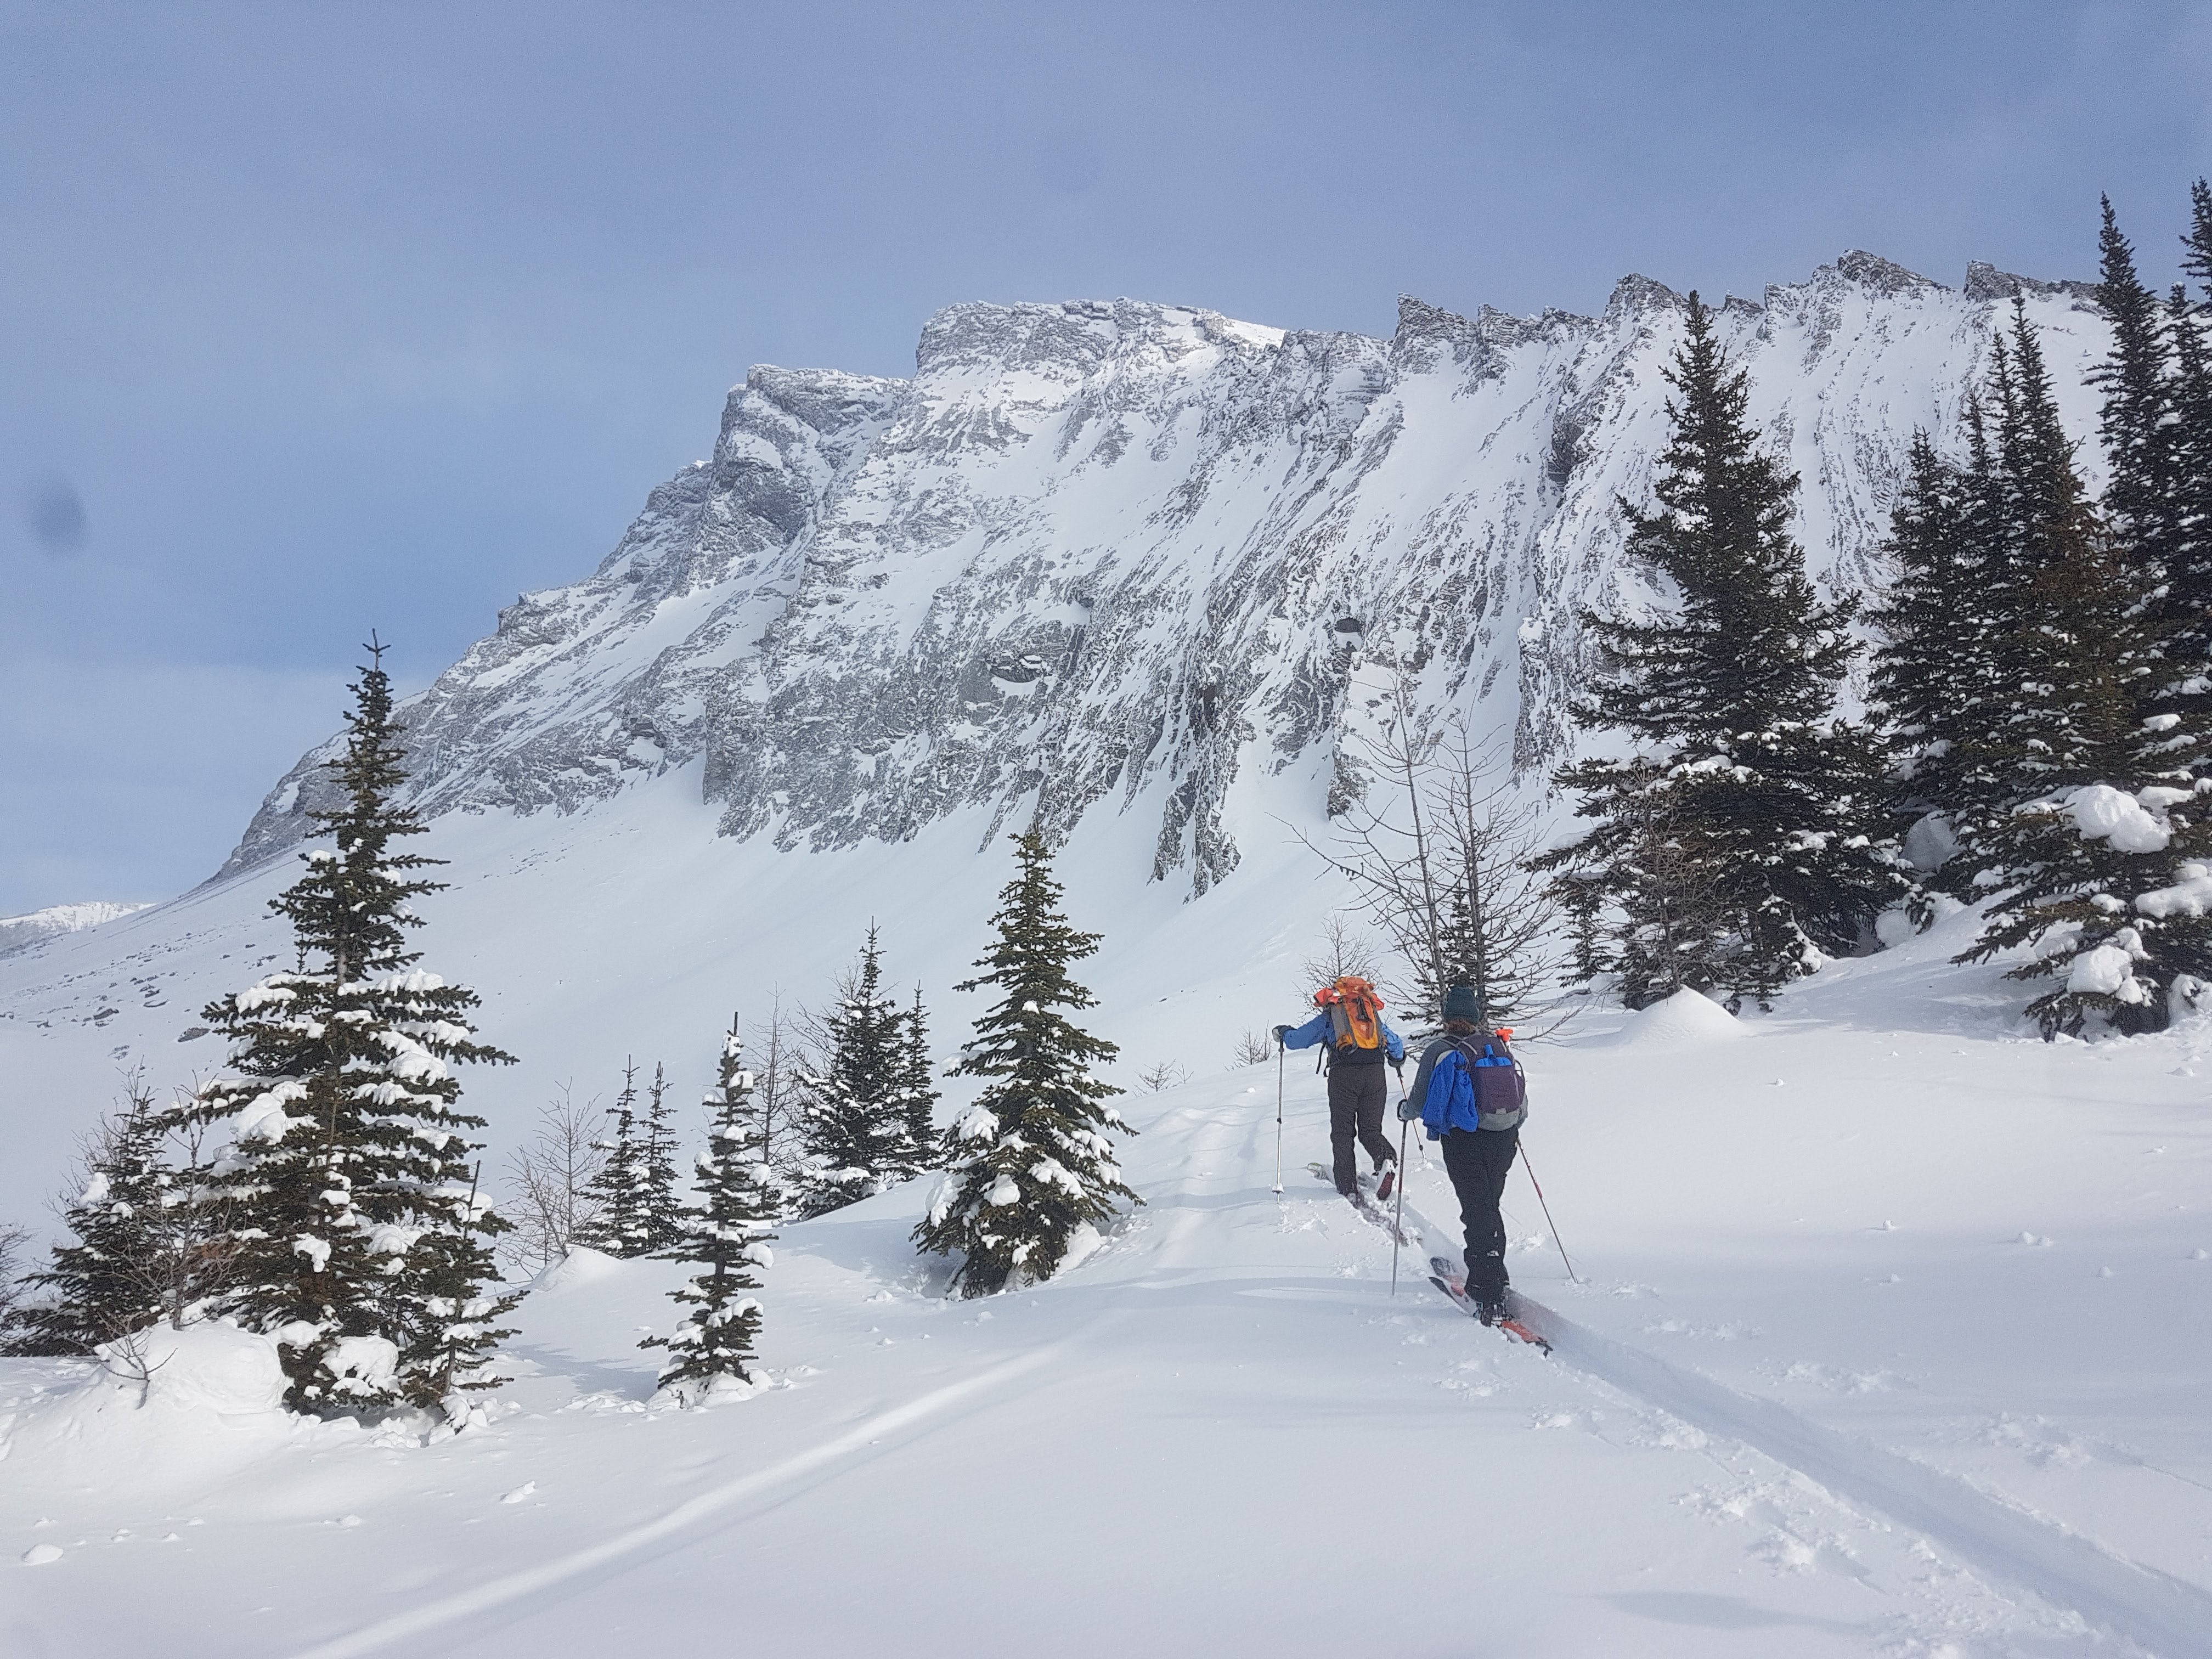
BACKCOUNTRY TOURING/SKI MOUNTAINEERING
Some people might find it surprising that skiing (or splitboarding) are fundamental aspects of alpinism. But there is a reason that its one of the 3 streams in IFMGA affiliated guiding associations. Ultimately, it comes back to simply being able to move efficiently over vast areas of snow (particularly soft snow where travel without floatation is prohibitively slow). Those who can’t ski (because of ability or finances) can always compensate to an extent with other forms of floatation like snowshoes but you are going to be significantly slower, more tired, and bored. In alpinism, safety is often provided by speed.
Skiing is perhaps my next most proficient area of alpinism. As I mentioned, I am not actually self-taught (as far as the fundamentals go). I was able to take a volunteer-led course with the ACC. If money is tight, I would highly recommend this route. Avalanches are SCARY and there is a huge element of chance when it comes to mitigating them.
Snow, compared to other alpine mediums (like rock), has an inherent level of unpredictability and there is a huge lack of feedback when travelling on it. With rock, you can often test holds or just visually inspect the rock to see if it is poor quality. With avalanches/snow, the danger is essentially invisible and dispersed in nearly impossible to predict patterns over small geospatial zones, and only in certain scenarios do you get immediate feedback of whether that danger exists. More than any other aspect, this is likely the most difficult part of alpinism to self-teach. I highly recommend taking a course with professional if you have the means OR seeking out a program like the one I took with the ACC. However, as I mentioned in the intro, I do believe this knowledge can be gained through self-teaching methods. In fact, as I also mentioned, I believe everyone (regardless of your educational background) needs to do some self-teaching. That goes for avalanche skills more than anything. There is a ridiculous amount to learn and AST1 (The Canadian Intro Avalanche course) just scratches the surface. If you want to get to the point of doing ski or winter alpinism (safely), you will need to learn lots. If you are afraid of the self-teaching route, this will cost a LOT of money.
On the flipside, we tend to make mitigating avalanche hazard an exercise in complexity. People fall into the rabbit hole of snow science thinking the more technical knowledge they gain the better. From a statistical standpoint, this is simply not true. If you are one of the lucky ones to live near an avalanche forecasting region, the best thing you can do is to learn how to read and understand the forecast, use that to mitigate the terrain (and thus learn to read terrain), and absorb real time feedback throughout the day to confirm or reject that forecast.
Resources:
- Staying Alive in Avalanche Terrain by Bruce Tremper
- This is considered the avalanche bible and is often used in AST2s as the textbook. I reference it often and try to skim it every season.
- Avalanche! by Doug Latimer
- A spectacular interactive e-book by ACC Head Winter guide, which he uses to teach AST1. It delves deep into the statistics I alluded to help encourage behaviour that is shown to provide the highest likelihood of skiing until you’re old.
- AvvySavvy from AvalancheCanada
- This is an interactive online ‘avalanche tutorial’. It essentially covers the theoretical portion of an AST1. Great for both newcomers and those looking to refresh.
- AvalancheCanada Forecast Map
- World class forecasts for the whole country in one, convenient spot. If you’re not from Canada, google your regional avalanche forecast.
- Fatmap
- Fatmap is a 3D mapping app, like Google Earth, with the amazing feature of slope angle shading (or as it’s called on the app ‘Avalanche Layer’). This is a great feature to do some pre-trip planning and getting an idea of where the avalanche terrain is. However, note, it’s only as accurate as the topographic data it pulls from. This means, it can miss micro-terrain in between the contour lines. I have measured upwards of 30deg on slopes it claimed were below 20.
- Windy.com
- A killer app for weather forecasts. Offers several forecasting models (and the only one that has free access to the acclaimed ECMWF model).
- Guidebooks
- Many popular areas have guidebooks that describe popular tours. These usually contain information regarding general avalanche exposure and level of ski ability for particular lines.
Skills:
- Touring
- Skiing/Riding
- Trip Planning
- Uptracking & Efficient Movement
- Winter Survival Skills
- Navigation
A lot of touring skills are things that simply take time invested to demonstrate competency in. If you are new to skiing or riding, the best way to get better is to go to a ski hill a lot (and ideally take a lesson or go out with a highly skilled friend). I was ski touring my first season skiing but I was a snowboarder before that so the learning curve was less steep. Regardless, I looked like a Ken doll coming down the slope, zero movement in the hips. The best thing that happened to my skiing was working at a ski hill. Nobody becomes a good skier doing a handful of laps a weekend. I would say that before you venture into the backcountry, being relatively comfortable on blue runs is ideal and is often the go-to prerequisite for beginner courses that I’ve seen.
Touring is essentially hiking with extra steps, gear, and movement skills. Rent, borrow, or buy used gear (see if you have a local outdoors consignment shop, but be weary of used avalanche gear). At a minimum you need:
- Skis with touring bindings or a splitboard
- Proper boots that fit your bindings and are purpose built for touring (ie have a good walk mode for hardshell ski boots)
- Climbing Skins
- All the associated ski accessories (poles, helmet, goggles, winter layers, etc.)
- Avalanche Safety Gear (3 Antennae Beacon, Shovel, Probe)
Start with winter trails that are known to have zero danger, familiarize yourself with your gear, how to move efficiently with skis, and practice companion rescue with a friend in a field somewhere (or at a beacon training park, google to see if there’s one nearby). Once you’ve moved onto actual backcountry slopes, begin practicing the dark arts of uptracking.
- Avalanche Skills
- Reading the Forecast
- Terrain Management
- Companion Rescue
- Snow Science
Avalanches are complex beasts and the more you learn, the more it sometimes feels like the less you actually understand. Furthermore, reading terrain while you’re moving in the mountains is a skill that takes time to develop and is near impossible to verify, unless you’ve fucked up, at which point you might be dead. Wooooo! There are a number of resources to learn about avalanches and terrain management, some of the best I’ve linked above. The key is to simply never stop learning and putting into practice the critical habits one needs to develop to be safe in the backcountry. Snow science (such as pit stability tests and snow profiles) are super interesting and help foster a deeper understanding of the mechanics of avalanches, but are often not that helpful to the average recreationist and simply serve to muddy the waters. Yet, you will certainly meet many people who rely heavily on it for their decision making processes in the backcountry, don’t be sucked in.
The key to progressing safely in touring, as with basically everything on this blog, is to take things slow. The Avalanche Terrain Exposure Scale (ATES) is a great metric for identifying your level of exposure to potential avalanche terrain. The original scale has 3 levels of exposure (Simple, Challenging, and Complex). Popular areas in Canada often have ATES maps that shows the ATES rating of specific zones. This is extremely helpful in trip planning. This is not a universally applied system but by learning how the terrain is defined within it will help you with the concept of terrain analysis and deciding if a zone is within your risk tolerance based on the avalanche forecast. I did not enter Challenging terrain until my second season but I was able to access a lot of Simple terrain that was adjacent to Challenging/Complex terrain, which allowed me to practice my terrain analysis skills without exposing myself to significant danger. Until I had spent time honing that skill, I refused to enter any terrain that held any possible significant danger. Having friends in the community that are more experienced is a great way to bounce terrain analysis off of. I’ve even used Reddit to get some input on choices I’ve made in certain scenarios (though I tend to avoid this because of the kinds of responses I’ve received, which prompted this whole article). The key is to acknowledge that most people aren’t experts and even the experts have nuanced opinions. Get as many perspectives as possible and avoid letting your biases cloud your analysis.
Another thing I did my first few seasons (and I should continue to do but struggle with the time commitment) was journaling. After every tour, I would write a journal entry describing the day and being critical about the choices I made. What I thought went well and what I thought could have been different or was unsafe. This kind of self-reflection is key.
- Ski Alpinism
- Steep Snow Travel & General Mountaineering Skills
- Steep Skiing Skills
- Glacier Travel and Crevasse Rescue
- Technical Descents
There is a huge overlap in ski mountaineering and general mountaineering skills, for obvious reason. However, the difference is that you are usually dealing with deeper winter snowpacks and this presents some nuance to the challenges of ascending/descending steep snow or glaciated terrain. Knowing how to ascend steep snow in various conditions (soft pack vs hard pack, ie using crampons vs bootpacking vs crampon plates or verts), self-arrest, skiing steep snow with techniques such as jump turns, transitioning on a steep slope, build snow anchors, perform efficient crevasse rescue, rappelling into lines, and using belayed ski cuts are some of the advanced skills for ski alpinism. Some googling will find you many resources for all of them. I would highly recommend not approaching this type of skiing until you are very solid in all ski touring fundamentals and general mountaineering skills.
One resource I have not personally used but heard good things about is Mark Smiley’s online ski mountaineering course. Though it’s nearly as expensive as a 2 day physical course in Whistler. Some resources that are free and I’ve personally used is Andrew McLean’s blog, Petzl’s Tech Tips blog, and G3’s Ski Mountaineering Youtube Playlist. For associated general mountaineering skills, there will be more resources in that section.
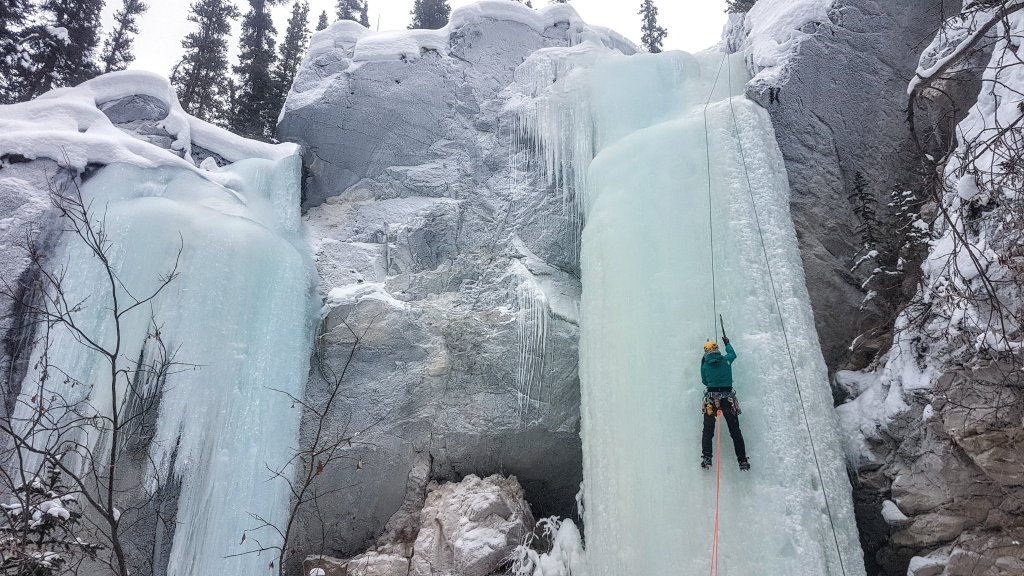
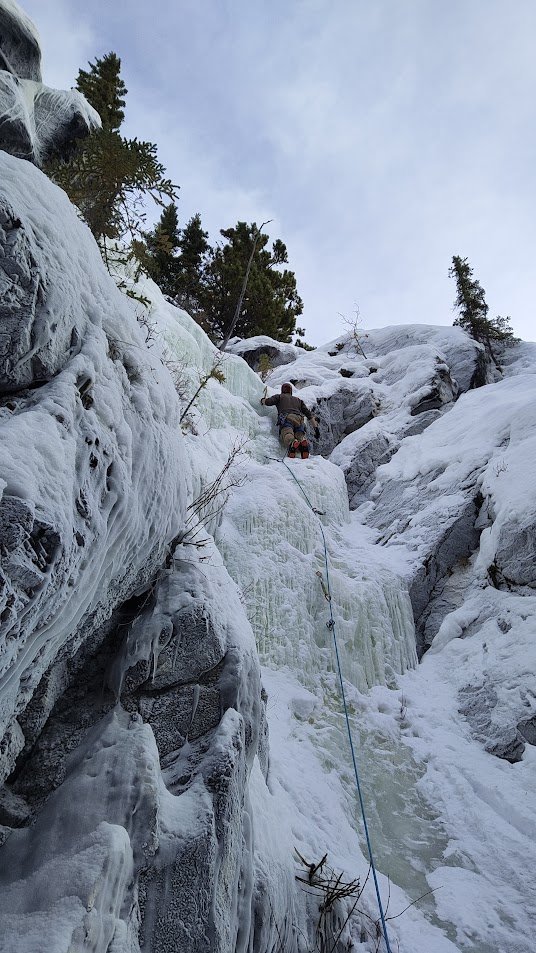
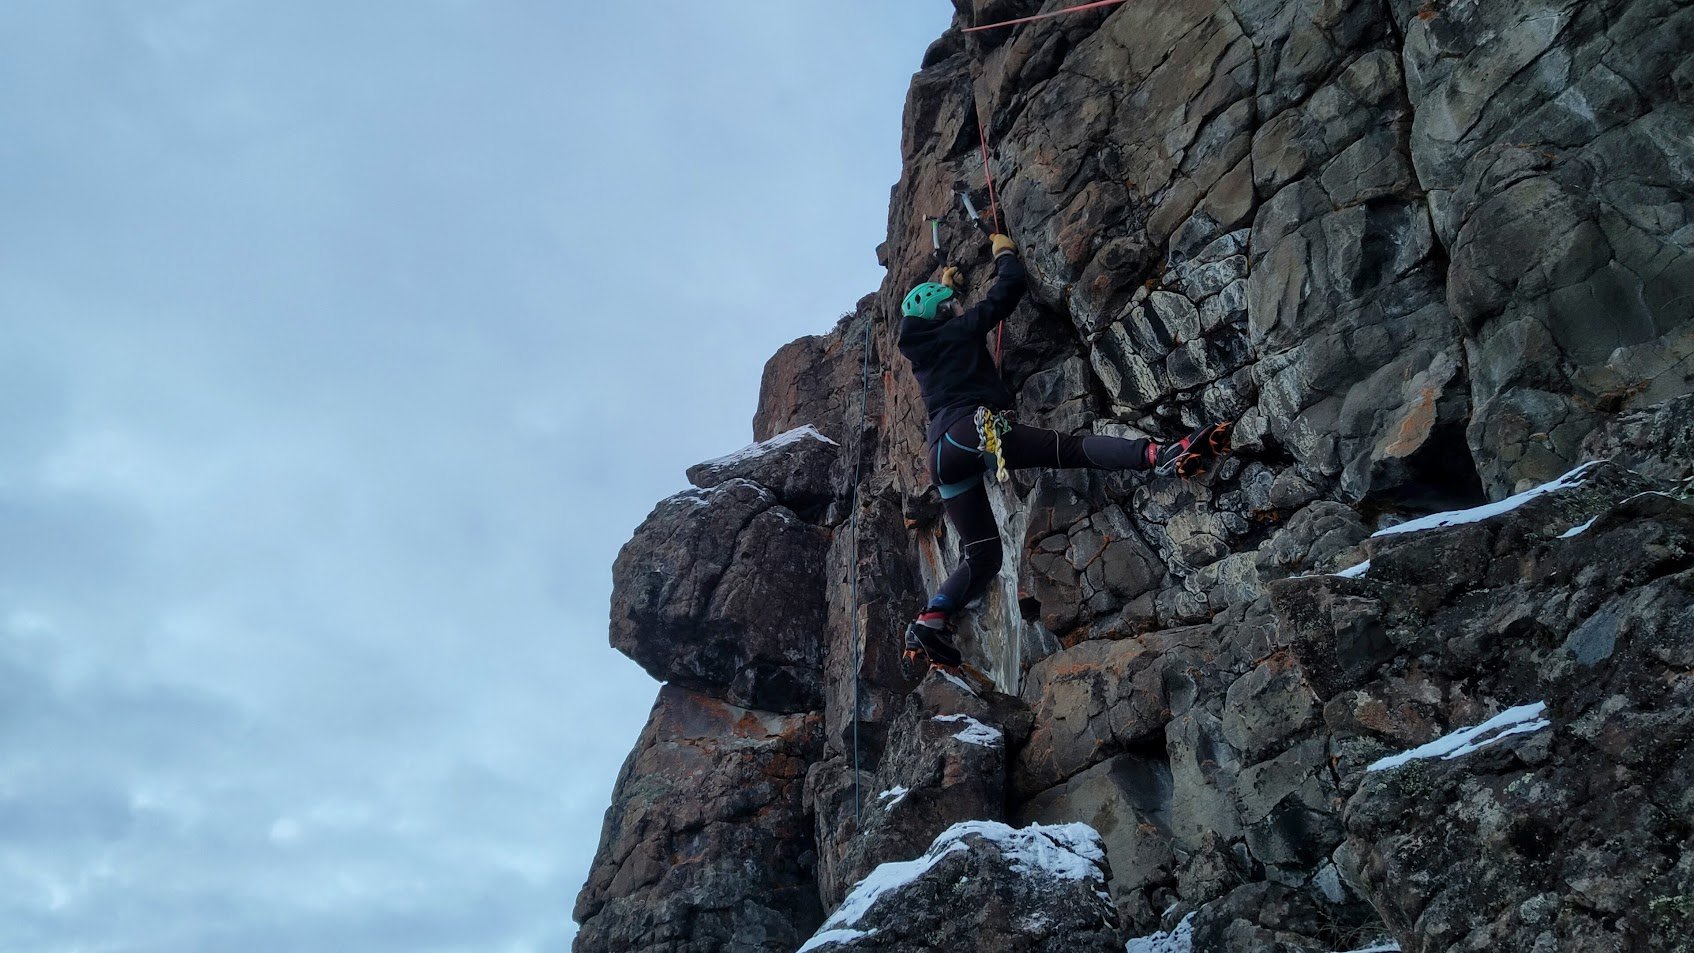
ICE AND WINTER CLIMBING
Ice and technical winter climbing is by far the area I have least experience in with this being my first season of earnest effort in learning the skills. However, I have been successfully implementing the same techniques I’ve used to learn skills in other areas.
The thing to note is that ice climbing is a totally different ballgame than rock climbing. For one, falling is fucking dangerous in nearly every scenario, given you have several spikey things attached to you that are happy to catch on you, or the ice, and break or stab things. The rule of ice climbing remains the same as it was for all climbing prior to the invention of dynamic ropes, harnesses, and modern protection: The Leader Must Not Fall.
Another thing to note is that ice climbs (or their approaches & descents) are often in avalanche terrain. Avalanches are scary and difficult to predict, even for the learned. This is why my approach was to dive deep into backcountry skiing before winter climbing. It’s also a great skill to have for those big, snowy approaches. But my learnings through that process have given me much more knowledge to feel comfortable analyzing the risks of being in the mountains in winter. As with everything else, the best approach is to segregate skills so you can be focused as possible. To me, it just makes sense to learn more about general winter travel and avalanche safety before also having to deal with learning how to move through technical terrain in the winter.
It also makes sense that even though there is a huge difference between ice and rock, a lot of the rope skills are transferable and are also best mastered before dealing with all the extra risks and factors of ice climbing. Though I have met a strange number of middle aged men that are almost exclusively ice climbers… Anyway, like rock, you’ll be spending your many formative hours top roping (and don’t be expecting to lead as quickly as you led on rock). However, unlike rock, top rope anchors are often difficult to access or set-up. I have taken to bringing a long cord for tree anchors since there is often rarely a perfectly placed tree. Knowing how to set up a monolithic anchor that is far from the edge of your climb is a very crucial skill in being able to access top ropable ice climbs. Knowing how to belay, tie your knots, etc. etc. is also key before starting out.
Resources:
- Will Gadd’s Blog
- Will is one of the world’s top ice climbers and his blog has spectacular insights for all skill levels.
- Outdoor Research YouTube playlist
- A fairly exhaustive playlist on various ice climbing skills presented by reputable guides. There are many other quality YouTube videos but these are my favourite.
- How to Ice Climb by Sean Isaac and Tim Banfield
- Another very exhaustive resource by two very skilled ice climbers. Sean is a very prolific ice guide in the Canadian Rockies.
- Avalanche Canada Ice Climbing Atlas
- This is only applicable to ice climbs in the Canadian Rockies but even if these aren’t accessible to you it’s a great resource to review how ice climbs can be affected by avalanches.
- Winter Climbing Skills YouTube playlist by BMC
- A really awesome playlist by the folks over in Britain about winter climbing (ie not just climbing ice but including steep snow and mixed climbing). It’s a particularly British lens and I’ve seen some things that are not considered best (or common) practice in Canada but it gives a really good idea of the various skills to be proficient in. The coolest part is they’re often en route filming these things in very Scottish conditions. Those folks across the pond definitely squeeze as much as they can out of every piece of elevated terrain they’ve got.
Skills:
- Ice Climbing Gear
- Crossover Skills from Rock Climbing
- Movement Skills
- Ice Screw placements
- V/A Threads
- Dry tooling
- Leading Ice
I won’t write as much on this section as I have in others as I am fairly novice in it. My advice is to follow Will Gadd’s advice. Top rope a fuck ton of ice (in different conditions) before ever hopping on lead, dial in your movement skills, and practice any skill that you don’t have transferred over from rock on the ground first.
The activity is also very gear intensive, much more so than rock. Ensure that your gear systems are very dialed as this can make or break you in ice. Layering, multiple gloves, proper fitting boots and crampons, etc. Even the way you rack is important as struggling to get a screw off your harness and placed quickly can be very dangerous. That being said, don’t make the mistake that I did of buying a handful of used ice screws that are not particularly sharp. These will not be ideal for placing on lead.
Ice is also a much more fickle and dynamic medium than rock. You also don’t have the sensory feedback of fingertips on rock, you are really relying on the sound, visual inspection, and ‘feeling’ of your tools and crampons in the ice. This simply takes a lot of time spent on ice in different conditions. Hence why Will recommends somewhere on his blog that you should TR upwards of 100 pitches before ever hopping on lead. Once you feel you’re about ready to lead, don’t just wing it. Spend time ‘mock leading’ and placing screws on TR. Practice placing screws and clipping at ground level ice first, with every step (ie taking your screws off your ice clippers, placing them with one hand on the upper tool, etc.). Dial in your screw placements so that it’s quick and painless for each hand.
If you are looking to get into winter climbing (ie technical winter mountaineering routes) then there is a huge crossover from all the above sections. Winter climbing (or climbing in mixed conditions with ice, snow and rock) is true alpinism and you’ll need to pull from all the pots to be successful. Dry tooling is a very weird niche activity and there have been many successful alpinists over the years that are not dry tool masters (Mark Smiley makes a note of this in nearly every one of his blog posts). Many dry tool areas are developed with the activity, in and of itself, in mind. Not necessarily as a training ground for alpinism. This means you’ll find things like drilled pockets in overhanging blank sections of rock meant for big, explosive movements. This isn’t something you would exactly find in the alpine. However, I’m not exactly one to try and wing it when it comes to these skills (as you may have realized). With a lack of developed dry tooling crags in my area, I went out and started my own, with a focus on moderate lines that follow natural features, to better represent the kind of climbing I hope to do. IF you’re going to do this, make sure you’re well tuned into the local community. Climbers don’t take kindly to people scratching up what would otherwise be a high quality summer rock destination. If you’re going to go exploring for dry tooling, it’s best to stick to unused choss piles that is really only suitable for climbing in the winter. But hopefully you’re one of the very lucky few who has a genuine dry-tooling crag already established nearby with easy top rope access to begin honing your scratchy-scratch skills on.

General Personal Timeline
The following skills aren’t written out in the chronological order of which I first learned and practiced them. Your path will really depend on your personal goals. My goal is to be an all-arounder and be proficient in all things alpinism, while I was living in the flatlands of Ontario, the only alpinism skills I could really practice were rock climbing, (and some general mountaineering stuff on the ski slopes after hours) but prior to that my interest was piqued by scrambling during summers working out west, so that was how my path went. I think this path was a perfect pace for someone like me who is mostly interested now in alpine rock climbing, while trying to learn all the skills of alpinism. Depending on your interest and focus, your path will surely be different, but this is a good overview of the pace I have had:
2013-2016:
I started backcountry paddling in Algonquin, where I developed many of my general outdoor skills.
2016-2018:
While in university I spent multiple summers out west in the Rockies, Vancouver Island, and the Yukon. Where my love of the mountains started with scrambling non-technical peaks and overnight trips. Did my first winter camping trips back home in Algonquin and Killarney. Practiced self-arrest and general crampon technique at the local ski hill after hours.
2018:
My first season rock climbing. I learned to set up climbs for top roping, did my first leads (first 10a lead after much TR practice), started TR soloing after much research online, did my first trad leads (5.4 was my highest grade), and my first sport and trad multipitches (2 and 3 pitches, 5.8 and 5.2, respectively). I did my first 4th class scrambles, including some that required some easy glacier travel (thus, I started learning general mountaineering skills).
2019:
First time ice climbing during the school year, rented gear and top roped off trees in Bancroft. Graduated and moved out west. Continued honing multipitch and trad skills. Highest achievements were a 5 pitch sport route (5.8) with an alpine end (5.2) and descent and a 5 pitch alpine rock route (5.6). Attempt and bail after 7th pitch (of 11) of Takakkaw Falls when the stranger I’d partnered up with clearly didn’t know what he was doing (I convinced myself to go on much longer than I should have before bailing, another learning experience).
2020:
Winter – First ski touring season, learned to ski at Norquay in Banff. Never left simple terrain. Second time top roping ice at the Junkyard, using rental gear.
Summer – Lived in my van in Squamish for half the summer, upping my trad skills. Climbed the Chief via Butt Lite (14 pitches, 5.9), simulclimbed for the first time and climbed DOA Buttress on Blackcomb peak (5.7), climbed Yak Check on Yak Peak (10 pitches, 10a), various other sport/trad multis. I then headed back to the Rockies, did my first Lead Rope Solo (not my favourite), climbed a lot of bolted/mixed multipitches up to 5.10+, first 11a sport redpoint, a highlight was climbing Eisenhower Tower on Castle Mtn (5.6++, 8 pitches-ish wtih simuling).
2021:
Winter – Second touring season, began entering Challenging terrain. First time skiiing a backcountry couloir. Worked as trail crew on Ski Patrol at Nakiska, so spent every working day skiing. Did a lot of visits to Kicking Horse and Fernie which quickly improved my skiing abilities in steep terrain.
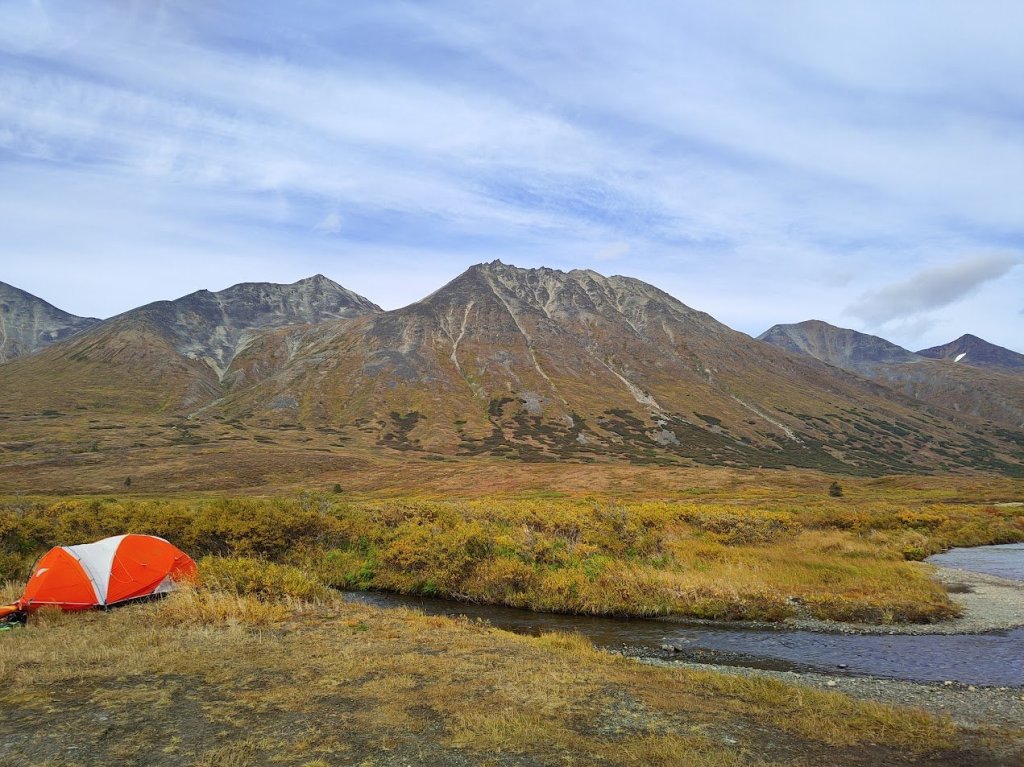
Summer – Started the season off with some great multipitching, but nothing new to my standard. Half the summer was spent working in NE BC with only single pitch cragging available. Finished the summer with a trip to the Bugaboos to climb Snowpatch Spire and Donkey Ears. Moved to the Yukon and did some multipitching there before the season ended quickly.
2022:
Winter – Third season touring. More time spent in Challenging and Complex terrain. Couple more ski mountaineering type objectives. Couple times out top roping ice and doing an easy multi. Visit to Arizona to go trad climbing in Cochise and Sedona.
Summer – Climbed as many of the few multipitches in the territory that I could. Short visit to the Rockies in late spring with terrible conditions, handful of multis there. Got much better at crack climbing due to the style of granite in the Yukon (Steep, sandbagged). Climbed Gwaihir on Caribou Mountain, a moderate alpine rock ridge with difficulties up to 5.7, mostly simuling, very little information on the route available. Starting learning how to bolt/ develop climbs.
2023:
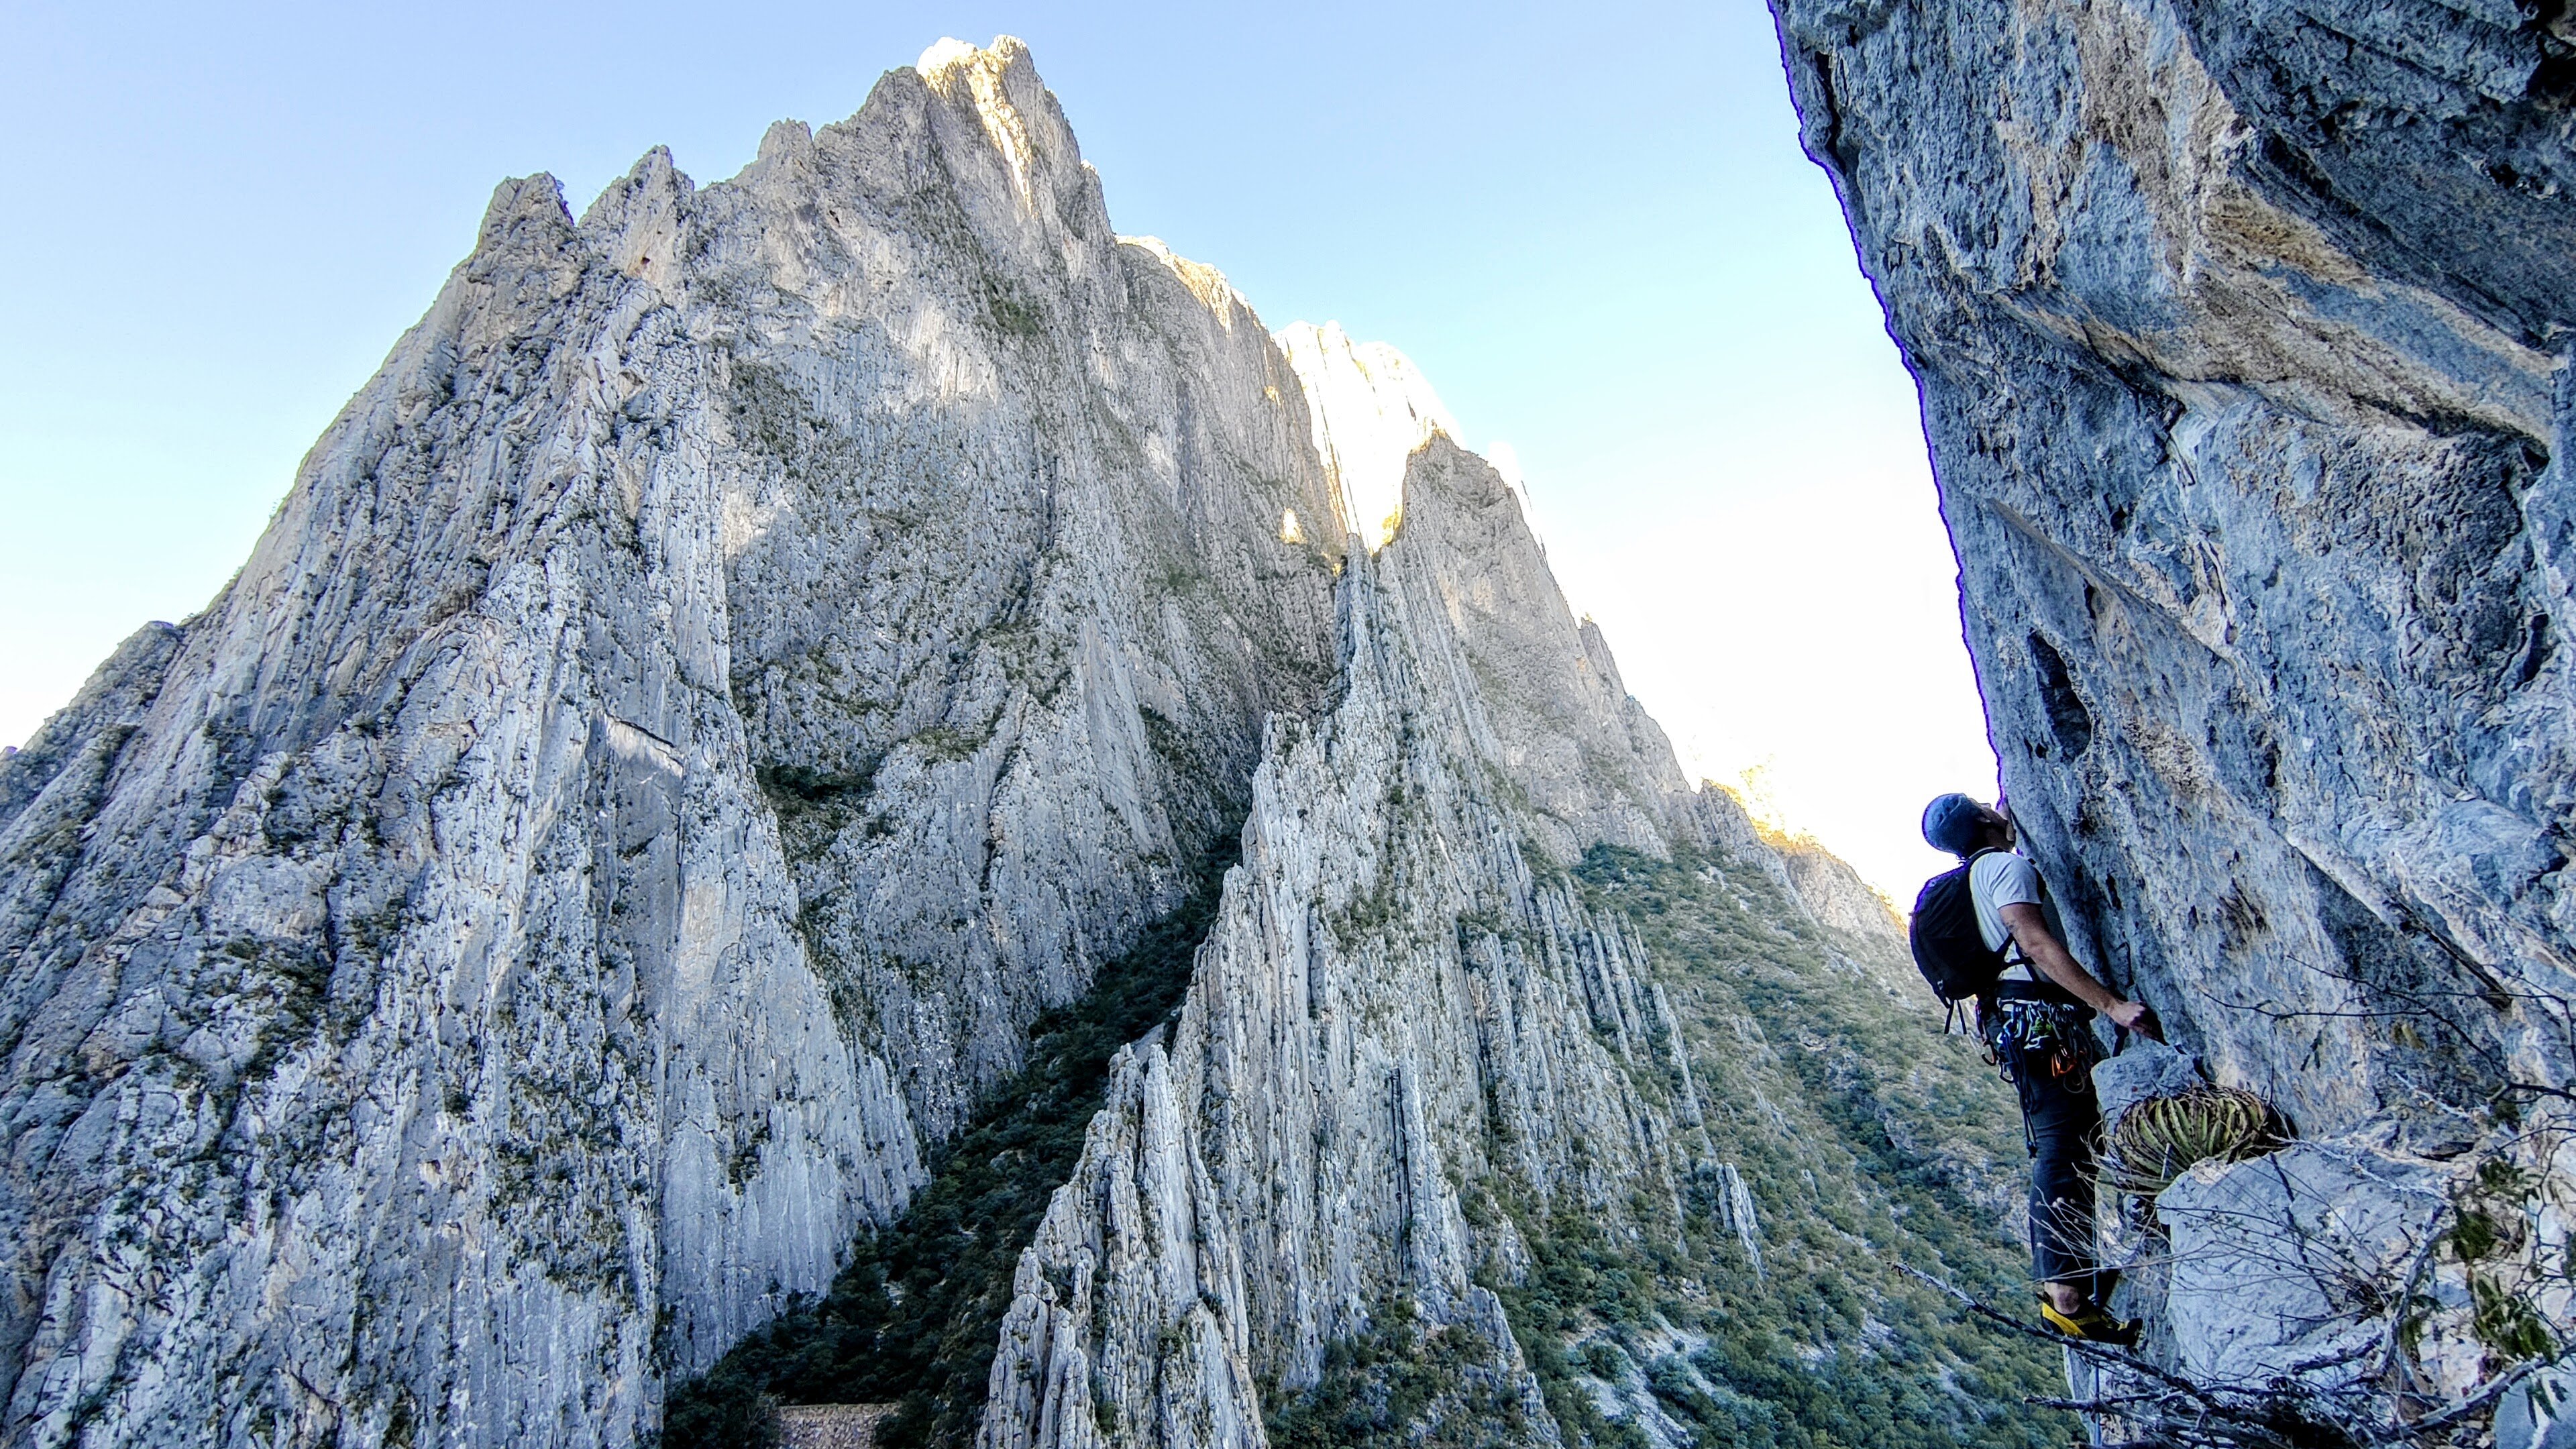
Winter – Fourth season touring. Little was done this season as the conditions were terrible and I got an overuse injury. More ice climbing, purchased my first set of tools and ice screws, first easy ‘lead’ on an easy multi that I’d previously solo’d on an ACC trip. Trip to Potrero Chico to do some vacation climbing, lots of bolted multis, climbed upwards of 60 pitches in 2 weeks.
Summer – Strong start to summer, climbed my previous season project (11a mixed, essentially bolted crux with some 5.9 crack climbing) and climbed one of the harder established trad multis (10d, 4 pitches). Visit to Washington, climbed a number of multis, alpine rock climbs in Washington Pass, and did Mt Baker in one insanely long day, certainly the most heavily crevassed peak I’ve done. Various single pitch climbs bolted, multipitch projects started and one finished (4 pitches, 5.9 mixed).
2024:
Winter – Strange conditions for everything recreation this winter. But achieved my first WI3 lead on ice and established some short, moderate dry tooling lines via top rope.
Summer – First ascent of Agents of Entropy – 7 pitch, 5.8+ bolted route (ground-up), Attempt of the Crystal Arete in Southern Yukon (1 1 pitches, 5.10 A1), 3 single pitch FAs (5.7-10+)
