BEGINNER TRAD IN THE YUKON
DISCLAIMER: This is not an exhaustive how-to on trad climbing, while I provide some insight and resources regarding skills, this blog post is specifically meant to give some local insight for budding Yukon trad climbers. To be as safe as possible, you must leverage a wide variety of knowledge resources beyond this post. This post is written assuming you have some pre-existing knowledge of trad climbing, if any term is confusing or new, Google is your friend.
For people who want to dive into more adventurous styles of climbing, like alpine rock in the Bugaboos or multipitch climbing in Red Rocks, learning how to place traditional protection is one of the most daunting learning curves. In the Yukon, we don’t have access to the abundance of climbing seen in areas down south, let alone an abundance of beginner gear protected climbing. Indeed, when I first came to the territory I was a bit dismayed at how difficult the grading seemed to be and how hard it was to find a climb that had any sort of consistent, protectable feature like the splitter cracks of Squamish.
I’ve now spent my fair share of time plugging gear around the territory’s crags. I also don’t climb particularly hard and I’m averse to bold, runout climbing so I’ve spent a fair bit of time with moderate grade climbs figuring out the protection.
I think the Yukon, despite it’s objective lack of vertical rock, does have a lot more opportunity for adventure-type climbing and I’d like to see that portion of the community grow. So, of the large portion of ‘easy to access’ single pitch trad climbs within a few hours of Whitehorse, here are my favourite recommendations to beginners.
Note: Gear recommendations are according to Black Diamond Camalot sizes. ‘Single Rack’ (SR) usually refers to a set of cams, one of each size, 0.3 to #3 (7 cams total), and implies a set of standard nuts as well. This isn’t to say BD cams are the best for Yukon rock, they are just the most commonly used cams in North America. Other brands work just fine as well.
For many shorter routes, a SR will be fine, but as you progress or move onto longer/more difficult routes doubling up on those SR cam sizes will be handy, starting with the smallest cams first typically. In addition, I’ve found microcams (such as the 3 smallest Z4 sizes) to be incredibly useful here and rack them often. Bigger cams, like a #4 and #5, are usually good additions when you have a particular route that you want to use one on.
With a few exceptions, a single 60m rope will be suitable for single-pitch trad climbing in the Yukon. You should also have a handful of alpine draws to reduce rope drag.
Pre-Requisite Skills
Trad climbing is obviously not something to immediately dive into. You should have a solid foundation of skills before starting your trad climbing career. You and your partner should:
- Be competent top rope (TR) climbers/belayers, including:
- Gear use & maintenance.
- Wearing a harness properly, tying-in, using a belay device etc.
- Using online resources like MountainProject to find & identify routes.
- Knowing how to set-up bolted and monolithic natural anchors (ie using trees).
- Knowing how to safely approach anchors that are over the edge or in an exposed location.
- Knowing how to clean anchors.
- Gear use & maintenance.
- Be competent sport climbers/belayers, including:
- All of the above.
- Understanding the nuances of when to give a hard or soft catch.
- How to clip efficiently and avoid mistakes like Z-Clips, back clips and inverted falls.
- Know how to safely bail off a sport climb.
- Know how to use a variety of skills & tools to push your way up a climb you can’t onsight.
- French-Freeing or ‘guerilla aid’ (like stepping in a sling, using stick clips or cheater draws).
- Safe rappelling methods with third hands/back-ups.
- Understand the nuances of trad climbing, whether through a course, via a mentor, or carefully approached self-learning (ideally all of the above). A great resource for self-learning is VDiff Climbing. There are very affordable e-books and courses on the subject.
- How to place and evaluate good traditional gear: such as cams, nuts, slung chockstones or trees, etc.
- The most efficient ways to clean different pieces of protection, particularly stubborn placements.
- When and how to extend placements to prevent walking and rope drag.
- How to avoid pit-falls like zippering.
Any additional advanced rope rescue or first aid skills are assets as well, especially if you are climbing in hard to access areas. The Yukon’s rescue capabilities are extremely limited and everyone should strive to be as self-sufficient as possible. In most single-pitch areas around Whitehorse, a scenario where you’d have to do more than simply lower a hurt climber and help them out via a trail is likely pretty rare. But climbing protected by your own placed gear adds an extra layer of risk, especially as a beginner. It’s better to be over-prepared than under.
Headpointing
Just a general beginner trad tip: embrace headpointing! I do this all the time, still, but it’s particularly helpful in learning to trust your gear when starting out. Climb a route on top rope, placing gear as you go as if you were leading, then when being lowered take a sling and clip it to the piece. Next, bounce on it with your full weight. Napkin math has shown this will produce forces equivalent to a small lead fall because of the static nature of slings. It may not guarantee you that it will hold a giant whip but it does give you some initial feedback on your placements. Nowadays, if I’m headpointing I never really bounce test the pieces I place unless I feel they are suspect, as it can cause wear. But starting out, it’s not a bad idea to test them all.
Jamming (Crack Climbing)
A lot of people are weary of learning to crack climb because jamming is not very intuitive at first. For starters, just because a climb has a crack does not mean there will be any required jamming on it, especially when it comes to granite. Climbs like Green Circle or Two-Ply Receipt follow consistent cracks but are frankly easier just to climb using the face features around it. This is why granite is my favourite type of rock to climb, it often requires a combination of styles such as face or slab climbing and jamming.
That being said, it’s not a bad idea starting out to play around with your jams even if they aren’t necessary. There are climbs like Memories of Squamish that can be lapped on top rope and you can practice perfect hand and foot jams. There are a lot of resources out there to learn proper technique, like WideBoyz Crack School. However, my opinion is that it just takes a lot of mileage for it to eventually click. Especially in the Yukon. Before I got here, I spent a season in Squamish and felt that I had a decent understanding of crack technique. When I started trad climbing here, it felt like I had never crack climbed in my life. I’ve noticed that most of the trad climbs here tend to be on the steeper side, vertical (or just off), whereas in Squamish you can be climbing up to 5.11 cracks that are on slab, which rewards a more balanced mixture of footwork and jamming. Don’t despair if it takes awhile for jamming technique to click, keep at it!
McIntyre Bluffs
McIntyre is my favourite crag in Whitehorse due to the natural atmosphere and solitude. As everything around town, it’s relatively short but it’s made up of solid granite with some good cracks. Though many of these cracks are not sustained throughout the entire route so you often see bolts.
TR access is generally easy though can be exposed in some cases. There are ways to mitigate this by using trees above the anchors to secure yourself to a rope while setting up anchors.
In order of ease, the routes I would recommend for beginners are:
- Green Circle, 5.6
- No jamming required, easy TR access, and the crux is pulling onto the upper slab protected by a bolt, for some reason.
- The route technically starts below the main area but in my opinion the lower portion goes harder than the supposed grade (5.8). You can access just the upper crack by scrambling past Memories of Squamish and belay off of bolted anchors. From here it’s fairly short (~8m) and goes at 5.6/7.
- A single rack to #2 is more than enough.
- Two-Ply Receipt, 5.7
- No jamming required, somewhat tricky TR access.
- This is the right most route at the crag, scrambling down the loose slope from the DoS section. It is extremely similar to Green Circle. A short route following a crack that has you protected the whole way. The crux is the opening moves (unprotected but relatively safe landing) and then pulling the lip, protected by great gear at your waist.
- Single rack to #3 is, again, more than enough here.
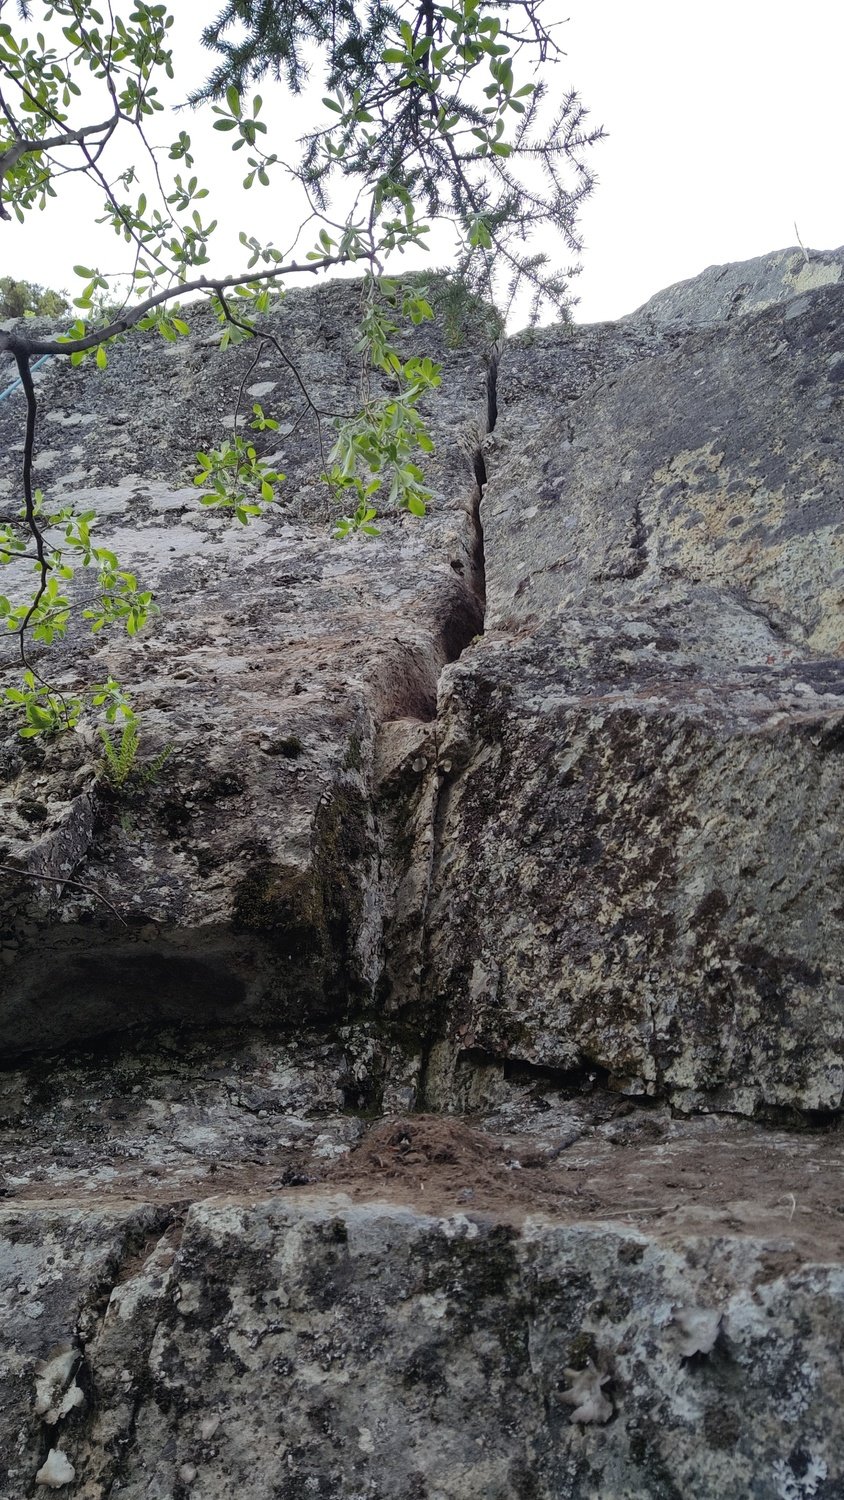
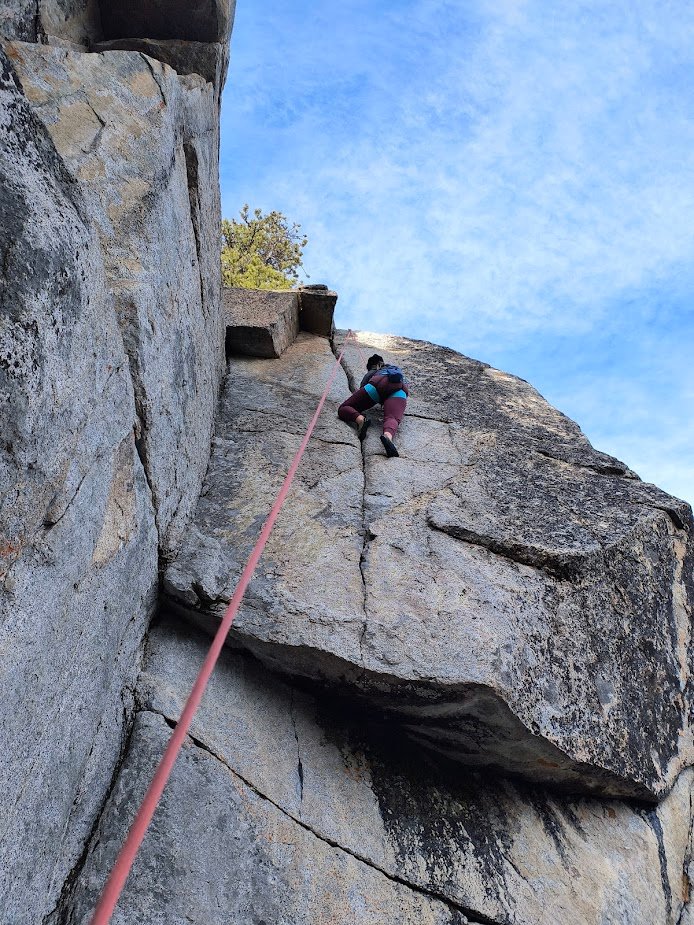
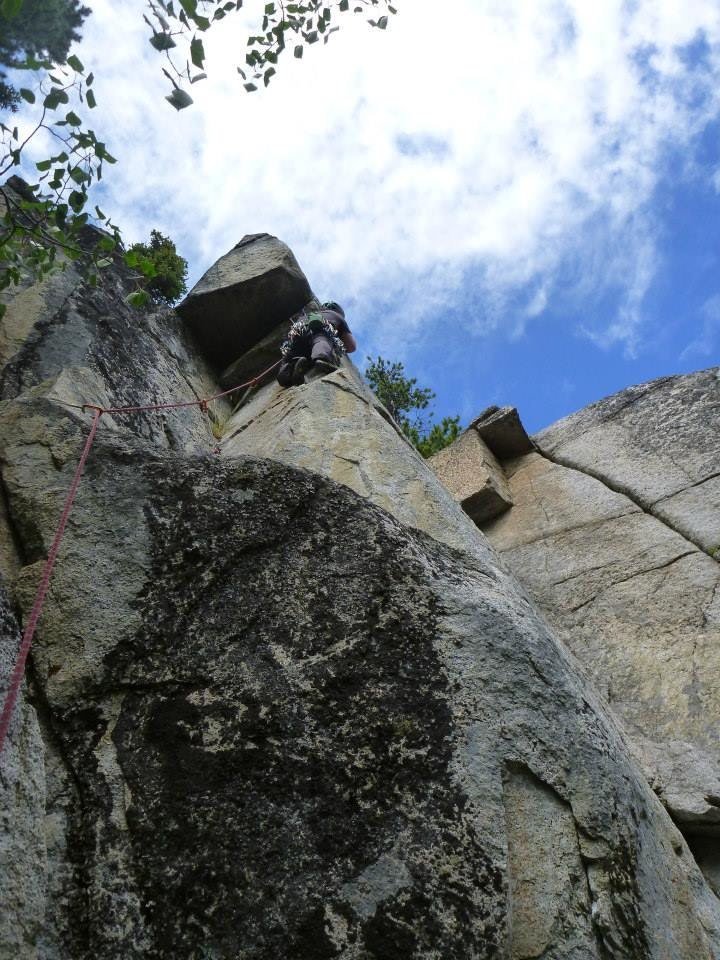
- Memories of Squamish, 5.8 (personally I think the crux is 5.9)
- Easy jamming required, easy (but exposed) TR access.
- The aforementioned ‘MoS’. This is a fantastic climb as one might infer from the name. However, the crux is the start and has some tricky protection. You can put a 0.4 in the horizontal crack under the lip of the roof if you need a take when figuring out the moves or are worried about tumbling down the rocks, just make sure you put a long enough draw to prevent rope drag on the roof itself. Next, I typically place a 0.3 once I get high enough to reach the beginning of the crack. After pulling through the bouldery crux it gets MUCH easier, both protection-wise and climbing, but will require a short section of hand/foot jamming.
- If you’re new to trad and crack, I recommend giving this one a top rope. You can even headpoint it or pre-place the first couple pieces so you can experience the lovely top hand crack without too much anxiety.
- Pusher, 5.9 (feels like 10a IMO)
- No jamming required, easy TR access.
- This climb is largely bolted but most people will end up placing 1-3 pieces on it. It’s very fun stemming through a corner to the left of MoS.
- All you need to sew this thing up is a small nut, a #1, and a #2.
- It can be easily headpointed with an easy to access top anchor.
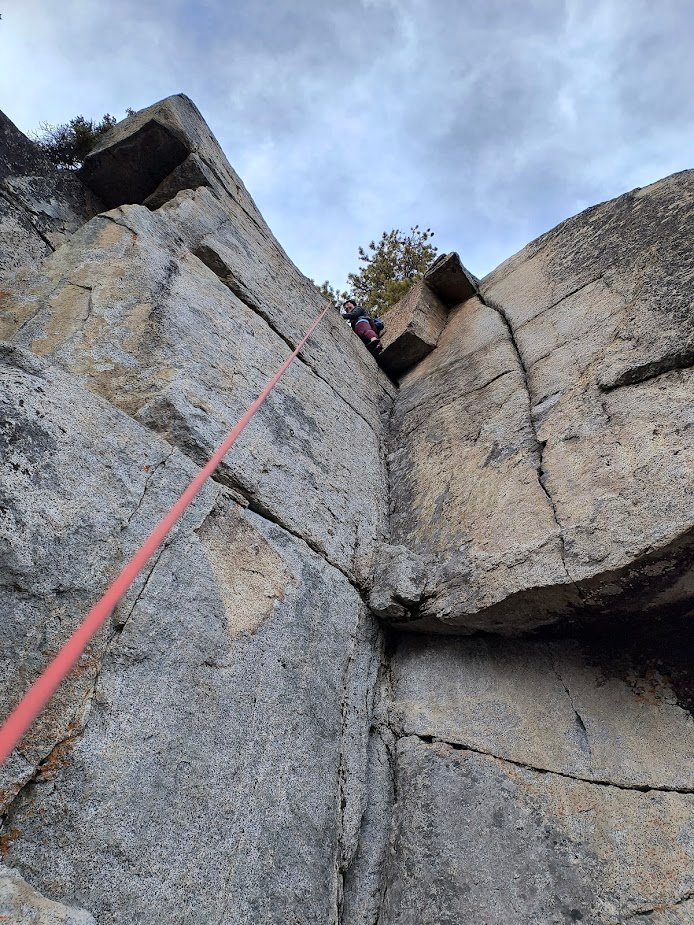
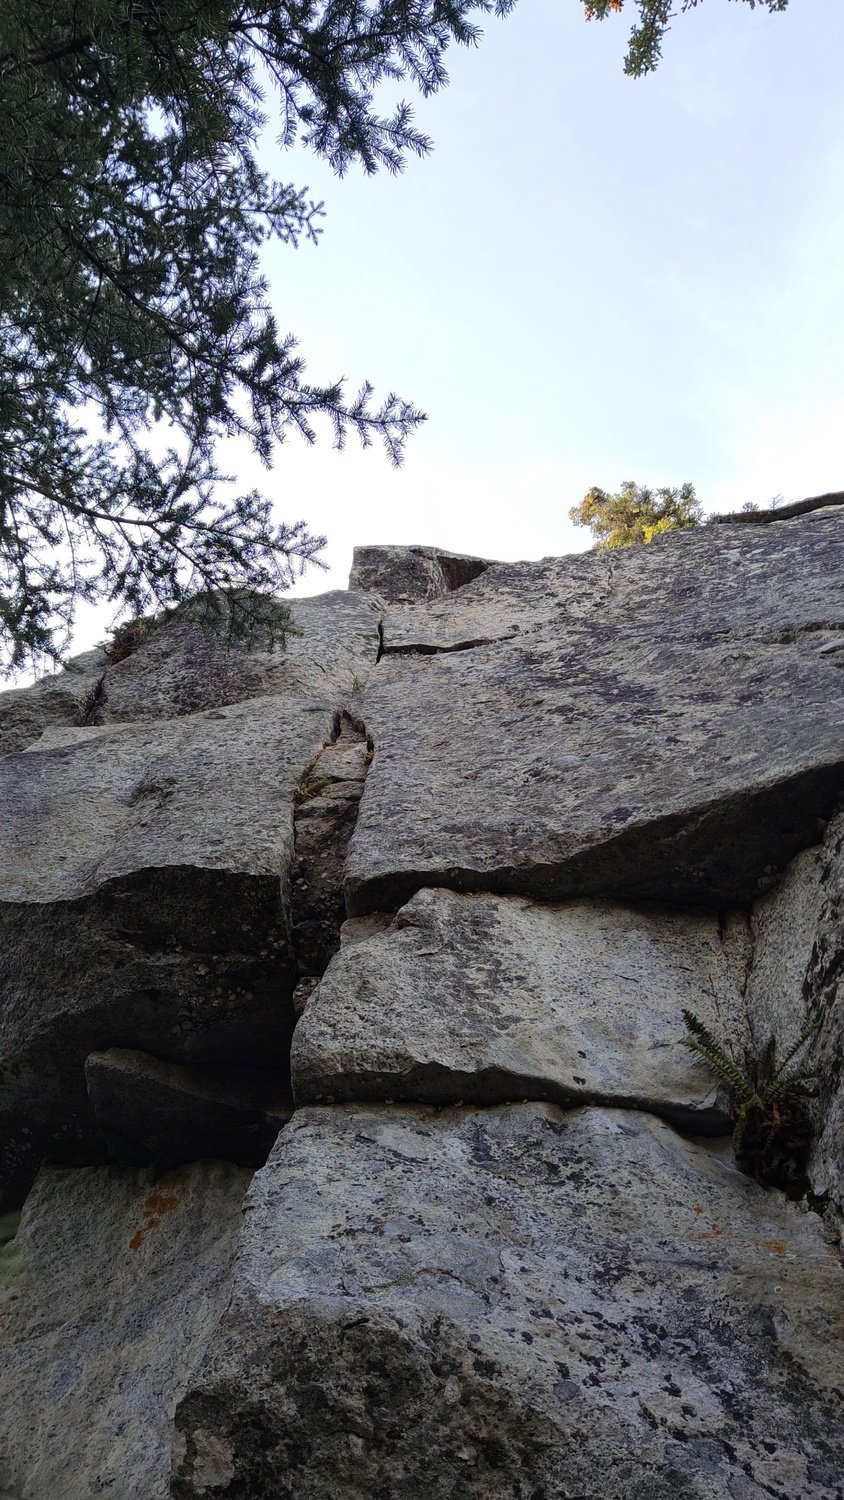
- Passive Aggressive, 5.9
- Easy jamming required, somewhat tricky TR access.
- This is a new addition (as far as we know) to the crag. Rob and I established it in Summer 2023 after asking around to see if it had been done prior. From below it looks like mostly a closed off seam, but when you get up there it opens up just enough for perfect fingerjams in bomber constrictions, which also happen to be fantastic spots for nut placements.
- Mostly small cams and some nuts, though a #2 is helpful to place in the widest opening where you pull into the crack. One bolt protects the slab start.
- Can be set up for a headpoint/TR but a little bit tricker. There is a high anchor that can be used to access a bunch of the lower climbs but it’s helpful to have someone below to help you decide where to place the rope. It’s also likely you’ll see some rope drag, unless you rappel to the lower anchor and set the rope up there. Alternatively, you can lead Two-Ply Receipt and traverse left on easy ground to the anchor for PA.
Feeling confident after all these? Try out Rule of Two or Life is Suffering. Both are 10a and have enjoyable climbing, not particularly difficult, but the gear tends to be on the trickier side. Life is Suffering requires microcams to protect the crux and Rule of Two can feel a bit heady at the start with multiple options that can put you in an awkward position if you choose wrong and mediocre protection over a poor landing. Both have easy access TR anchors and can be given a headpoint.
McIntyre Bluffs climbs in order of the list
Vinyl Village
Vinyl Village is, next to Rock Gardens, the next most popular crag in the Whitehorse area. It is mostly sport climbing with a couple mixed/trad routes:
- Ramp Crack, 5.8+
- Frankly, I haven’t climbed this route so I can’t actually comment on it. It looks to be mostly chossy-ish scrambling followed by 10ft of easy crack climbing.
- Accessing it for TR should be relatively easy by scrambling left or right of the cliffs.
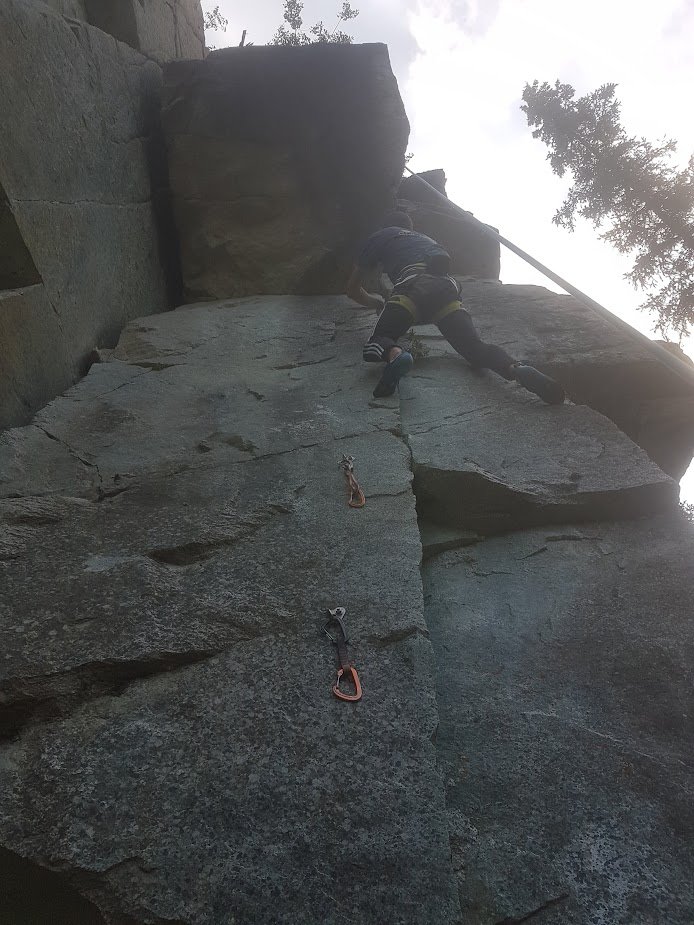
- Untitled Mini Offwidth, 5.8/9
- Easy jamming required.
- This is a fantastic climb that is one of the few softly graded trad climbs in the territory, in my opinion. MountainProject had it listed as 5.9 but I would say its closer to 5.8. If you try to force offwidth technique on it, it might be harder, but once you reach the wide section you can just easily use face features. The crux comes once you hit the vertical step above the offwidth and requires some sporty face climbing to surmount but it’s brief.
- The climb starts with a couple bolts then widens progressively from about 0.75 to #5. The direct start is apparently 5.10 but you can start in the corner to the left and traverse in for a much easier start.
- Having a single rack of cams from 0.75 to #5 will make this a perfectly safe climb. You can get away with only up to a #4 and placing a nut or opposed cams in the detached block at the crux. Other climbs in the territory rely on equally suspect placements to protect them and I’ve climbed it a number of times this way, but I would not call it bomber. Ever since buying a #5, I wouldn’t bother. What I’ve done for beginners to lead this line before I had a #5 was hang an extended draw off the anchor which allowed them to clip it from the crux and skip the need for that placement.
- The anchors for this aren’t readily accessible for TR. I initially top roped it by rappelling in off a tree from above but this was awkward and I wouldn’t recommend if you have limited rope skills.
Otherwise, there’s not much for gear protected climbing at Vinyl. e^2 is a weirdly contrived climb that requires a couple small cams to protect the true line. Though the bolted face climbing above is as good as Sting in the Tail to the right of it, I’m not sure why this was established as a mixed route. The ‘Untitled Offwidth’ next to the mini off-width is a heinously tough, proper offwidth that is very dirty. I tried to TR it once but didn’t make much progress.
Rock Gardens
Rock Gardens is well known in the Whitehorse climbing community. Easily the most popular crag, has ample parking, and an easy approach. There are a handful of easy trad routes but not too many I’d really recommend. But if you’re heading there for some bolt clipping anyways, why not bring the rack and mess around?
- Easy Corner, 5.6
- No jamming required, easy TR access.
- This route is the obvious corner to the left of the infamous Babette. Your average climber could honestly probably solo this without too much heart racing. There is perhaps one or two moves near 5.6 but otherwise it’s easy stemming with ample protection in the crack. Though it tends to be dirty and might require some excavation with your nut tool.
- Can be easily top roped, though the anchors were moved sometime and are kind of awkward. Regardless, you can make it work.
- Single Rack to #2 will be more than enough
- Crucifix (Alternate), 5.9
- No jamming required but will make this significantly easier, easy TR access.
- This is the fully gear protected version of the well known ‘Crucifix’ (11-). After climbing the initial crack, you can traverse right and keep following a wider crack rather than climbing the direct line up the bolts.
- The lower crack can be very slippery and is a bit of a weird shape, I’ve found that cams can easily walk into a bad placement here or can be extremely fiddly. But it’s very fun to practice your jams! If you end up laybacking this, it will feel much less secure on lead.
- There are two top rope anchors to use if you want to headpoint and neither are perfect. Heretic’s anchor (lookers right around the arete) will force the rope into a weird notch. Otherwise, you can use the Crucifix direct anchor but will probably want a directional placed in the upper crack to avoid a swing.
- Single rack to #3 with doubles in 0.75, 1, and 3 being very nice. Pulling onto the midway ledge can feel a bit awkward and it’s nice to have the #3 in the opening right before. But if you only have a single #3 you’ll have to choose between using it there or saving it for the wider upper crack (or you can just shamelessly clip the bolt that is on the neighbouring sport line Apostate).
There are a number of short, easy trad lines on the North side of Grand Central Station (Lunch Cart, Riverdale Rise, The Caboose). Frankly, I’ve never done these. They don’t look long enough to be worth it and many of the protectable features are loose blocks.
‘Tabernac’ is a worth doing once route but I found it hard for the stated grade, 5.7 (though the fact that I was wearing jeans at the time and it requires a high step might have been a contributing factor). If I recall correctly, the gear at the crux was also small and fiddly. It doesn’t have a bolted anchor so you will need to use the tree above and either have a follower clean or clean on rappel then retrieve your anchor after from above.
‘Tree of Life’ seems to be a fan favourite and now has a number of bolts protecting it. Many people just lead it on bolts now. This is one I don’t personally enjoy and most of the placements would be in detached blocks.
Climbs at RG (Click on photos for description)
Golden Canyon
Golden Canyon is easily the highest quality single-pitch trad area developed in the Yukon. Unfortunately, there’s not a lot of easy options there but there’s a couple high quality moderates I’d recommend. Top roping is generally not easy to access beside the Ballpark Boulder.
- Tour de France, 5.7
- No jamming required.
- A shorter route but an excellent corner climb that doesn’t really require any jamming skills. The start is loose and has some fiddly protection to gain the ledge where the corner starts but it’s not too bad. I recall a decent 0.3 placement here.
- Single rack to #2 is probably fine but you could double up on those mid sizes if you want to sew things up (0.75 and 1).
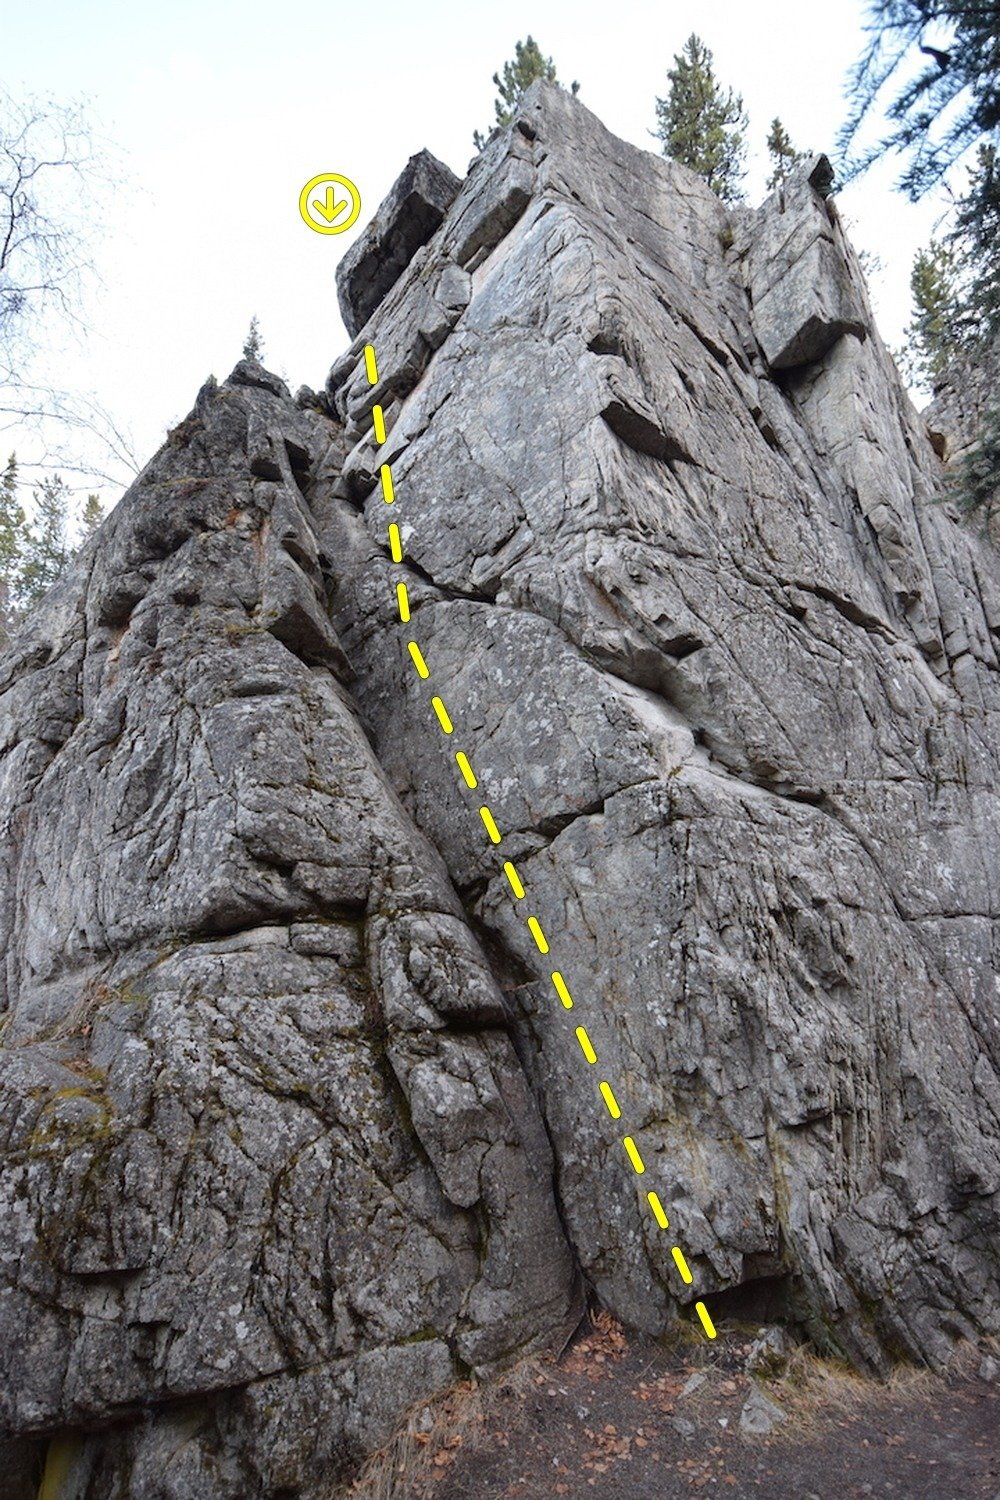
- Battle of the Bulge, 5.9
- Jamming required.
- Immediately to the left of TdF, another corner climb. The crux comes at the bulge halfway up. Jamming required.
- Single rack to #4, I found a second #1 to be nice. Crack gets wide before the anchor and you’ll have a slight runout on easy ground but keep your cool.
- Ballpark Boulder, 5.9
- A variety of cracks on a boulder at the entrance of the canyon. I’ve never actually climbed any of these but they would allow for fairly easy top rope access with a bolted anchor at the top. Looks like a great spot to do laps and practice your jams.
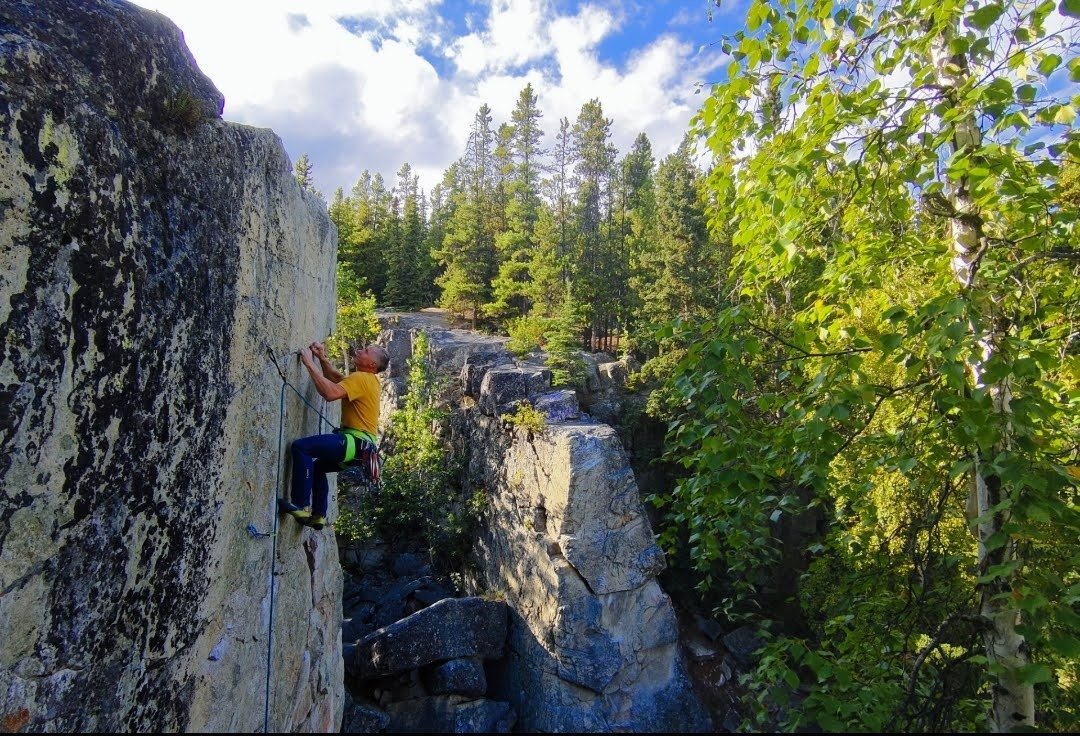
- Cracking Up, 5.9
- One of the best single trad pitches in the Yukon. It’s long and has a good variety of moves. I always find it a bit tricky to place gear in layback cracks but there is abundant placements so hang dogging your way up is more than doable. I think this one is closer to 10- but that’s the Yukon for you.
- Single rack to #3, doubles 0.3-1. A #4 isn’t necessary but it could be used at the top.
- Shark Fin, 10a
- Jamming required.
- A short but fantastic climb that takes gear very well up to a cool feature (the Shark Fin). I thought it was easier than Cracking Up, so despite it’s grade I’m putting it here.
- A single rack to #3 works, if you have doubles in smaller sizes (say 0.4 to 0.75) that would probably let you sew it up.
There’s a number of other moderate routes there if you look on MountainProject. I haven’t climbed some of them as descriptions are a bit vague and they don’t necessarily follow obvious features, so I can’t speak to those. Kootenay DJs (5.8) is the first climb I did in the canyon and the bolted crux felt very sandbagged with the rest of the climb being gear protected on shitty rock, not worth it despite the grade in my opinion. Bird Nest (5.7) is right next to Shark Fin and the grade might seem attractive but overall it’s a pretty meh climb with lots of loose rock, though the TR anchor can be accessed easily. Feelers Protected (10a) is a mixed route with some gear at the start then ending with fantastic bolted face climbing. I found the gear on it a tad tricky in spots but didn’t feel too spicy.

Paint Mountain
Paint Mountain is one of the most spectacular places to climb in the territory. It is also a large zone with a number of different crags, most of them trad or mixed.
Highly recommended you use the .gpx files on each crags MountainProject page your first time out to find the approaches.
Orange Corner
This is the most popular crag at Paint. It’s accessed by following the standard Paint Mountain hiking trail then branching left (see MP).
I won’t delve too much into these routes, most of them have either run-out sections or options for fiddly or micro protection. However, it’s the only spot on the mountain that has top rope access. It’s not anywhere as simple as a spot like Rock Gardens though. It requires you to solo or lead up some low 5th terrain far left of the routes then fix a second rope or rap off of upper anchors to get to the anchors of each climb. Practice dialing in those skills in a low-commitment crag in Whitehorse before you attempt it here.
Gato Buttress
The next crag lookers left of Orange Corner. Easily seen from the parking lot. No TR access.
- Alley Cat, 5.8
- I actually haven’t done this one but from all reports it’s fairly straightforward. However, there is no bolted anchor, requiring you to use a tree (bring extra webbing/cord to leave, don’t rely on old tat). Your follower will also need to clean as the rappel line does not follow the route.
- Single rack to #3, #4 optional.
- Gato Negro, 10a
- Jamming required.
- A really fantastic climb but as per the norm for the Yukon, the start can feel a bit spicy. Climbing the crack proper at the start can be difficult and the pro is tricky. I’ve watched a buddy deck here. Thankfully, it is fairly low to the ground and he was fine. Otherwise, you can head right up a flake with no pro and traverse in. Once you’re established in the crack, the pro is bomber though.
- Single rack to #1, doubles to sew it up.
- The Cat’s Meow, 5.9 A0
- Jamming required.
- It starts with a 3-bolt bolt ladder you’ll have to pull on draws (french-free) to get up. From there it’s two cracks that are mostly hands. Though none of the moves are particularly hard it’s SUSTAINED, especially on the ankles. There are basically no edges to take a rest on but thankfully gear is good.
- Single Rack with doubles 0.75 to #3.
Swiss Wall
Swiss Wall has some of the most fantastic granite cragging in the territory. All of the routes are mixed protection but don’t let that fool you. There can still be a bit of spice. Basically every line there is high quality but there are only a couple I would recommend to beginners. No TR access.
- Letter to the Editor, 5.7
- No jamming required.
- This is a bit of a funny climb, it’s got a fair number of bolts but they’re largely unnecessary and don’t really help protect the trickier sections. You generally place a bomber piece, pull a move, then find yourself at a bolt. That being said, the bolts will certainly give you some extra confidence.
- The crux has two options, what I expect is the intended line takes you direct up the face laybacking left where the crack thins out with some delicate feet. This feels around 5.9 (if not a tad harder) in my opinion. But it can be easily by-passed to the right by clambering up some dirt & juniper. There is a good small cam here (0.3) but it can be tricky to place with the crack facing away. Climbing up to the right, making the reachy placement, then climbing back down (or continuing on if you want the easier moves) is the way.
- SR to #2, doubles 0.3 to 0.75 will let you sew this up.
- Swiss Family Robinson, 5.9
- Jamming required.
- A Yukon classic. The crux comes with a short hand jam sequence on good gear with delicate feet. If you’re nervous about the grade or weary about your jamming skills, the crux could likely be easily aided.
- One bolt protects the exposed traverse out of the large alcove. The climbing above the alcove can be a bit tricky to protect. The gear is good but it can be awkward positioning to get a good view of it. Bit of a sting in the tail but it’s all there!
- SR to #3. Beginner might want doubles 0.4 to #1.
Buffalo Shoulder Buttress
No TR access.
Buffalo is a fantastic area to climb. Has a relatively long and difficult to find approach but is usually secluded because of this. Previously, the only published routes here were multipitches but recently Jon Driscoll has been reviving some old moderate routes with fixed anchors. These are long pitches that generally require a double lower/rappel to descend and a large rack. He’s provided a good explanation of all the lines in a Facebook post. I will update my opinions on the suitability of these routes for newer Trad climbers once I’ve actually attempted them.
In addition, my major project last year was establishing a short, moderate multipitch. Named Let Them Eat Cake. Once you are breaking into multipitches, this is a great first trad multipitch in the territory. It has much less committing climbing compared to other moderate trad multis. Set up to easily bail with a single 60m rope and descend via walk-off. The one 5.9 crux on the first pitch is bolted and all other cruxes protect well with gear. The first pitch alone would be a worthwhile route to climb if you’re out there cragging. It is less than 30m, so easily descended in one rappel/lower. But due to the traversing nature, you’ll want your follower to clean the pitch.
Skagway
Despite being in Alaska, Skagway is an often visited area for Yukoners and is almost as close to Whitehorse as Haines Junction, so I am adding it here. There isn’t exactly loads of climbing developed in the Skagway area, though there is huge potential for more. I also have only scratched the surface there so my suggestions are limited.
For beginner trad climbers, there are two good crags to visit.
This small, oceanside crag is located on the Western edge of the shoreline near the popular Dyea Flats campground. It is only easily accessible at low-tide, so timing is key. I have not climbed here yet but Top Rope access looks fairly easy with a number of moderate crack climbs. There are few bolted anchors, so you should expect to bring tat to replaced fixed tree anchors.
Black Lakes sits right above the Klondike Highway, right before you drop down the big hill toward sea level going into Skagway. From below, through the trees, it looks quite crappy. However, it hosts a number of quality, good length routes. I’ve yet to dive into all of them there but all the moderate trad climbs I’ve done, I would highly recommend.
Top rope access is probably doable but definitely not easy, especially trying to identify the climbs from above.
- Unnamed 5.8 (Despite the ‘name’ it feels 5.7, IMO)
- No jamming required.
- One of the best trad climbs around for the grade range.
- It is generally well protected though there is some loose scrambling terrain to start and the end can feel slightly a tad spicy. You gain a ledge and can place some bomber small cams in the crack (0.3/0.4). You then have some fun face moves to pull the vertical face in front of you to reach the anchor. If you fell you would hit the ledge, but it would be a pretty tiny fall with your pro stopping you from tumbling any further (if you somehow manage not to land on your feet).
- SR to #3, doubles 0.3 to 0.75
- Pullout Crack, 5.8
- Easy jamming required.
- This is a short route but totally splitter and has great pro the entire way.
- I found the crux a little bit unintuitive, there is a great face hold to your right but this puts you in an awkward position to pull the move with some slippery feet. I took my first gear fall in a long time on this route despite the grade. But you have a bomber cam right at your waist so it’s not scary at all.
- SR to #2, doubles 0.4, 0.5, and 0.75 will let you absolutely sew it up.